v2024 Boris FX Sapphire Perpetual License
EDIT in Admin Edit in WP
Downloads
Download demos and trial versions, product documentation, free presets and more.
You may download a free Demo after logging in.


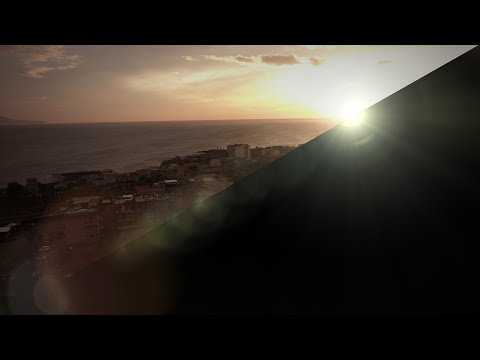

Stylize Footage Fast With Boris FX Sapphire 2024
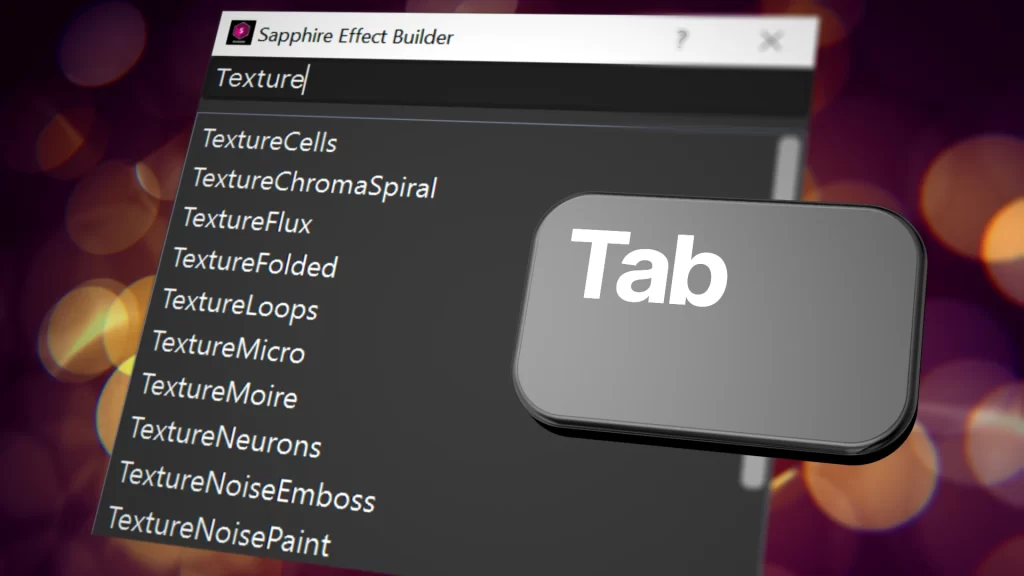
Introducing Boris FX Sapphire 2024 – an all-in-one plugin package that lets you create stunning organic looks that would be unmatched by any other effect tools. Featuring over 270 effects and 3000+ presets, this plug-in offers great control and image quality, allowing you to produce the kind of visuals that will keep your audience coming back for more. You will also benefit from its powerful Effect and Transition Builder, and enjoy the convenience of integrated tracking and masking with the Academy Award-winning Mocha. With Sapphire, you can save time and effort in your creative projects and focus on what matters most – delivering an impact that will capture the attention of your audience. Get Boris FX Sapphire 2024 and unlock the full potential of your creative projects.
New! Boris FX Hub
Meet the Boris FX Hub. It’s your home for downloading, installing, and licensing Boris FX tools. Get ready for a seamless, user-friendly experience.
- Dive into free trials for any of our products
- Easily install and license the Boris FX Suite or select software
- Activate or deactivate licenses without the fuss
- Stay up-to-date on the latest versions of our products
- Direct connections to dedicated training and support

Sapphire Perpetual License 2024 – What’s New
The Emmy Award-winning plugin collection adds 2 new creative effects, 10 new lens flares, and 65 new curated presets for Adobe, Avid, and OFX hosts.
- New! Effect & Transition: Unleash digital chaos with Sapphire PixelMosh.
- New! Effect: Add atmospheric realism and cinematic aura to any image with Sapphire Dust.
- New! Retooled Time Effects: The Sapphire time category is updated for better behavior and integrated into the Effect and Transition Builder.
- New! 10 More Flares: New and updated Sapphire Lens Flares.
- New! 65+ Effect Presets: Includes 18 advanced Builder presets.
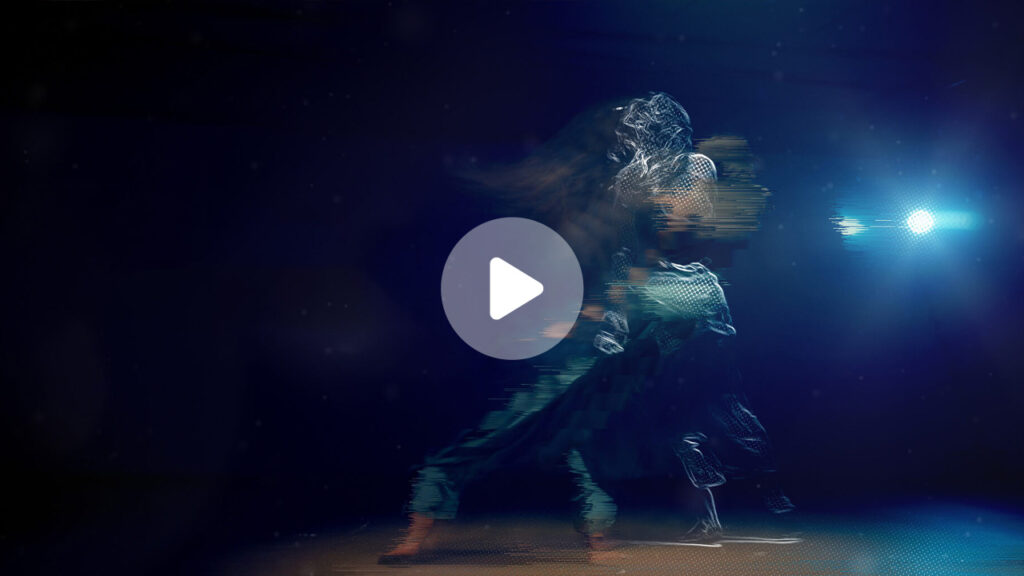
Sapphire PixelMosh
Glitch your art with beautifully precise imperfections using the new Sapphire PixelMosh plugin. Smear and drag pixels from one group of frames to another. Add bursting blobs of color that bloom and pulsate or digital decay with corrupted, stuck frames. Combines seamlessly with other Sapphire damage effects inside S_Effect and S_Transition.
Want to learn more about S_PixelMosh? Check out Boris FX’s in-depth 2 part training course.
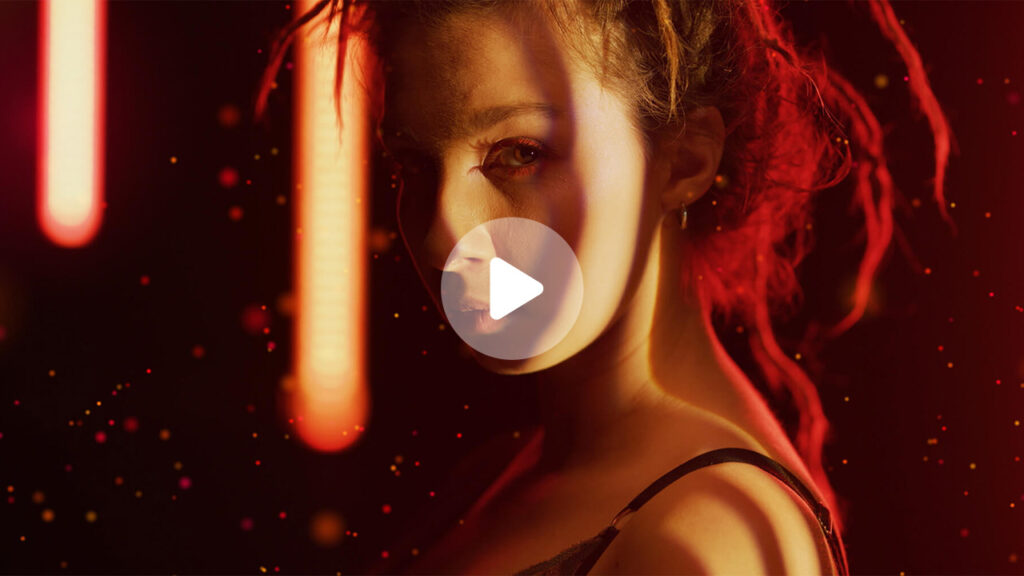
Sapphire Dust
Breathe life into every frame with the new Sapphire Dust Effect. S_Dust is blazing-fast, replicates the look of a simple particle simulation without the complexity, and includes rich, user-friendly controls.
It’s perfect for adding a touch of photorealism to CG renders, creating a cinematic atmosphere, and enhancing motion graphics. Set the mood with a few shimmering specks or unleash a turbulent sandstorm.
Create more stunning results by pairing it with other classic Sapphire effects inside S_Effect and S_Transition.
S_Dust: Deep dive S_Dust with this introductory training video.
Improved Time Effects
Every effect in the Sapphire Time category is re-engineered with better behavior and refined functionality. The collection features 30 effects focused on time manipulation. Each effect now renders quickly and accurately, and you can now use them within S_Effect and S_Transition.
Learn how to build advanced Sapphire effects with this training video.
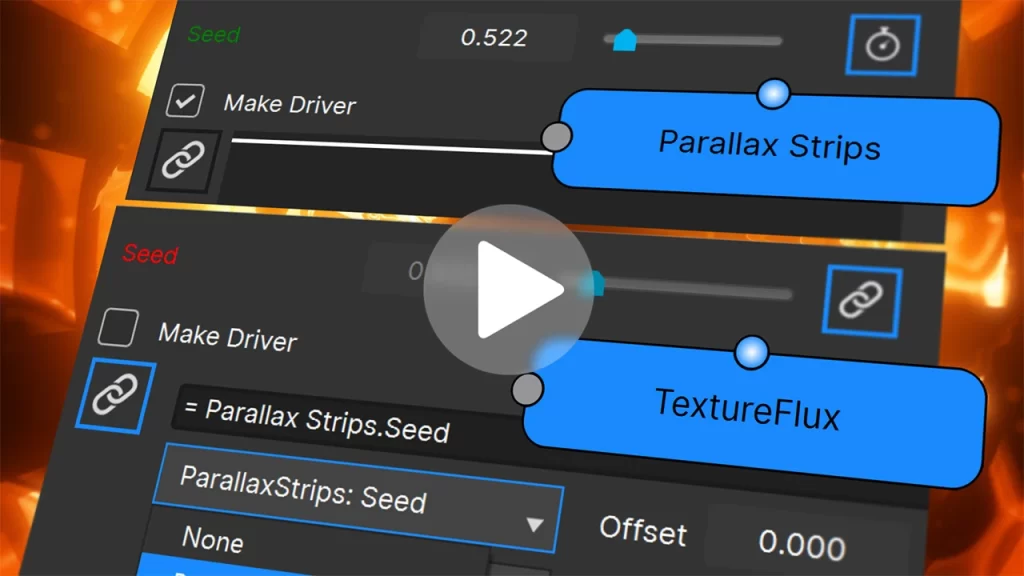
New in 2023.5! Parameter Linking in Builder
The new parameter linking feature in S_Effect and S_Transition allows editors and artists to create dynamic and complex effects by connecting parameters and values across different Sapphire effects. Users can set a “driver” parameter and then link other parameters to it, including adding offsets and multipliers.
Parameter linking gives users control over an entire effect’s animation with a single slider. This makes it easier to create advanced animations and effects without having to manually adjust multiple parameters!
New in 2023.5! Quick Access and Favorites
The new Quick Access feature provides users with a fast option to find and add effects to Builder. Simply add effects directly into the node graph with just a few clicks rather than navigating Sapphire’s expansive list of effects. Users can also star frequently used effects and add them to the new Favorites category, making them easily accessible.
New in 2023.5! Custom Parameter Naming
The 2023.5 update to Sapphire introduces a highly-requested feature: the ability to customize effect parameter names in Builder. Users can now create their names for any parameter inside any Sapphire effect. By choosing more intuitive and user-friendly parameter names, Builder artists can quickly identify key parameters in an effect and adjust accordingly.
New in 2023.5! New and Improved Presets
Artists can hit the ground running with stunning looks and professionally-curated transitions thanks to 15 new S_Effect presets and 12 new S_Transition presets — all built out with custom expressions. Plus, 130+ existing S_Effect and S_Transition presets are updated and improved, giving users even more options and refined looks.
New in 2023.5! New and Improved Sapphire Lens Flares
Sapphire’s award-winning Lens Flare, renowned across the film & TV industry for gorgeous and natural-looking results, now includes 12 more reasons to love it with the addition of new and improved flares for Sapphire 2023.5. Use the integrated Academy Award-winning Mocha technology to do fast and accurate motion tracking directly in the plugin. Perfect flares, wherever you need them.
New in 2023! Sapphire PrismLens
Created to replicate shooting through a physical prism, S_PrismLens reflects and refracts light to create cinematic and dreamy looks. It has a feature-rich parameter set, allowing editors and artists unparalleled freedom and control to create single, linear, and circular reflections. Great for music videos, travelogues, cinematic opens, social media, or even stills — anywhere you wish to create stunning images.
New in 2023! Sapphire UltraGrain
Created for the modern VFX artist, editor, and colorist. S_UltraGrain accurately recreates the qualities and aesthetics of film and camera grain with the needed flexibility of a digital toolset. S_UltraGrain makes the art of grain management completely natural and blazing fast thanks to native CUDA and Metal GPU acceleration.
Speed, Beauty, And Endless Possibilities
Light And Flares
Shot missing something? Add lighting effects and beautiful lens flares. Lens flares, rays, glows, glints, bokeh effects, streaks, light leaks, flashbulbs, and more.
Blur And Distort
High-quality lens distortions and photorealistic blurs. Camera shakes, rack defocuses, lens whacking, z-blurs, edge-aware blurs, beauty effects, and more.
Render And Composite
Deep & fast tools to adjust your shots and build better comps by adding new textures and elements. Zaps, textures, caustics, starfields, gradients, sparkles, grunge, auroras, and more.
Stylize
A wide variety of ways to add high production value to any project. Film effects, glitches, pixel sorts, vignettes, film grains, retro TV and film looks, Kaleido, auto-paints, and more.
Transition And Time
Auto-animating transitions from classic to modern and mind-bending time effects. Many custom dissolves and wipes, film rolls, hyper pulls, swish pans, feedback effects, time-averaging, trails, and more.
Do Virtually Anything
Create cross-platform stacks of effects that apply as a single effect, or make entirely new effects and transitions with Sapphire Builder. Endless possibilities!
Why Use Sapphire?
Built For Speed And Excellence
Sapphire is built for the pros. Its suite of hundreds of effects features image-processing algorithms that produce Hollywood’s highest-quality results. Each Sapphire effect is GPU-accelerated for faster rendering with NVIDIA CUDA technology for Windows and Linux, and Apple’s Metal technology for macOS, along with native support for Silicon-powered Macs. Look no further if you’re a professional artist looking to create an array of stunning visuals with blazing speeds.
Thousands Of Presets
You’ll always find something to suit your taste and needs with thousands of preset effects crafted by top-notch artists. Every Sapphire release includes brand-new presets. There’s always something fresh to play with!
Learn The Language Of Sapphire
Sapphire effects are loved for a beautifully designed and carefully laid out top-down parameter workflow often structured with a guided order of operations. The user-friendly experience — paired with a uniform naming structure and speedy workflow — makes it easy for editors and artists to start creating gorgeous effects. Sapphire also features a large online library of tutorials to teach you about the effects or provide you with inspiration on what to create next!
Track Everything With Mocha
Say goodbye to keyframing with Academy Award-winning integrated Mocha tracking. Mocha’s rock-solid planar tracking is included within every Sapphire effect. Drive effect parameters like Sapphire Lens Flare position data or isolate an area with a tracked mask on an effect like Sapphire Glow or Sapphire Blur.
Ready For Any Pipeline
Work faster and smarter with Sapphire — a powerful and proven VFX solution that seamlessly integrates into any pipeline. Easily scale up your rendering output when needed with Sapphire background renders with identical CPU fallbacks. Choose how your facility licenses with flexible options including floating virtual machine licensing servers or monthly subscriptions. Access personalized customer support 7 days a week or browse an online library of help documentation for any technical needs.
Description
Boris FX Sapphire Filter List
Filter & Example | Unit & Description |
|---|---|
WipeWedge | Unit: Transitions Sapphire WipeWedge performs a wipe transition between two input clips using a wedge shape. The Wipe Percent parameter should be animated to control the transition speed. Increase the Border Width parameter to draw a border at the wipe transition edges. |
WipeWeave | Unit: Transitions Sapphire WipeWeave performs a wipe transition between two input clips using a texture resembling perpendicular woven strands. The Wipe Percent parameter should be animated to control the transition speed. Increase the Grad Add parameter to make the timing of the weave pattern move across the screen during the wipe. Increase the Border Width parameter to draw a border at the wipe transition edges. |
WipeTiles | Unit: Transitions Sapphire WipeTiles performs a wipe transition between two input clips using a pattern of growing or shrinking hexagons, triangles, diamonds, or stars. The Wipe Percent parameter should be animated to control the transition speed. Increase the Grad Add parameter to make the timing of the tile pattern move across the screen during the wipe. Increase the Border Width parameter to draw a border at the wipe transition edges. |
WipeStar | Unit: Transitions Sapphire WipeStar performs a wipe transition between two input clips using a star shape. The Wipe Percent parameter should be animated to control the transition speed. Increase the Border Width parameter to draw a border at the wipe transition edges. |
WipeStripes | Unit: Transitions Sapphire WipeStripes performs a wipe transition between two input clips using a series of stripes. The Wipe Percent parameter should be animated to control the transition speed. Increase the Grad Add parameter to make the timing of the stripe pattern move across the screen during the wipe. Increase the Border Width parameter to draw a border at the wipe transition edges. |
WipeRings | Unit: Transitions Sapphire WipeRings performs a wipe transition between two input clips using a pattern of concentric rings. The Wipe Percent parameter should be animated to control the transition speed. Increase the Grad Add parameter to make the timing of the rings pattern move across the screen during the wipe. Increase the Border Width parameter to draw a border at the wipe transition edges. |
WipeRectangle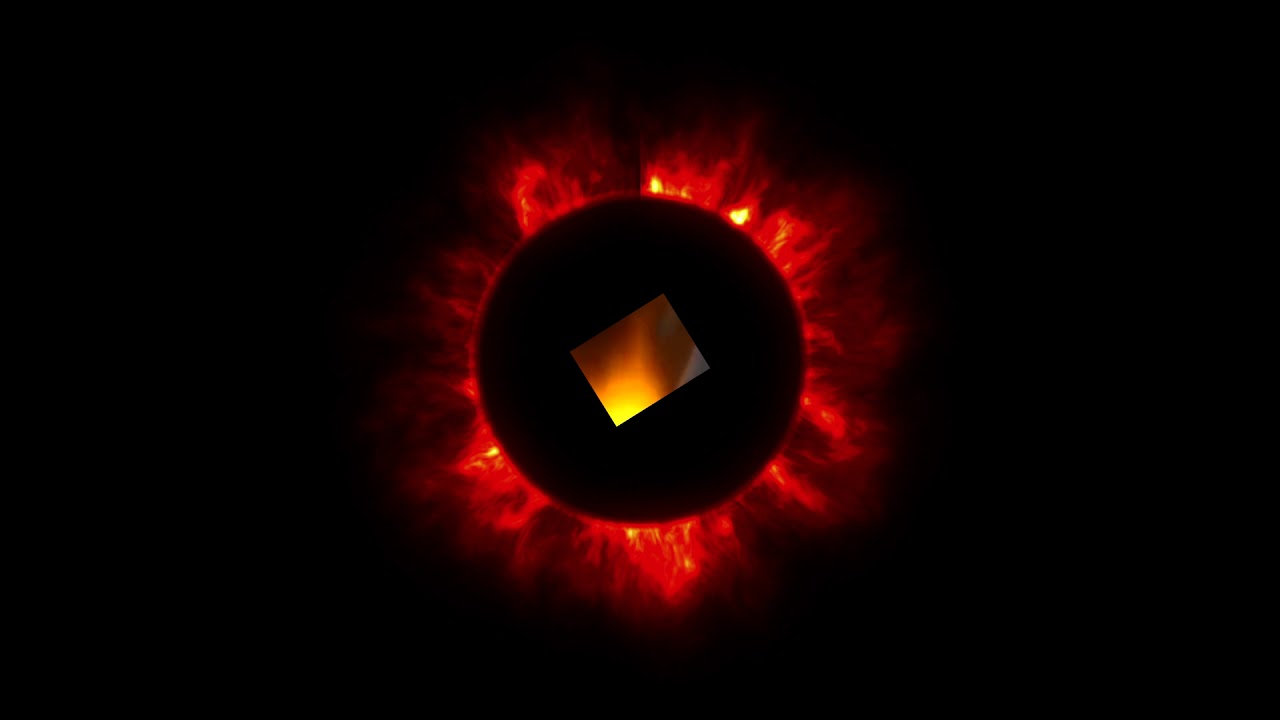 | Unit: Transitions Sapphire WipeRectangle performs a wipe transition between two input clips using a growing or shrinking rectangle. The Wipe Percent parameter should be animated to control the transition speed. Increase the Border Width parameter to draw a border at the wipe transition edges. |
WipePointalize | Unit: Transitions Sapphire WipePointalize transitions between two input clips by adding brush-like polygon shapes from one clip onto another in a semi-random order. The Wipe Percent parameter should be animated to control the transition speed. Adjust the Frequency to change the size of the shapes, and adjust the Edge Width and Chunky parameters for different patterns. |
WipePlasma | Unit: Transitions Sapphire WipePlasma performs a wipe transition between two input clips using a plasma texture with moving tendrils. The Wipe Percent parameter should be animated to control the transition speed. Increase the Grad Add parameter to make the timing of the plasma pattern move across the screen during the wipe. Increase the Border Width parameter to draw a border at the wipe transition edges. |
WipePixelate | Unit: Transitions Sapphire WipePixelate Transitions between two input clips by adding blocks of pixels of one clip onto another in a semi-random order. The Wipe Percent parameter should be animated to control the transition speed. Adjust the Edge Width and Chunky parameters for different pixelated patterns. |
WipeMoire | Unit: Transitions Sapphire WipeMoire performs a wipe transition between two input clips using a pattern of combined concentric rings. The Wipe Percent parameter should be animated to control the transition speed. The Phase Speed and Moire Speed parameters cause the rings to automatically animate over time. Increase the Grad Add parameter to make the timing of the pattern move across the screen during the wipe. Increase the Border Width parameter to draw a border at the wipe transition edges. |
WipeLine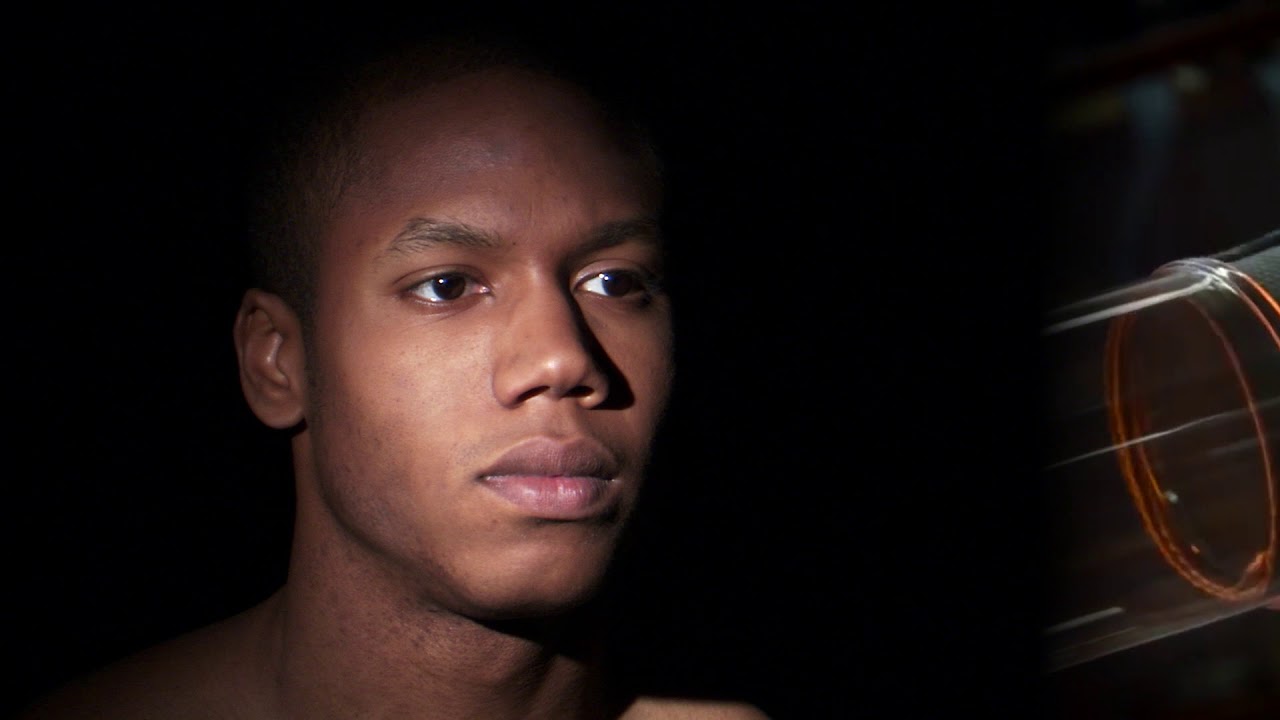 | Unit: Transitions Sapphire WipeLine performs a simple line wipe transition between two input clips. The Wipe Percent parameter should be animated to control the transition speed. Increase the Border Width parameter to draw a border at the wipe transition edges. |
StripSlideTransition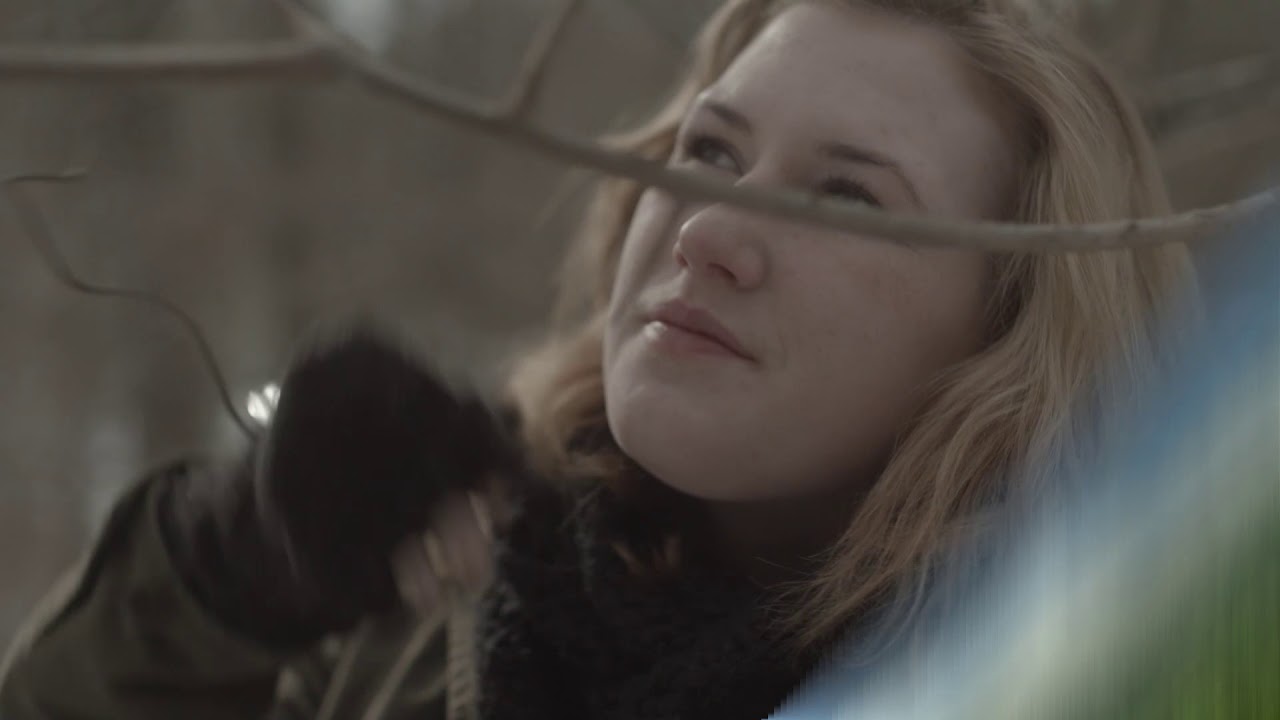 | Unit: Transitions Sapphire Slipslide Transitions between two clips by breaking them into strips and sliding them off the screen one at a time to reveal the incoming clip. |
FlutterCut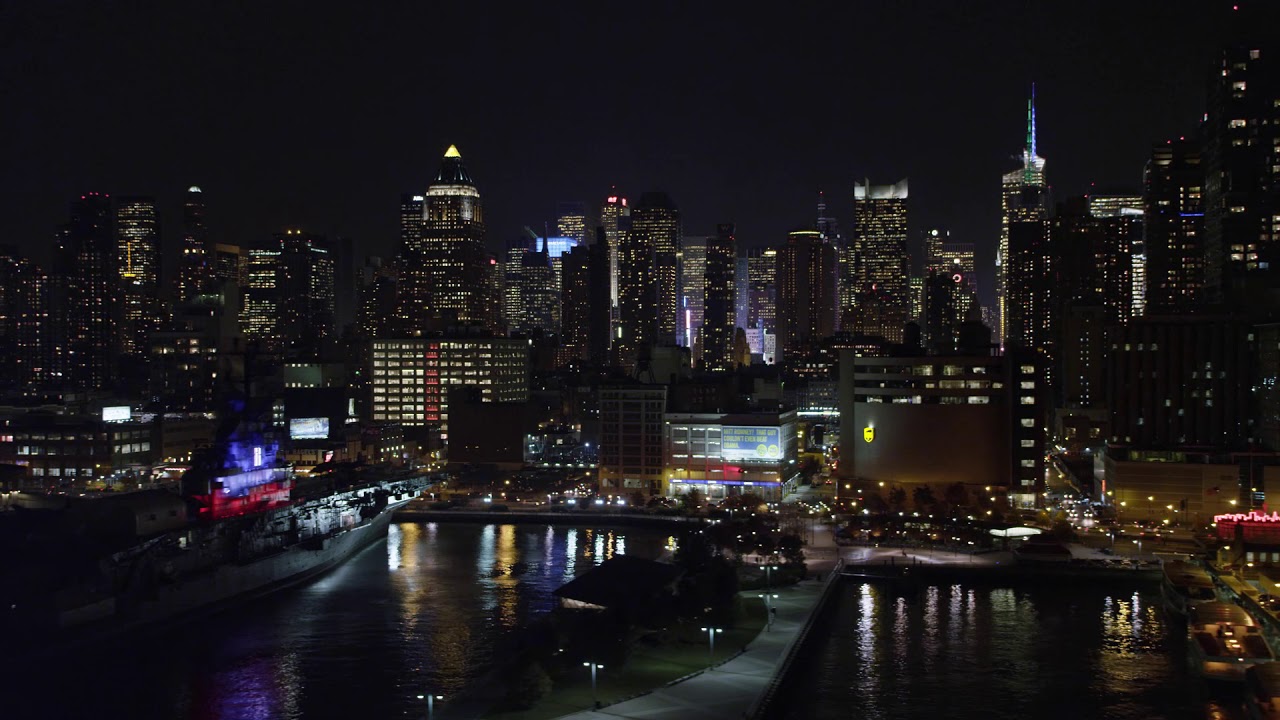 | Unit: Transitions Sapphire FlutterCut transitions between two clips by rapidly cutting back and forth between them, optionally inserting solid colored or inverted frames as well. The cuts of each clip can get longer or shorter over the length of the transition. |
FilmRoll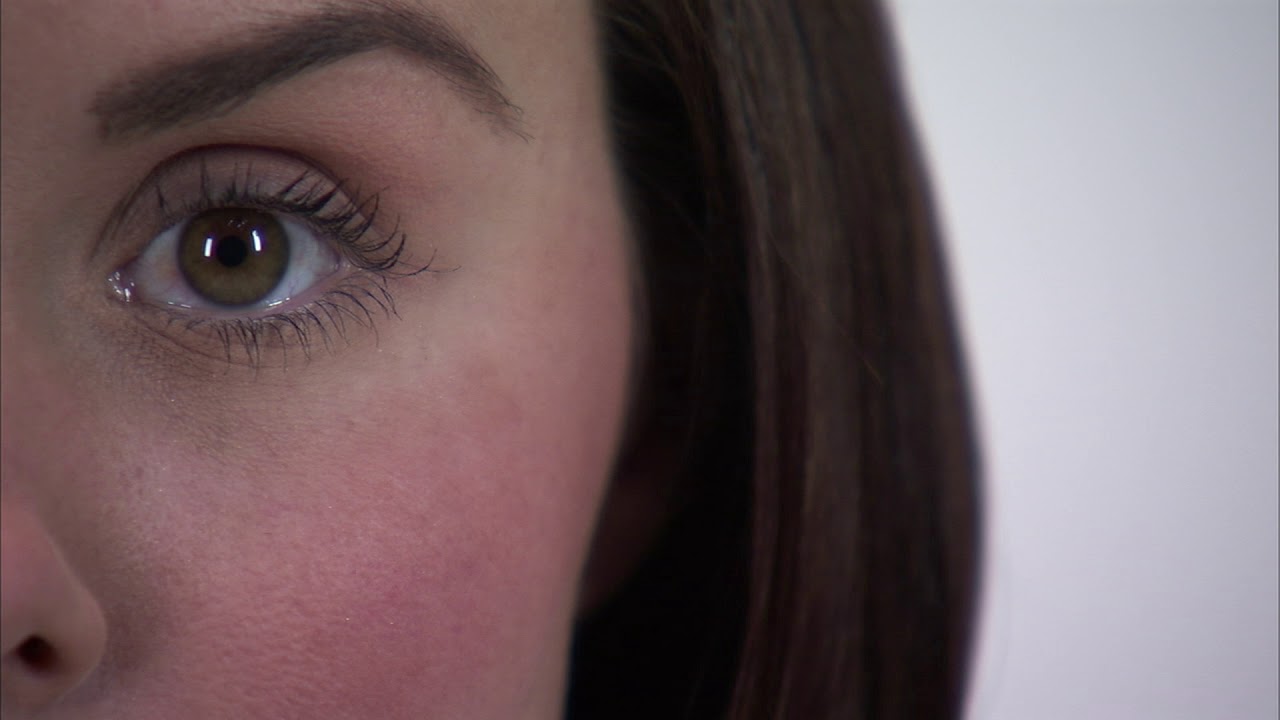 | Unit: Transitions Sapphire FilmRoll transitions between two clips by rolling one off screen vertically while rolling the other on, while applying various film damage effects such as shaking, stains, scratches, and flicker. |
CardFlip | Unit: Transitions Sapphire CardFlip transitions between two clips by sliding or spinning the outgoing clip to reveal the incoming clip behind it. The Amount parameter should be animated to control the transition speed. Adjusting Revolutions and Shift will give different kinds of transitions. |
TestureSpots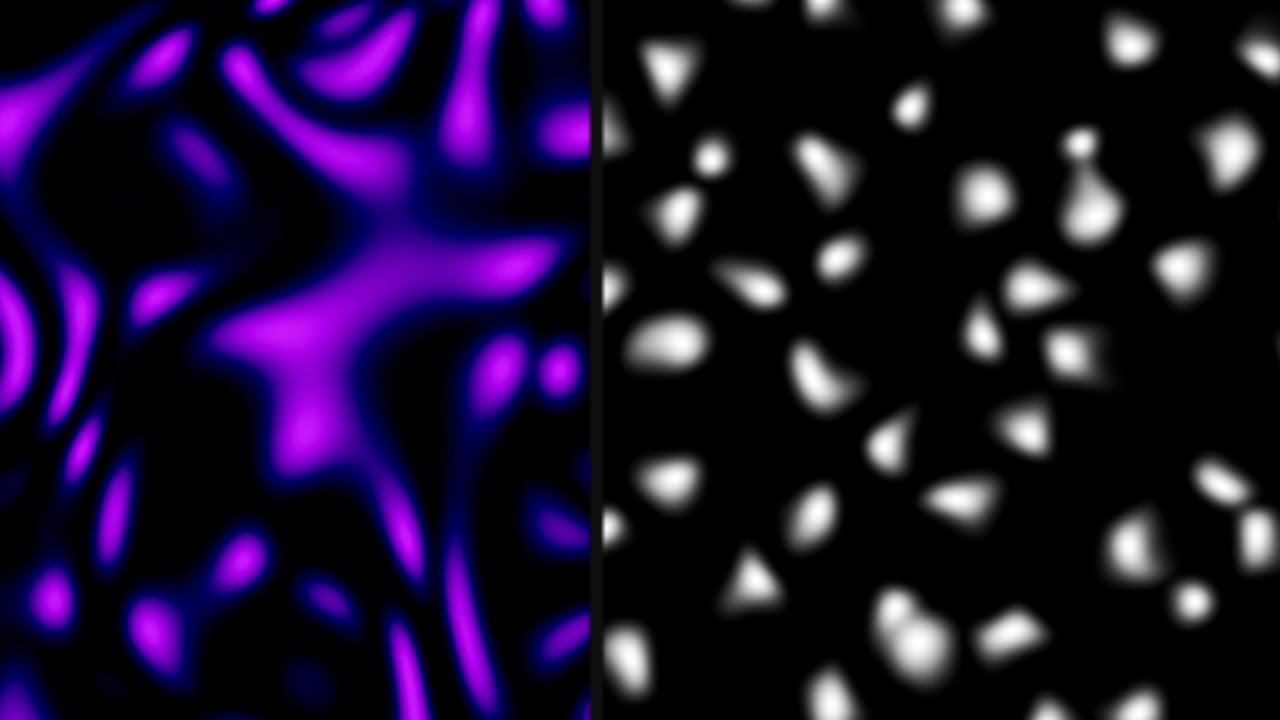 | Unit: Render Sapphire TextureRender creates a field of spots that can be distorted and animated. The Warp Speed parameter causes the spots to be distorted over time by a random warping pattern. |
TextureWeave | Unit: Render Sapphire TextureWeave creates an abstract texture resembling perpendicular woven strands. The two sets of strands, horizontal and vertical, can be adjusted independently using frequency, octaves, and speed parameters. |
TextureMoire | Unit: Render Sapphire TextureMoire creates an abstract Moire texture by adding together two patterns of concentric rings. The Phase Speed and Moire Speed parameters cause the rings to automatically animate over time. |
TextureNeurons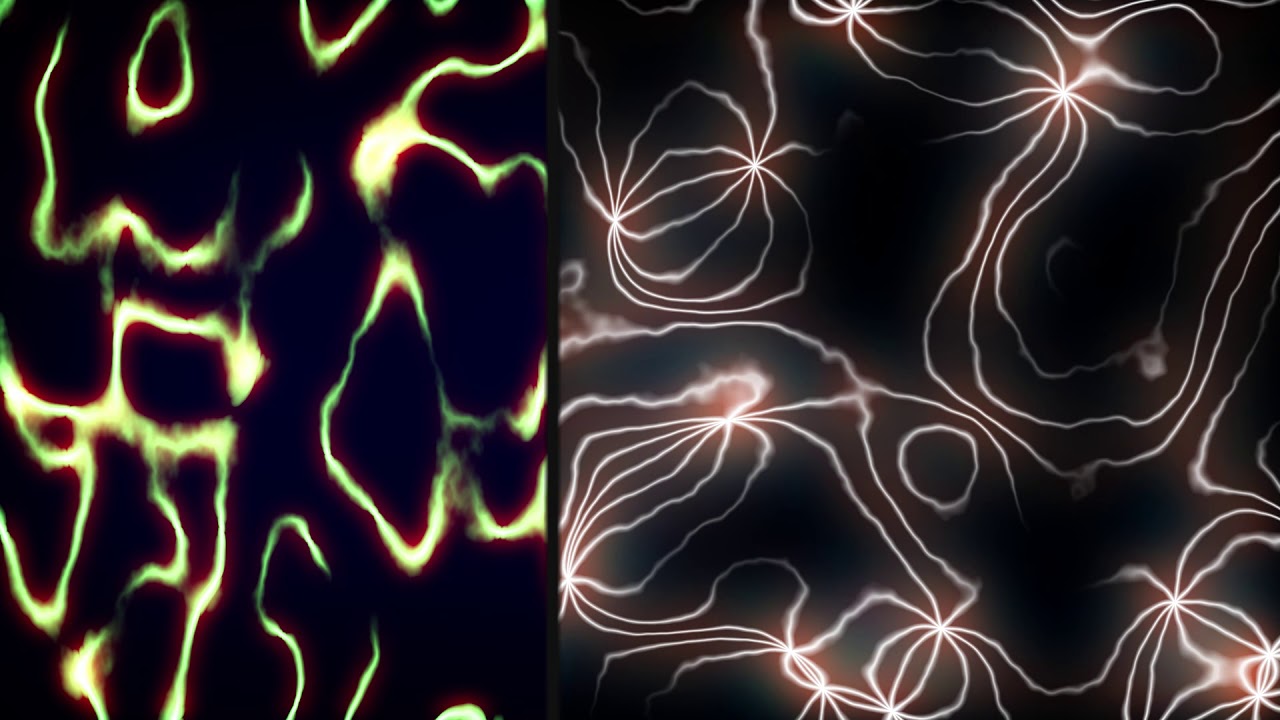 | Unit: Render Sapphire TextureNeurons creates an abstract texture resembling moving nerve cell tendrils. The Phase Speed and Morph Speed parameters cause the pattern to automatically change over time. |
TextureNoiseEmboss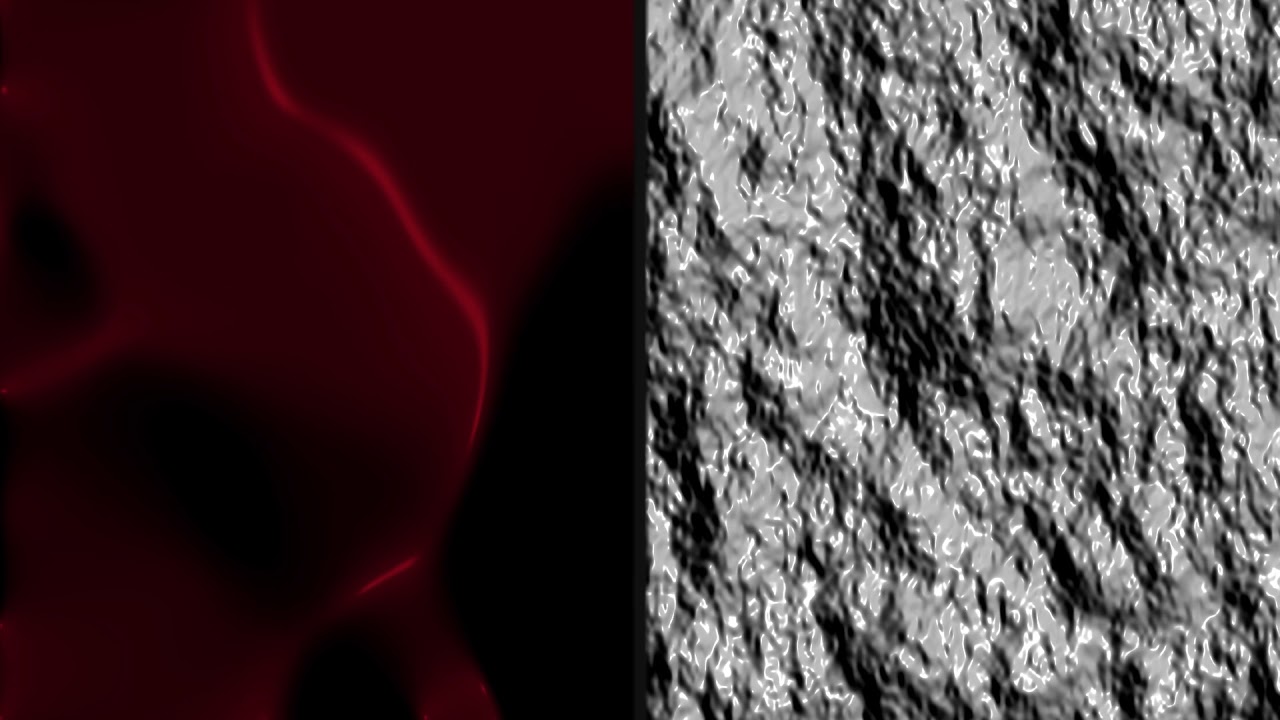 | Unit: Render Sapphire TextureNoiseEmboss creates an abstract texture by applying a EmbossShiny effect to a procedurally generated noise texture. Adjust the Light Dir to illuminate the pattern from different angles. |
TextureNoisePaint | Unit: Render Sapphire TextureNoisePaint creates an abstract texture by applying an AutoPaint effect to a procedurally generated noise texture. |
TexturePlasma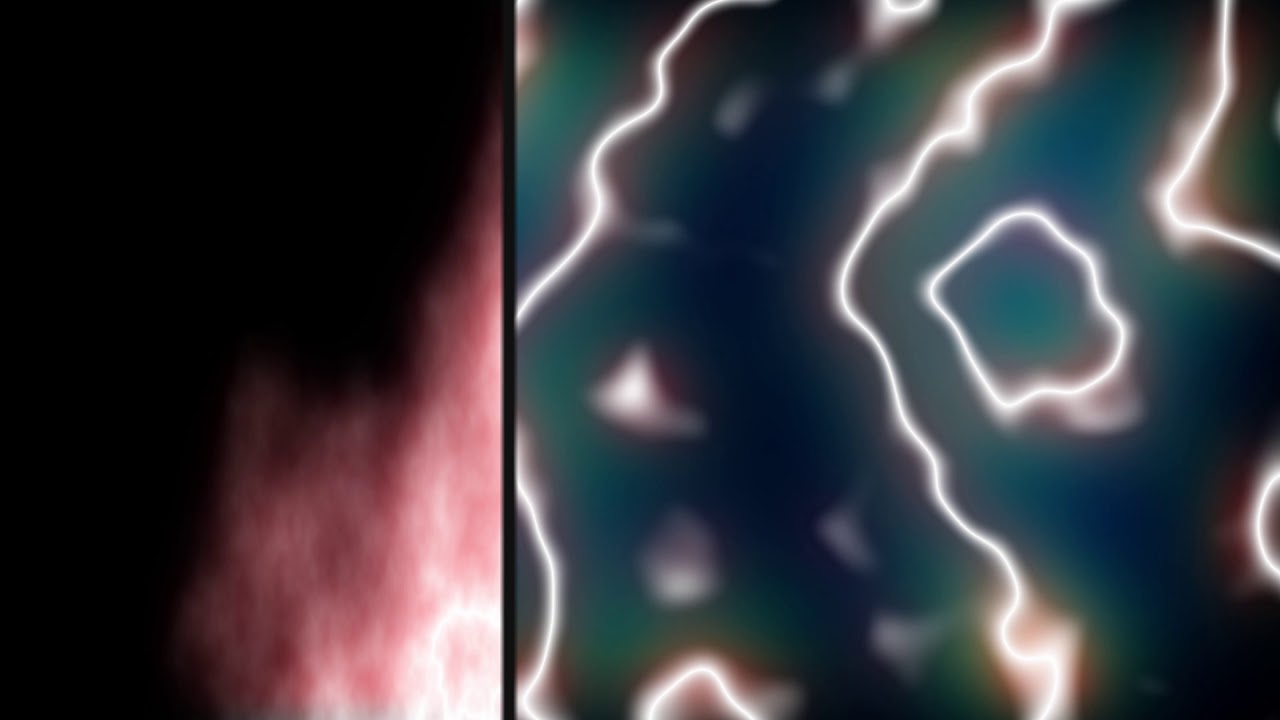 | Unit: Render Sapphire TexturePlasma creates an abstract texture resembling an electrical plasma effect. The Phase Speed parameter causes the pattern to automatically undulate over time. |
WarpMagnify | Unit: Distort Sapphire WarpMagnify magnifies an elliptical region of the source to create a glass lens refraction effect. |
WarpPolar | Unit: Distort Sapphire WarpPolar warps the source clip into a rounded disk shape. The vertical direction of the source image is mapped between the Inner Radius and Outer Radius, and the horizontal direction is rotated about the center based on the number of Angle Repeats and offset by Angle. |
WarpVortex | Unit: Distort Sapphire WarpVortex twists the source clip into a vortex, about a given Center location. Use the Vortex Start parameter to adjust the amount of vortexing, and use Angle Offset to also apply a normal rotation. Vortex Speed can be used to automatically animate the amount of vortexing. |
WarpWaves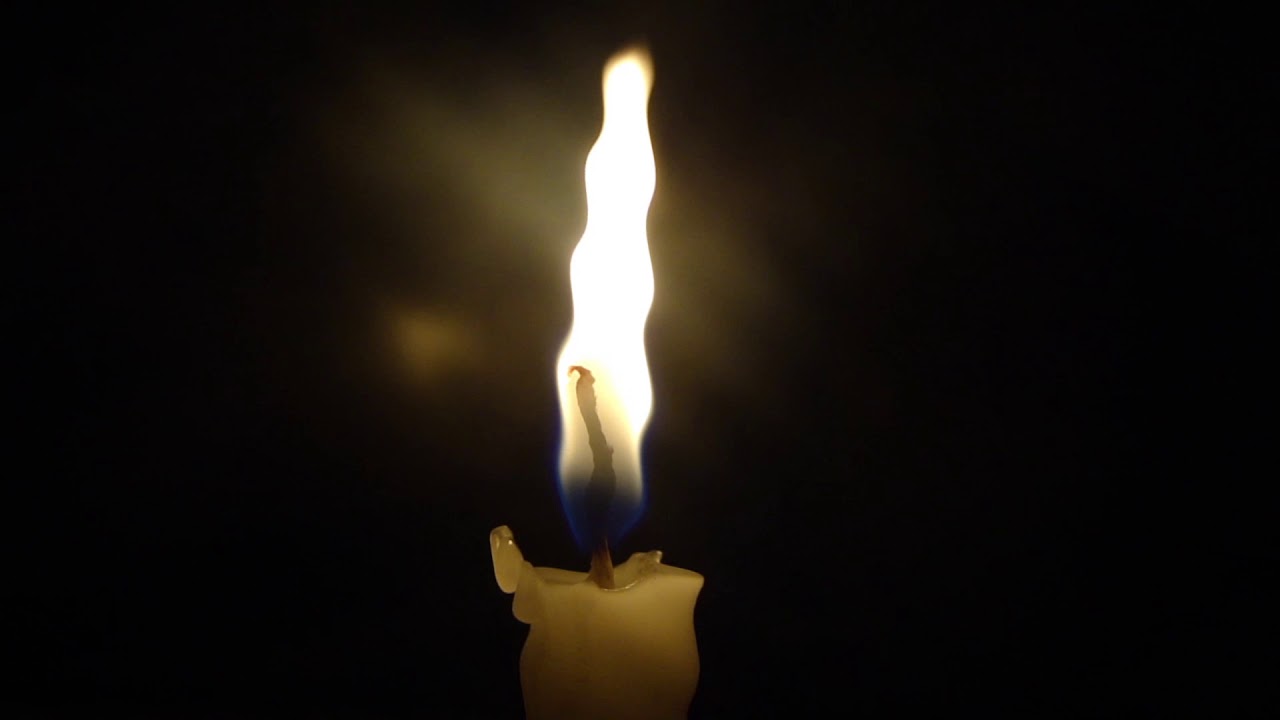 | Unit: Distort Sapphire WarpWaves warps the source clip by a wave pattern. You can make the waves move over time by increasing the Phase Speed parameter, or by animating the value of Phase Start. |
WarpWaves2 | Unit: Distort Sapphire WarpWaves2 warps the source clip using two sets of overlapping wave patterns. You can make the waves move over time by increasing the Phase Speed parameters, or by animating the value of the Phase Start parameters. |
Aurora | Unit: Render Sapphire Aurora generates a two colored swirl of light along a user controlled spline reminiscent of the Aurora Borealis (Northern Lights). |
AutoPaint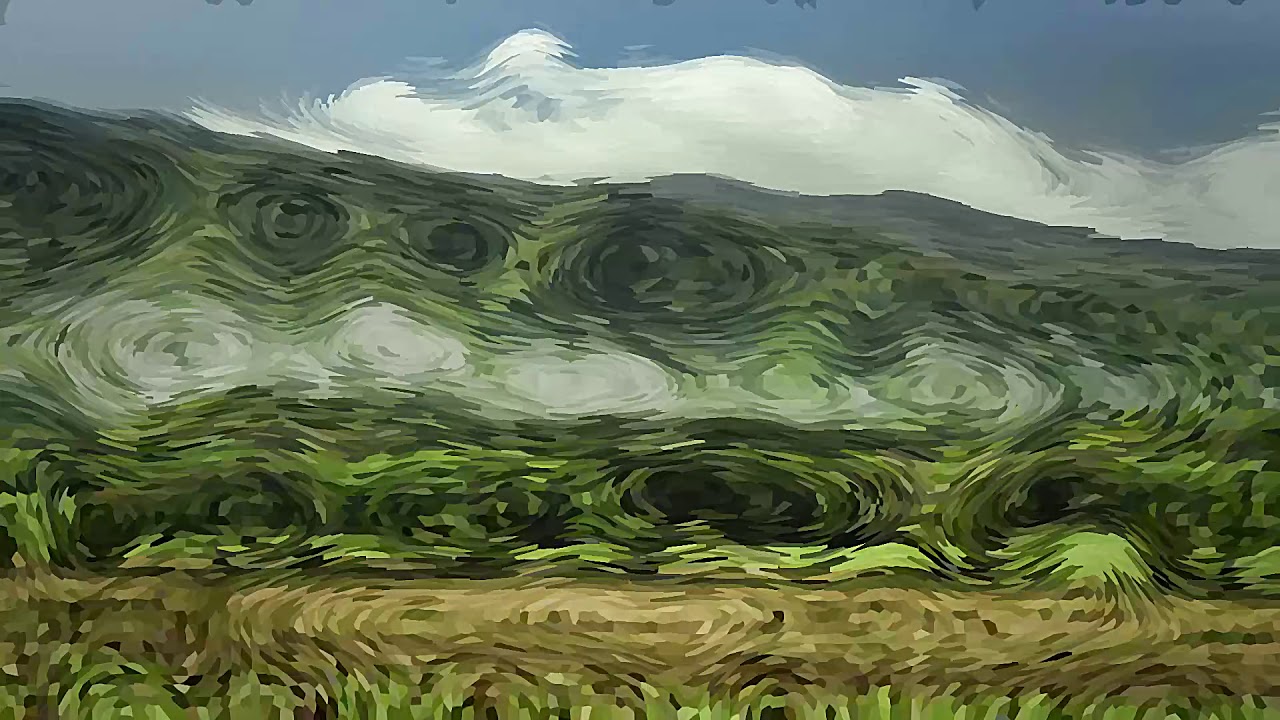 | Unit: Stylize Sapphire AutoPaint generates a \u0026lsquo;paint-brushed' version of the source clip. Use the Frequency and Stroke Length parameters to adjust the density and shape of the brush strokes. You can set Jitter Frames to 1 if you want to re-randomize the brush stroke pattern for each frame. |
BokehLights | Unit: Lighting Sapphire BokehLights generates random, defocused lights that move around the screen. |
Brush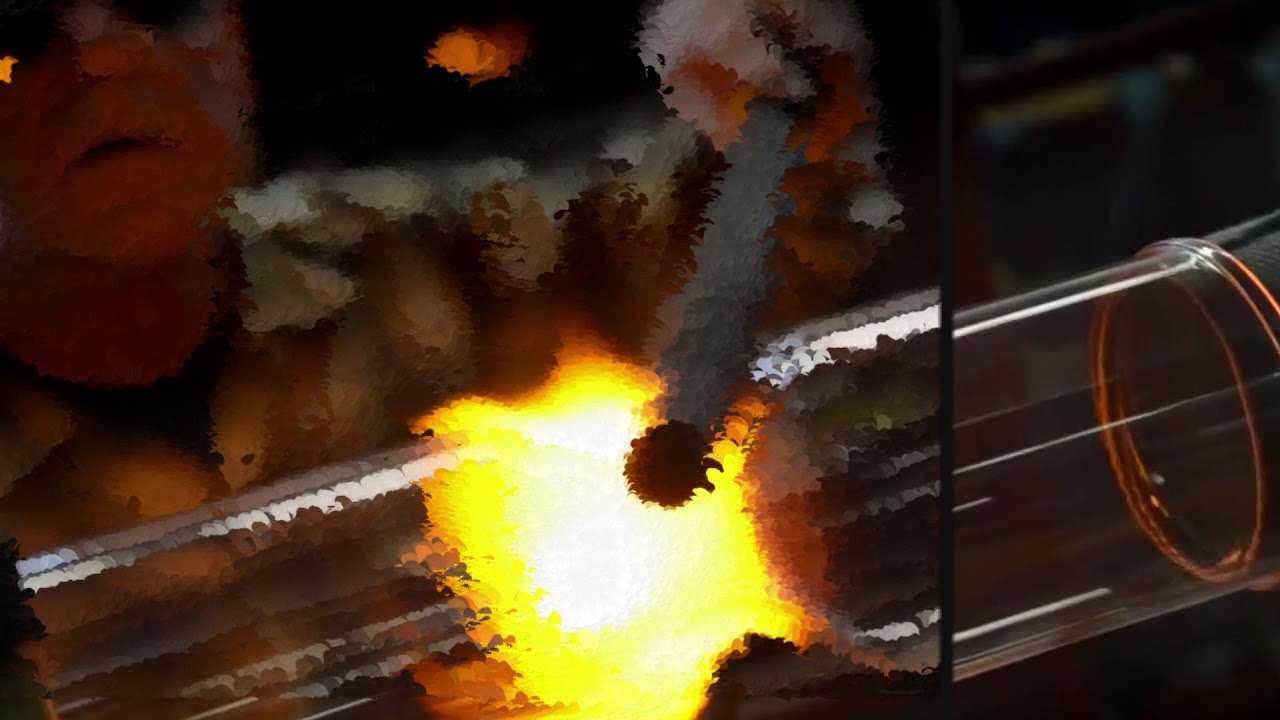 | Unit: Stylize Sapphire Brush simulates the look of drawing and painting by layering brush strokes of different sizes and directions. The style of the effect can be Oil or Chalk with the option to use one of the following brushes: felt tip, splat, water color, stipple, pencil, pastel, sponge, splodge, round, or cubes. In addition to the master controls for adjusting shape, size, orientation, density, etc., there are also three unique controls to each effect style that control the lighting and shading of the brushes. |
Kaleido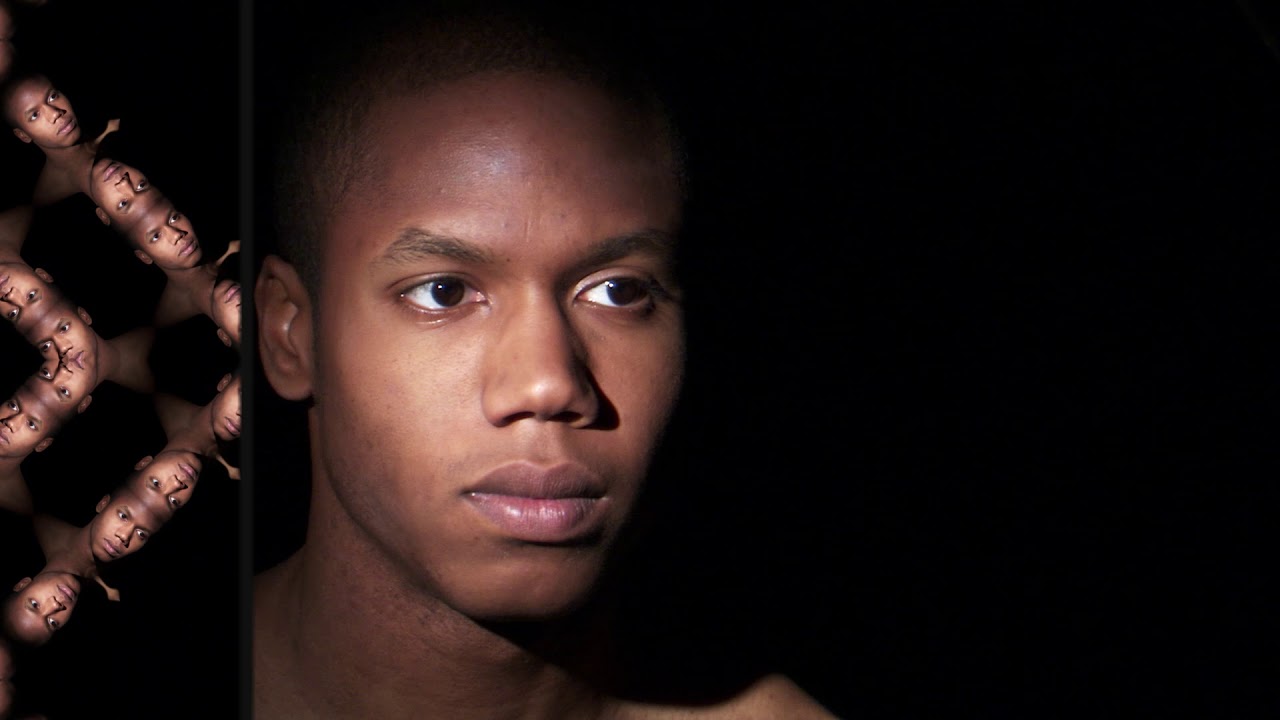 | Unit: Stylize Sapphire Kaleido reflects the source clip into a kaleidoscopic pattern of triangles, squares, diamonds, or octagonal shapes. Use the Pattern menu to select different reflection patterns. The 'Inside' parameters transform the Source image before it is reflected into the pattern. The Center and Z Dist transform the entire result including the reflection pattern, and the Rotate affects only the reflecting \u0026lsquo;mirrors'. |
KaleidoPolar | Unit: Stylize Sapphire KaleidoPolar warps the source clip around in a disk shape and reflects radially as if viewed through a reflecting cylinder. |
KaleidoRadial | Unit: Stylize Sapphire KaleidoRadial simulates a traditional 2 or 3-mirror kaleidoscope. You see a pie-slice shaped piece of the source through the angle between the mirrors, and mirror-reflected copies of it in the rest of the image. Use the Slices parameter to control the how many copies of the source pie slice you see around the central point. |
Luna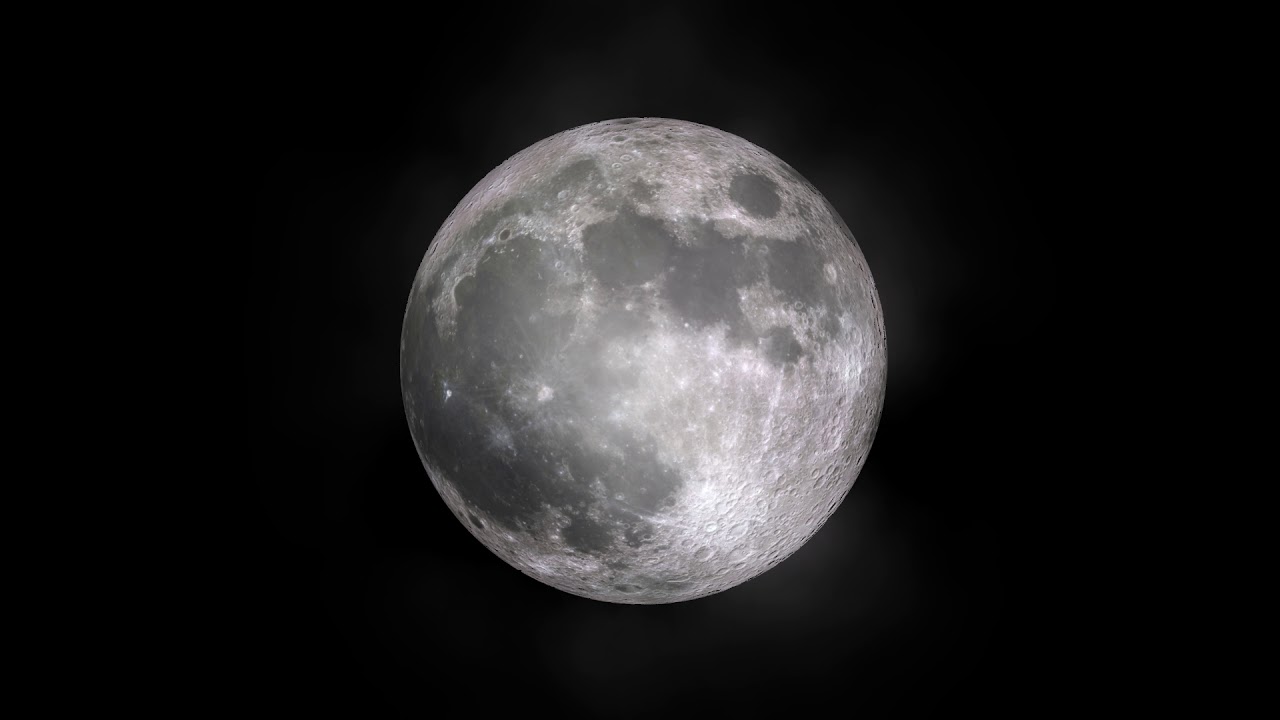 | Unit: Render Sapphire Luna renders the Earth's Moon; you can adjust phase and colors, and add atmospheric effects. |
NightSky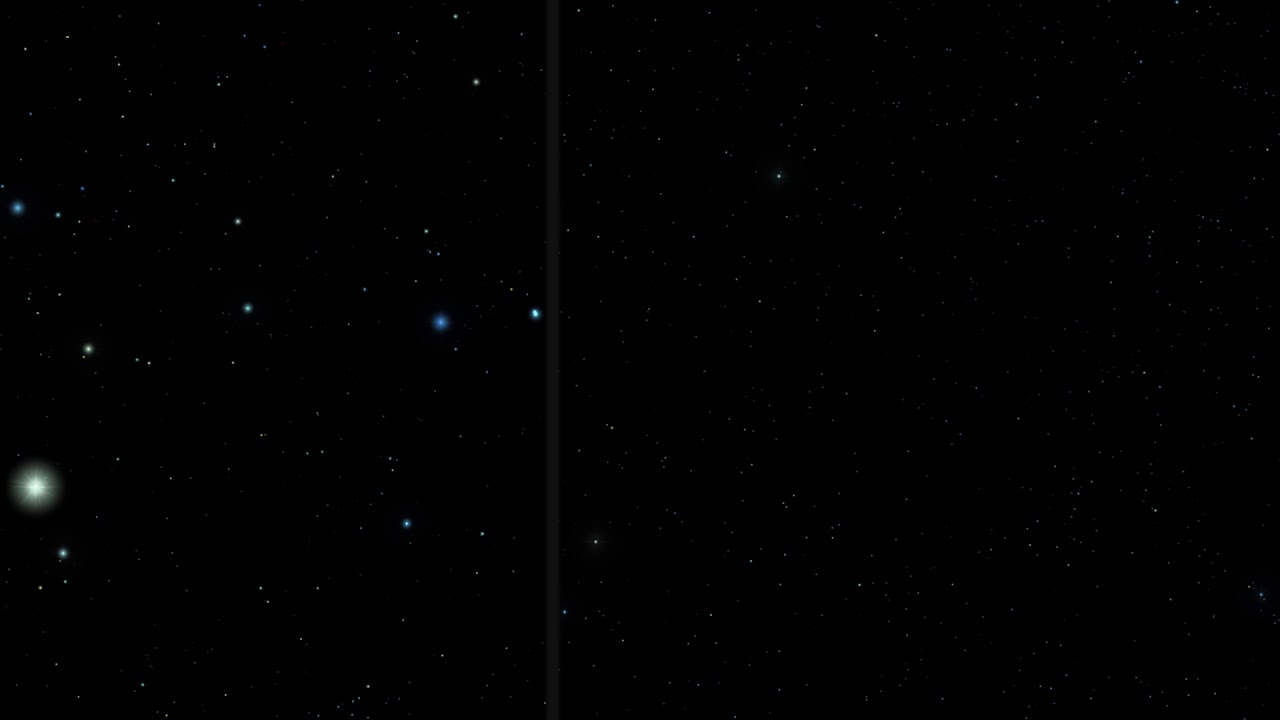 | Unit: Render Sapphire NightSky generates a realistic starry night sky as viewed from a major city or a specified longitude and latitude. The stars are generated using a star database so that major constellations are visible where expected. Adjust magnitude limit to see more stars. Animate the Minute param to make the stars move realistically over time. |
WarpFishEye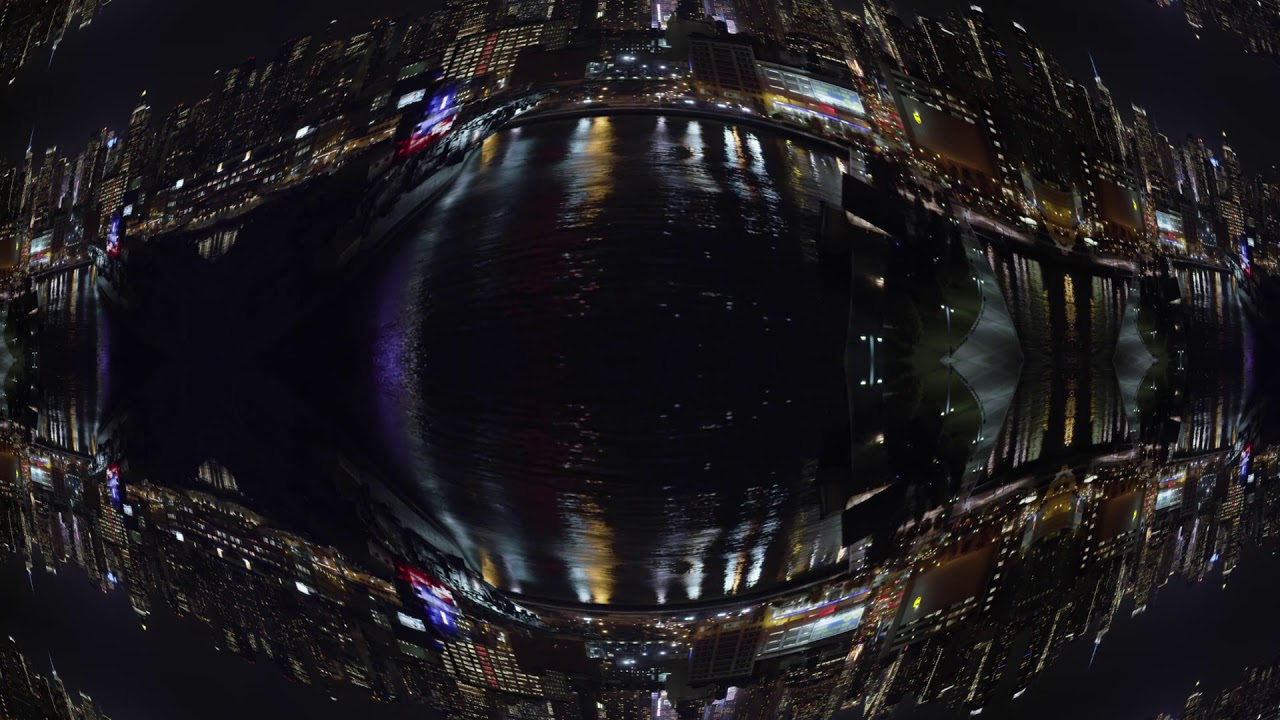 | Unit: Distort Sapphire WarpFishEye expands the center of the source clip as if viewed through a fish-eye lens. Adjust the Amount parameter to give more or less distortion. Turn off the Wrap options to give transparency beyond the borders of the input clip instead of reflected copies. |
WipeFourWedges | Unit: Transitions Sapphire's WipeFourWedges filter performs a wipe transition between two input clips using a pattern of four wedges merging into an X shape. The Wipe Percent parameter should be animated to control the transition speed. Increase the Border Width parameter to draw a border at the wipe transition edges. |
WipeFlux | Unit: Transitions Sapphire's WipeFlux filter performs a wipe transition between two input clips using a flux texture with mostly round cells. The Wipe Percent parameter should be animated to control the transition speed. Increase the Grad Add parameter to make the timing of the flux pattern move across the screen during the wipe. Increase the Border Width parameter to draw a border at the wipe transition edges. |
WipeDoubleWedge | Unit: Transitions Sapphire WipeDoubleWedge filter performs a wipe transition between two input clips using two wedge shapes. The Wipe Percent parameter should be animated to control the transition speed. Increase the Border Width parameter to draw a border at the wipe transition edges. |
WipeDots | Unit: Transitions Sapphire's WipeDots filter performs a wipe transition between two input clips using a grid of growing or shrinking dots. The Wipe Percent parameter should be animated to control the transition speed. Increase the Grad Add parameter to make the timing of the dots pattern move across the screen during the wipe. Increase the Border Width parameter to draw a border at the wipe transition edges. |
WipeDiffuse | Unit: Transitions Sapphire's WipeDiffuse filter wipes between two input clips with a pixel-diffusion process performed within the transition area. The Wipe Percent parameter should be animated to control the transition speed. The pixelated look of this effect depends on the image resolution, so it is recommended to test your final resolution before processing. |
WipeClouds | Unit: Transitions Sapphire's WipeClouds filter transitions from the first clip to the second using a moving cloud texture. The Wipe Percent parameter should be animated to control the transition speed. |
WipeClock | Unit: Transitions Sapphire's WipeClock filter performs a clock wipe transition between two input clips. The Wipe Percent parameter should be animated to control the transition speed. Increase the Border Width parameter to draw a border at the wipe transition edges. |
WipeChecker | Unit: Transitions Sapphire's WipeChecker filter performs a wipe transition between two input clips using a grid of growing or shrinking checkers. The Wipe Percent parameter should be animated to control the transition speed. Increase the Grad Add parameter to make the timing of the checker pattern move across the screen during the wipe. Increase the Border Width parameter to draw a border at the wipe transition edges. |
WipeCells | Unit: Transitions Sapphire's WipeCells filter performs a wipe transition between two input clips using a pattern of procedurally generated cellular shapes. The Wipe Percent parameter should be animated to control the transition speed. Increase the Grad Add parameter to make the timing of the cells pattern move across the screen during the wipe. Increase the Border Width parameter to draw a border at the wipe transition edges. |
WipeBubble | Unit: Transitions Sapphire's WipeBubble filter wipes between two input clips with a bubble-warp process performed within the transition area. The Wipe Percent parameter should be animated to control the transition speed. |
WipeBlobs | Unit: Transitions Sapphire's WipeBlobs filter performs a wipe transition between two input clips using a pattern of blobs generated by a noise function. The Wipe Percent parameter should be animated to control the transition speed. Increase the Grad Add parameter to make the timing of the blobs pattern move across the screen during the wipe. Increase the Border Width parameter to draw a border at the wipe transition edges. |
TVChannelChange | Unit: Transitions Sapphire's TVChannelChange filter transitions between two input clips by simulating a channel change on an old television set. The first clip goes black with bad reception, followed by the second clip with bad reception. The reception improves over time until only the second clip is left. |
SwishPan | Unit: Transitions Sapphire's SwishPan filter transitions between two input clips by sliding one clip off the frame and the other clip on, and adding motion blur to give the appearance of a quick pan. This works best when the duration of the transition is short. |
Swish3D | Unit: Transitions Sapphire's Swish3D filter dissolves between two input clips while performing 3D moves on each. During the transition the From clip is transformed by the Zdist, Rotate, Swivel, Tilt, Shift, Scale, and Shear parameters, and the To clip is transformed by the opposite of these values. The overall amount of motion for each image can be scaled by the Rel Amp From and Rel Amp To parameters. |
DissolveZap | Unit: Transitions Sapphire's DissolveZap filter transitions between two clips using animated lightning bolts. The clips dissolve into each other, while the lightning grows. The Dissolve Percent parameter should be animated to control the transition speed. |
DissolveWaves | Unit: Transitions Sapphire's DissolveWaves filter transitions between two input clips using a waves warping function. The first clip is warped away and faded out while the second clip is unwarped into place and faded in. The Dissolve Percent parameter should be animated to control the transition speed. |
DissolveVortex | Unit: Transitions Sapphire's DissolveVortex filter transitions between two input clips using a vortex warping function. The first clip is warped away and faded out while the second clip is unwarped into place and faded in. The Dissolve Percent parameter should be animated to control the transition speed. |
DissolveTiles | Unit: Transitions Sapphire's DissolveTiles filter transitions between two input clips while breaking each up into tiles and scrambling them. The first clip breaks apart and spreads out while the second clip coalesces behind the first. The Dissolve Percent parameter should be animated to control the transition speed. |
DissolveStatic | Unit: Transitions Sapphire's DissolveStatic filter transitions between two input clips using random pixel static. The Dissolve Percent parameter should be animated to control the transition speed. The pixelated look of this effect depends on the image resolution, so it is recommended to test your final resolution before processing. |
DissolveSpeckle | Unit: Transitions Sapphire's DissolveSpeckle filter transition between two input clips using a speckled noise pattern. The Dissolve Percent parameter should be animated to control the transition speed. |
DissolveShake | Unit: Transitions Sapphire's DissolveShake filter transitons between two clips by applying a shaking motion to them, along with a quick dissolve. The shaking uses translation, zooming, and\/or rotation. It is random but repeatable, so with the same parameters the same shaking motion is generated each time. Turn on Motion Blur and adjust the Mo Blur Length for different amounts of blur. Adjust the Amplitude and Frequency for different shaking speeds and amounts. The Rand parameters give detailed control of the random non-periodic shaking, and the Wave parameters adjust the regular periodic shaking. The X, Y, Z, and Tilt parameters control the horizontal, vertical, zoom, and rotation amounts of shaking respectively. |
DissolveRays | Unit: Transitions Sapphire's DissolveRays filter transitions between two input clips using animated rays. The clips dissolve into each other, and rays are added to the result. The rays ramp up and down over the duration of the effect. The rays animate by moving the origin of the rays across the screen along a line. The Dissolve Percent parameter should be animated to control the transition speed. |
DissolvePuddle | Unit: Transitions Sapphire's DissolvePuddle filter transitions between two input clips while warping by a circular pattern of waves. The first clip is warped away and faded out while the second clip is unwarped into place and faded in. The Dissolve Percent parameter should be animated to control the transition speed. |
DissolveLuma | Unit: Transitions Sapphire's DissolveLuma filter transitions between two input clips using a pattern derived from their luminances. One clip often appears to emerge through the other. The Dissolve Percent parameter should be animated to control the transition speed. |
DissolveLensFlare | Unit: Transitions Sapphire's DissolveLensFlare filter transitions between two input clips using an animated lens flare. The clips dissolve into each other, while a lens flare moves along a straight line. The lens flare grows and shrinks over the duration of the effect. The Dissolve Percent parameter should be animated to control the transition speed. |
DissolveGlow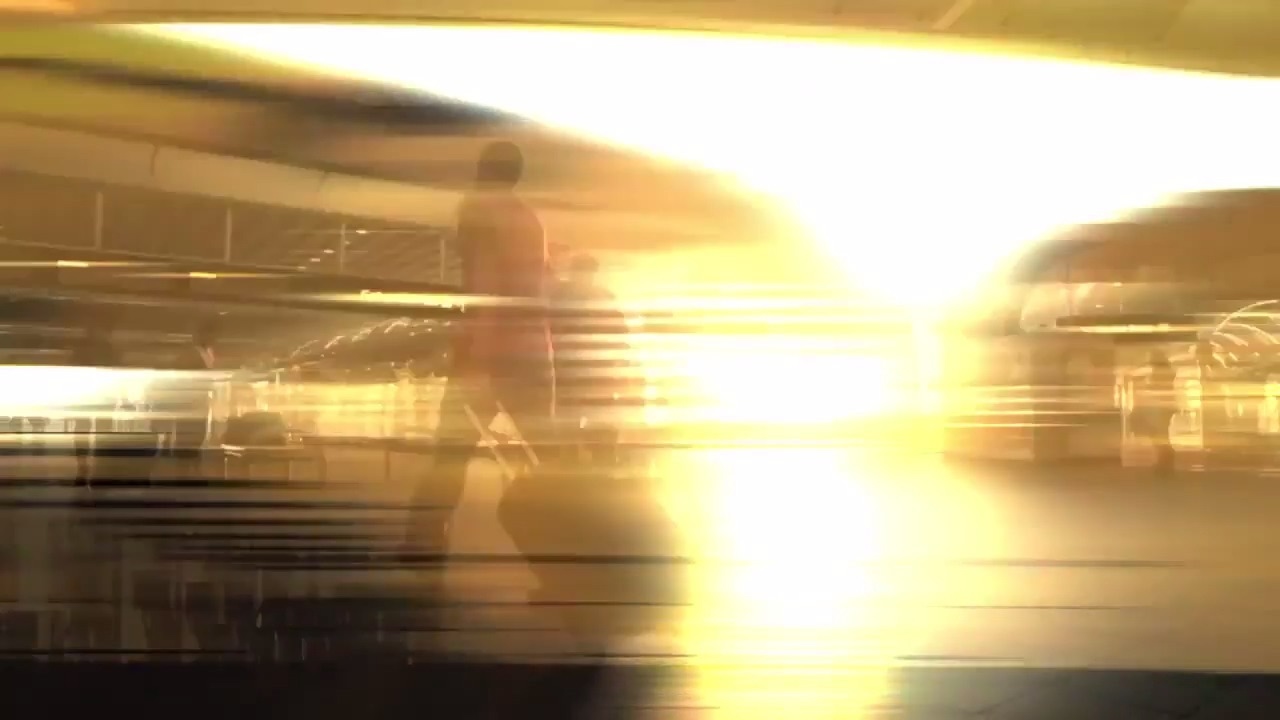 | Unit: Transitions Sapphire's DissolveGlow filter transitions between two input clips using a bright glowing flash. The clips dissolve into each other, while each one gets a glow which ramps up and down over the duration of the effect. The Dissolve Percent parameter should be animated to control the transition speed. |
DissolveGlintRainbow | Unit: Transitions Sapphire's DissolveGlintRainbow filter transitions between two input clips using a bright glowing glint. The clips dissolve into each other, while each one gets a glint which ramps up and down over the duration of the effect. The Dissolve Percent parameter should be animated to control the transition speed. |
DissolveGlint | Unit: Transitions Sapphire's DissolveGlint filter transitions between two input clips using a bright glowing glint. The clips dissolve into each other, while each one gets a glint which ramps up and down over the duration of the effect. The Dissolve Percent parameter should be animated to control the transition speed. |
DissolveGlare | Unit: Transitions Sapphire's DissolveGlare filter transitions between two input clips using animated glares. The clips dissolve into each other, and glares are added to the result. The glare size and brightness ramps up and down over the duration of the effect. |
DissolveFlashblulbs | Unit: Transitions Sapphire's DissolveFlashbulbs filter simulates lots of flashbulbs going off while dissolving between two clips. With many small flashes it can look like a stadium scene. With a few large flashes it works well on a celebrity red carpet clip |
DissolveFilm | Unit: Transitions Sapphire's DissolveFilm filter transitions between two input clips using a film dissolve with selectable gamma. Film dissolve preserves the highlights in the clips longer compared to a regular dissolve. The Dissolve Percent parameter should be animated to control the transition speed. |
DissolveEdgeRays | Unit: Transitions Sapphire's DissolveEdgeRays filter transitions between two input clips using animated edge rays. The clips dissolve into each other, and edge rays are added to the result. The edge rays ramps up and down over the duration of the effect. The edge rays animate by moving the origin of the edge rays across the screen along a line. The Dissolve Percent parameter should be animated to control the transition speed. |
DissolveDistort | Unit: Transitions Sapphire's DissolveDistort filter transitions between two input clips while distorting each using the gradient of the other. The first clip is warped away and faded out while the second clip is unwarped into place and faded in. The Dissolve Percent parameter should be animated to control the transition speed. Note that the Background input must be provided or this effect will just perform a simple dissolve without any distortion. |
DissolveDiffuse | Unit: Transitions Sapphire's DissolveDiffuse filter transitions between two input clips by scrambling the pixels of the inputs within an area determined by Max Amount. The first clip is diffused away while the second clip is diffused into place. The Dissolve Percent parameter should be animated to control the transition speed. The pixelated look of this effect depends on the image resolution, so it is recommended to test your final resolution before processing. |
DissolveDefocus | Unit: Transitions Sapphire's DissolveDefocus filter transitions between two input clips while defocusing each. The first clip is defocused and faded out while the second clip is brought into focus and faded in. The Dissolve Percent parameter should be animated to control the transition speed. |
DissolveBubble | Unit: Transitions Sapphire's DissolveBubble filter transitions between two input clips using a bubble warping function. The first clip is warped away and faded out while the second clip is unwarped into place and faded in. The Dissolve Percent parameter should be animated to control the transition speed. |
DissolveBlur | Unit: Transitions Sapphire's DissolveBlur filter transitions between two input clips while blurring each. The first clip is blurred and faded out while the second clip is unblurred and faded in. The Dissolve Percent parameter should be animated to control the transition speed. |
ZebrafyColor | Unit: Stylize Sapphire's ZebrafyColor filter modulates the brightness of the source clip with sinusoids for each color channel to give a color striped effect. |
Zebrafy | Unit: Stylize Sapphire's Zebrafy filter modulates the brightness of the source clip with a sinusoid to give a black and white solarized look. |
VintageColor3Strip | Unit: Stylize Sapphire's VintageColor3Strip filter simulates the color 3-strip film process from 1935 through 1955. Three-strip color was a subtractive process which exposed three separate film strips through color filters, then applied complementary color dyes to the print according to the density of the original records. This process was used for many films such as The Wizard Of Oz, Fantasia, and Gone With The Wind. Modern color film has much broader color filtering in the emulsion layers, so this effect simulates the narrower filters and sharper colored dyes of the era which gave it its characteristic vibrancy. This effect also allows adding grain and color correction. |
VintageColor2Strip | Unit: Stylize Sapphire's VintageColor2Strip filter simulates the old color 2-strip film process from the 1920s. The scene is exposed twice, through red and green filters, onto alternating frames of a monochrome film strip. Then the red print is dyed with a red dye, and the green print is dyed cyan. Those two strips are cemented together back-to-back to form the final print. The result contains mostly red and green colors, with some synthetic blue from the blue components of the dyes. This effect simulates the two filter colors and the two dye colors, and also allows adding grain and color correction. |
Vignette | Unit: Stylize Sapphire's Vignette filter darkens the border areas of the source clip to create a vignette effect. Use the Squareness, Radius, and Edge Softness parameters to affect the shape of the vignette. Use the Opacity and Color parameters to adjust its strength and color. |
TileScramble | Unit: Stylize Sapphire's TileScramble filter breaks the image into rectangular tiles and shifts the image within each tile to create an effect like a wall of small randomly oriented mirrors reflecting the source image. The amount and direction of shifting are controllable. |
ScanLinesMono | Unit: Stylize Sapphire's ScanLinesMono filter is a monochrome version of ScanLines. Creates a version of the source clip with a scan lines pattern resembling a black and white TV monitor. Increase the Add Noise parameter to also add a grainy effect to the result. |
WipeCircle | Unit: Transitions Sapphire's WipeCircle filter performs a wipe transition between two input clips using a growing or shrinking circle. The Wipe Percent parameter should be animated to control the transition speed. Increase the Border Width parameter to draw a border at the wipe transition edges. |
PsykoStripes | Unit: Stylize Sapphire's PsykoStripes filter combines the source clip with a stripe pattern and then passes them through a colorization process. The Phase Speed parameter causes the colors to automatically rotate over time. |
PsykoBlobs | Unit: Stylize Sapphire's PsykoBlobs filter combines the source clip with a field of blob shapes and then passes them through a colorization process. The Phase Speed parameter causes the colors to automatically rotate over time. |
PseudoColor | Unit: Stylize Sapphire's PseudoColor filter colorizes the source image. The hue is calculated from the brightness of the source. |
S_Posterize | Unit: Stylize Sapphire's Posterize filter generates a posterized version of the input by limiting the number of colors in the source, and replacing detailed texture and noise with solid colors. |
Mosaic | Unit: Stylize Sapphire's Mosaic filter generates a pixelated version of the source clip. Adjust the size and shape of the blocks using the Pixel Frequency and Pixel Rel Height parameters. Increase the Smooth Colors parameter to cause the colors of nearby pixel blocks to be more consistent, and less flickery over time. |
JPEGDamage | Unit: Stylize Sapphire's JPEGDamage filter creates a version of the Source input that is subjected to Jpeg compression artifacts and errors. This can be used to give various looks of low quality digital transmissions. Three methods for manipulating your image are provided: the Jpeg quality can be adjusted, various internal frequencies can be scaled, and random decompression errors can be introduced. In all cases it can also be useful to lower the resolution factor to create larger, more obvious Jpeg blocks. |
HalfToneRings | Unit: Stylize Sapphire's HalfToneRings filter generates a duotone version of the source clip using a repeating pattern of concentric rings. Use the Smooth Source parameter to remove some details and make the dots more consistently shaped. |
HalfToneColor | Unit: Stylize Sapphire's HalfToneColor filter generates a version of the source clip using a colored dot pattern. Use the Smooth Source parameter to remove some details and make the dots more consistently round. You can invert the dots pattern from CMY to RGB using the Dots menu. |
HalfTone | Unit: Stylize Sapphire's Halftone filter generates a halftone version of the source clip using a black and white pattern of dots. Use the Smooth Source parameter to remove some details and make the dots more consistently round. |
GrainStatic | Unit: Stylize Sapphire's GrainStatic filter adds color and\/or monochrome random noise of given amplitudes to every pixel of the source clip. Unlike the other Grain effects, there is no coherency of the grain between pixels, so the resulting look will vary with different output resolutions. |
FlysEyeRect | Unit: Stylize Sapphire's FlysEyeRect filter breaks the image into rectangle shaped tiles and transforms the image within each shape, to create a flys eye view effect. The Inside parameters transform the Source image before it is tiled into the pattern, and the Tile parameters transform the entire flys eye pattern. |
FlysEyeHex | Unit: Stylize Sapphire's FlysEyeHex filter breaks the image into hexagon shaped tiles and transforms the image within each shape, to create a flys eye view effect. Increase Edge Softness for a smoother overlap between the tiles. The Inside parameters transform the Source image before it is tiled into the pattern, and the Tile parameters transform the entire flys eye pattern. |
FlysEyeCircles | Unit: Stylize Sapphire's FlysEyeCircles filter breaks the image into circle shaped tiles and transforms the image within each shape, to create a flys eye view effect. The Overlap options allow the circles to be combined in different ways where they overlap. The Inside parameters transform the Source image before it is tiled into the pattern, and the Tile parameters transform the entire flys eye pattern. |
FilmDamage | Unit: Stylize Sapphire's FilmDamage filter simulates damaged film with many options, including dust, hairs, stains, scratches, defocusing, flicker, and shake. Each option has a master control and a set of detailed controls for adjusting the look of that type of damage. |
Etching | Unit: Stylize Sapphire's Etching filter generates a version of the source clip using two sets of black and white lines of varying thickness to give an etching or lithograph look. Use the Smooth Source parameter to remove some details and make the lines more evenly shaped. Use the Lines Frequency parameter to adjust the density of all lines. |
EmbossShiny | Unit: Stylize Sapphire's EmbossShiny filter embosses the Source clip using the Bumps input as a relief map. A lighting model is used which includes highlights from specular reflections. Increase the Bumps Smooth parameter for bolder bumps, and adjust the Light Dir to illuminate the bumps from different angles. |
EmbossGlass | Unit: Stylize Sapphire's EmbossGlass filter embosses and warps the Source image using the Bumps input as a relief map and lens image. A chrominance distortion is also performed, separating the spectrum for a prismatic look. Increase the Bumps Smooth parameter for bolder bumps, and adjust the Light Dir to illuminate the bumps from different angles. |
EmbossDistort | Unit: Stylize Sapphire's EmbossDistort filter embosses and warps the Source clip using the Bumps input as a relief map and also distorts the result using the Bumps as a lens image. Increase the Bumps Smooth parameter for bolder bumps, and adjust the Light Dir to illuminate the bumps from different angles. |
Emboss | Unit: Stylize Sapphire's Emboss filter embosses the Source clip using the brightness of the Bumps input as a relief map. Increase the Bumps Smooth parameter for bolder bumps, and adjust the Light Dir to illuminate the bumps from different angles. |
EdgesInDirection | Unit: Stylize Sapphire's EdgesInDirection filter finds the edges of the source input that are aligned in a specified direction. Increase the Edge Smooth parameter for thicker edges. |
EdgeDetectDouble | Unit: Stylize Sapphire's EdgeDetectDouble filter performs an edge detect operation twice giving a double stranded edge effect. Increase the Edge Smooth parameters for thicker edges. |
EdgeDetect | Unit: Stylize Sapphire's EdgeDetect filter finds the edges within the source clip. Increase the Edge Smooth parameter for thicker edges. Select Mono or Chroma mode to show only edges in Luminance or Chroma. |
EdgeColorize | Unit: Stylize Sapphire's EdgeColorize filter assigns different colors to the edges of the source clip depending on their direction. Increase the Edge Smooth parameter for thicker edges. |
DogVision | Unit: Stylize Sapphire's DogVision filter generates a dual color-channel version of the input image, as might be perceived by the limited color vision system of dogs. Humans have three color receptors (for red, green, and blue) while dogs have only two receptors (for yellow and blue). |
DigitalDamage | Unit: Stylize Sapphire's DigitalDamage filter simulates bad digital TV transmission with many options, including freeze-frames, shifting and flowing blocks, various kinds of blocky noise, and pixelization. Can give looks similar to MPEG stream errors, digital dropouts, and satellite feed data corruption. |
Diffuse | Unit: Stylize Sapphire's Diffuse filter scrambles the pixels of the source input within an area determined by the Diffuse Amount. Use the Blur Rel X and Y parameters for a more horizontal or vertical diffuse direction. The pixelated look of this effect depends on the image resolution, so it is recommended to test your final resolution before processing. |
CartoonPaint | Unit: Stylize Sapphire's CartoonPaint filter auto-generates a version of the source clip with a cartoon paint-brushed look. Finds the edges in the image and draws new outlines for those edges. Replaces the colors of the areas between the edges with paint brush shapes. |
Cartoon | Unit: Stylize Sapphire's Cartoon filter generates a version of the source clip with a cartoon look. Finds the edges in the image and draws new outlines for those edges. Smooths the colors of the areas between the edges, and optionally posterizes the colors into fewer color values. |
BleachBypass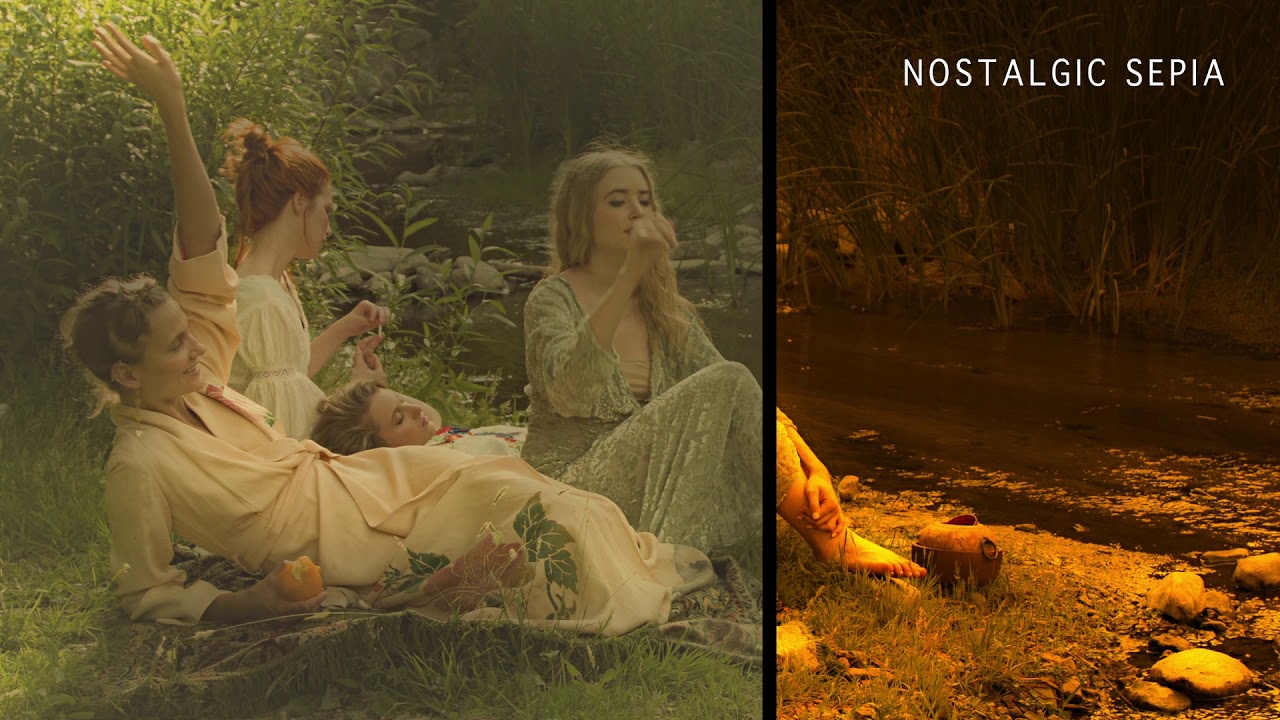 | Unit: Stylize Sapphire's BleachBypass filter simulates a film process in which silver is not removed from the negative. The result has increased contrast and reduced color saturation. |
BandPass | Unit: Stylize Sapphire's BandPass filter generates an X-ray-like effect using a band-pass filter. Two blurs are performed with different widths, and the result is the difference scaled and offset by a gray value. Frequencies above and below the cutoffs are attenuated, leaving only the middle band of frequencies. |
TVDamage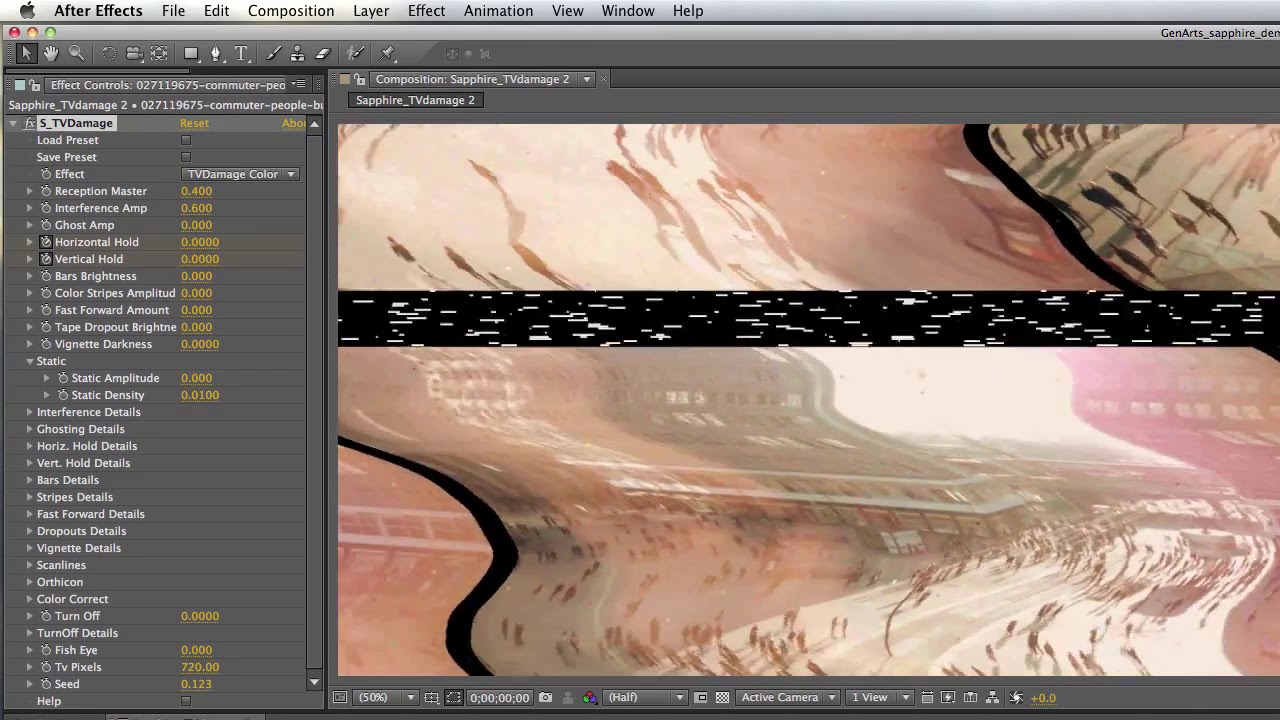 | Unit: Stylize Sapphire's TVDamage filter simulates a TV with transmission and reception problems, VCR issues, and TV hardware difficulties. Simulates static, interference, ghosting, horizontal and vertical hold, hum bars, color stripes, visible scanlines, VCR fast-forward, dropouts, vignetting, orthicon, fisheye, and turn-off. |
Solarize | Unit: Stylize Sapphire's Solarize filter inverts the colors of the input clip that are brighter than the Threshold value, to create a solarization effect. |
Sketch | Unit: Stylize Sapphire's Sketch filter generates a version of the input with a hand drawn sketched look. The results of this effect can depend on the image resolution, so it is recommended to test your final resolution before processing a clip. |
ScanLines | Unit: Stylize Sapphire's ScanLines filter creates a version of the source clip with a scan line pattern resembling a color TV monitor. Increase the Add Noise parameter to also add a grainy effect to the result. |
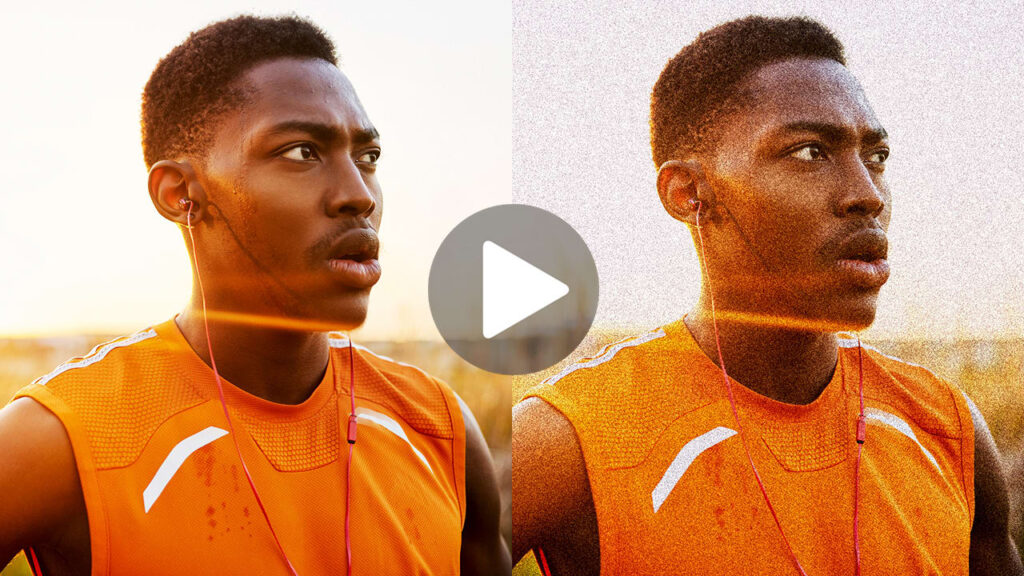
Grain | Unit: Stylize Sapphire's Grain filter adds color and\/or monochrome grain to the source clip. Amplitude and frequency parameters allow adjusting the grain texture independently for all colors together, each color channel, or black and white grain. |
FilmEffect | Unit: Stylize Sapphire's FilmEffect filter provides a physically accurate model of film exposure and processing to make your video footage look like it was shot on particular film stocks. It can remove field artifacts, perform color correction for specific film types, add film grain, and apply glow or soft focus effects. The color correction and grain can be selectively disabled using the Scale CC and Grain Amp parameters. |
Crosshatch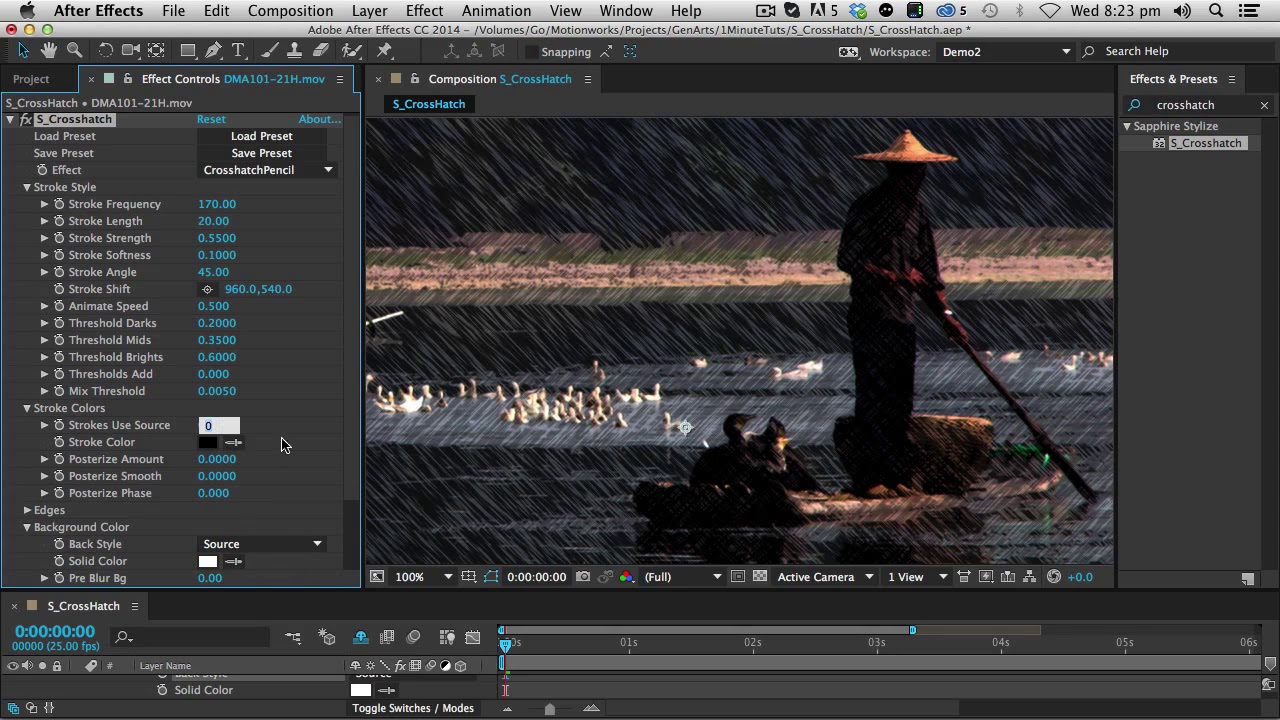 | Unit: Stylize Sapphire's Crosshatch filter simulates a pen-sketch crosshatched look using overlapping strokes. The source is divided into four bands based on luma; each band from dark to light gets a different pattern of strokes. |
Zap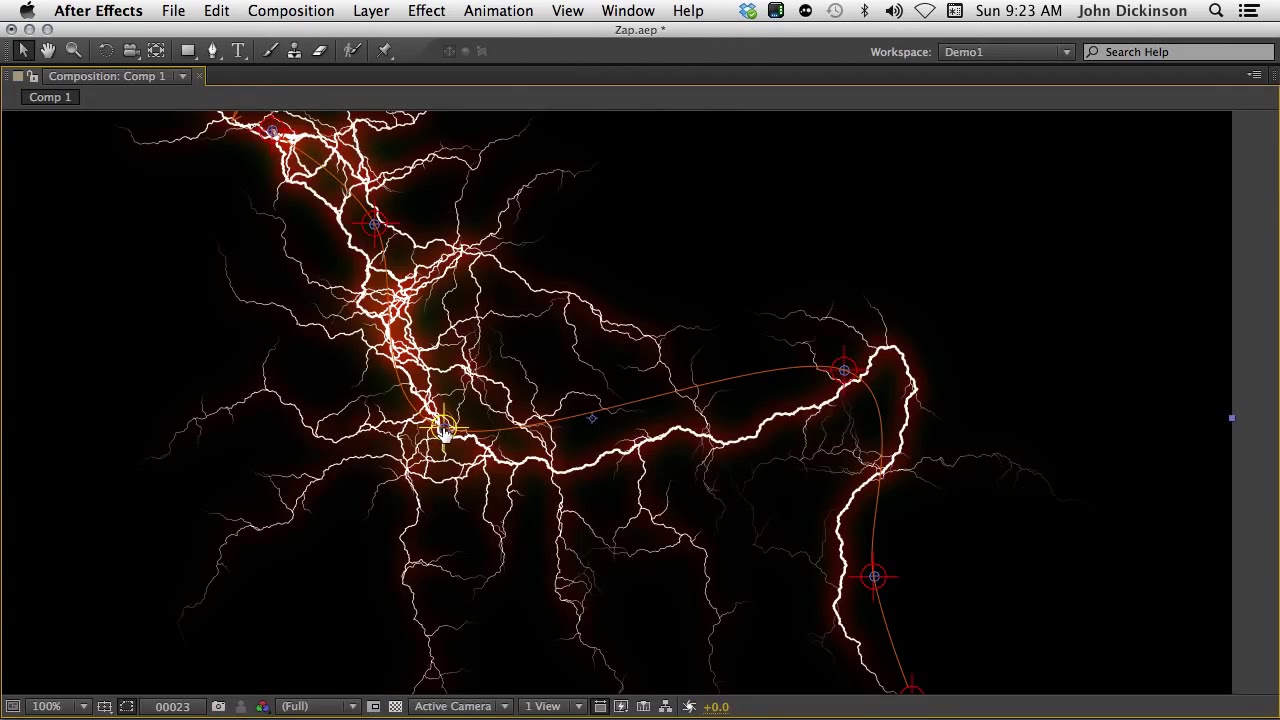 | Unit: Render Sapphire's Zap filter generates lightning bolts between two points, and renders them over a background. Increase the number of bolts to give a electrical plasma effect. Increase Vary Endpoint to spread out the ends of the bolts. Adjust the Glow Color for differently colored results. The Wiggle Speed parameter causes the bolts to automatically undulate over time. |
TextureTiles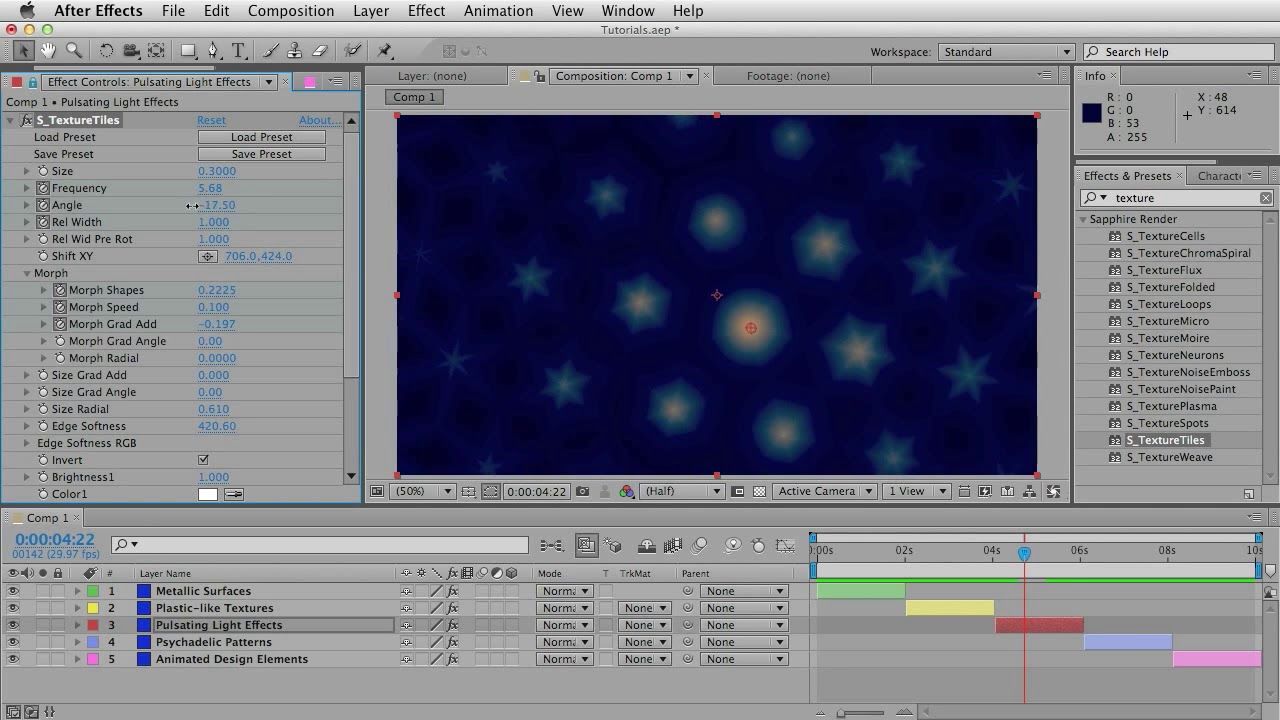 | Unit: Render Sapphire's TextureTiles filter draws a repeating pattern of tiles. The shapes can be hexagons, triangles, diamonds, stars, or variations on those, depending on the Morph parameters. |
TextureFlux | Unit: Render Sapphire's TextureFlux filter creates abstract textures of fluctuating liquid or cellular patterns. The Morph Speed parameter causes the pattern to automatically undulate over time. |
Grunge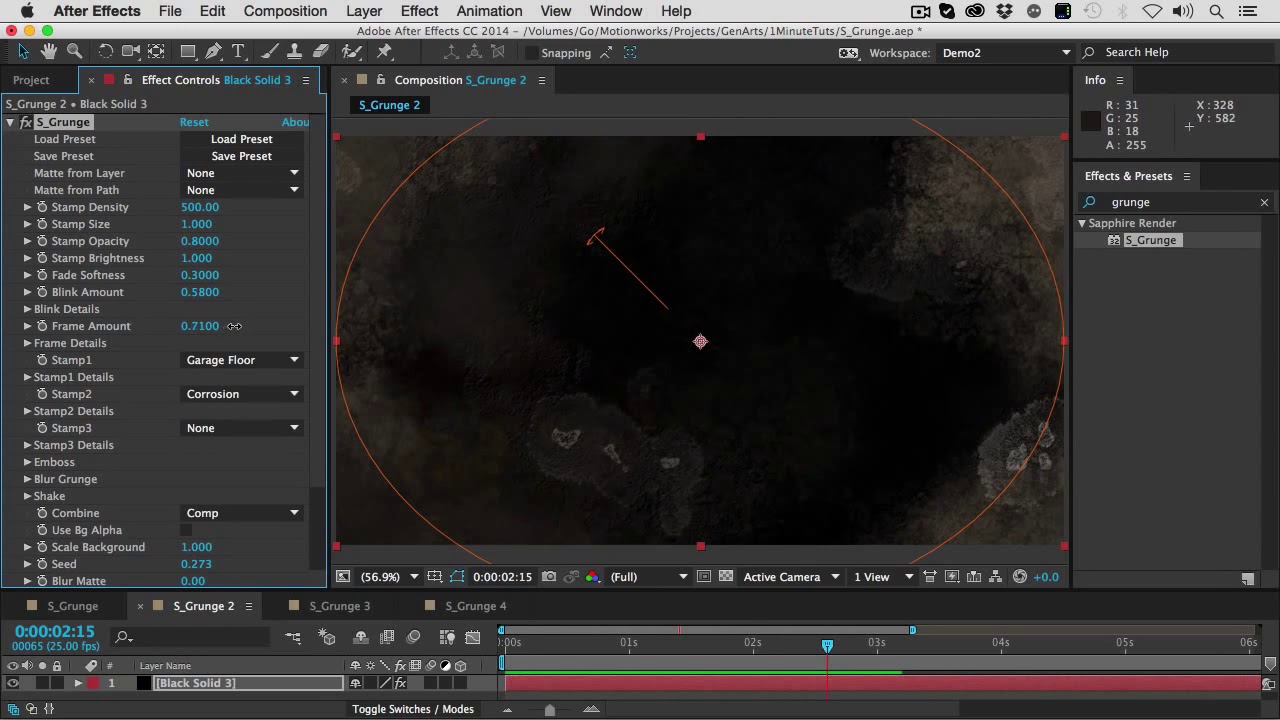 | Unit: Render Sapphire's Grunge filter simulates many different kinds of grunge including dirt, stains, flecks, grime, scratches, and paint. Up to three different kinds of grunge can be combined. There are master controls for adjusting all grunge together as well as a set of detailed controls for adjusting the look of each of the grunge collections. |
Grid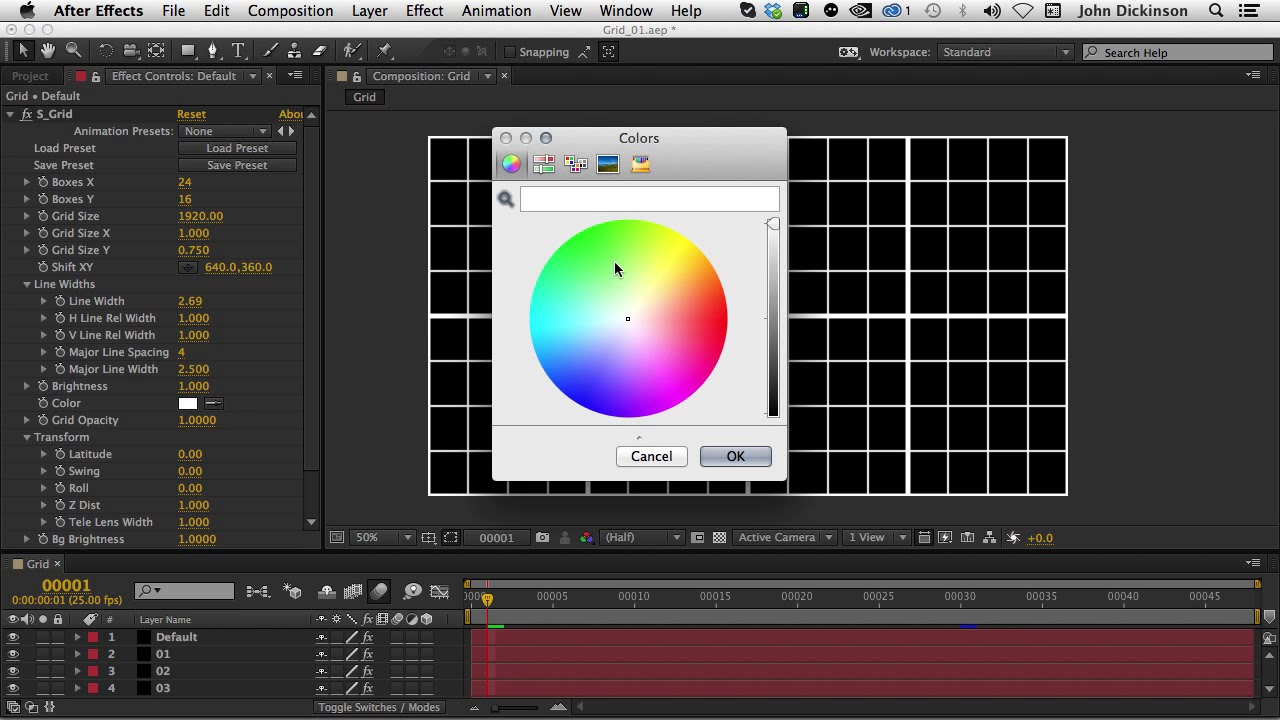 | Unit: Render Sapphire's Grid filter generates a grid of lines and combines it with a background clip. Adjust the Latitude, Swing, and Roll parameters to rotate the grid on various axes, and adjust Shift and Z Dist to translate and zoom. |
GradientMulti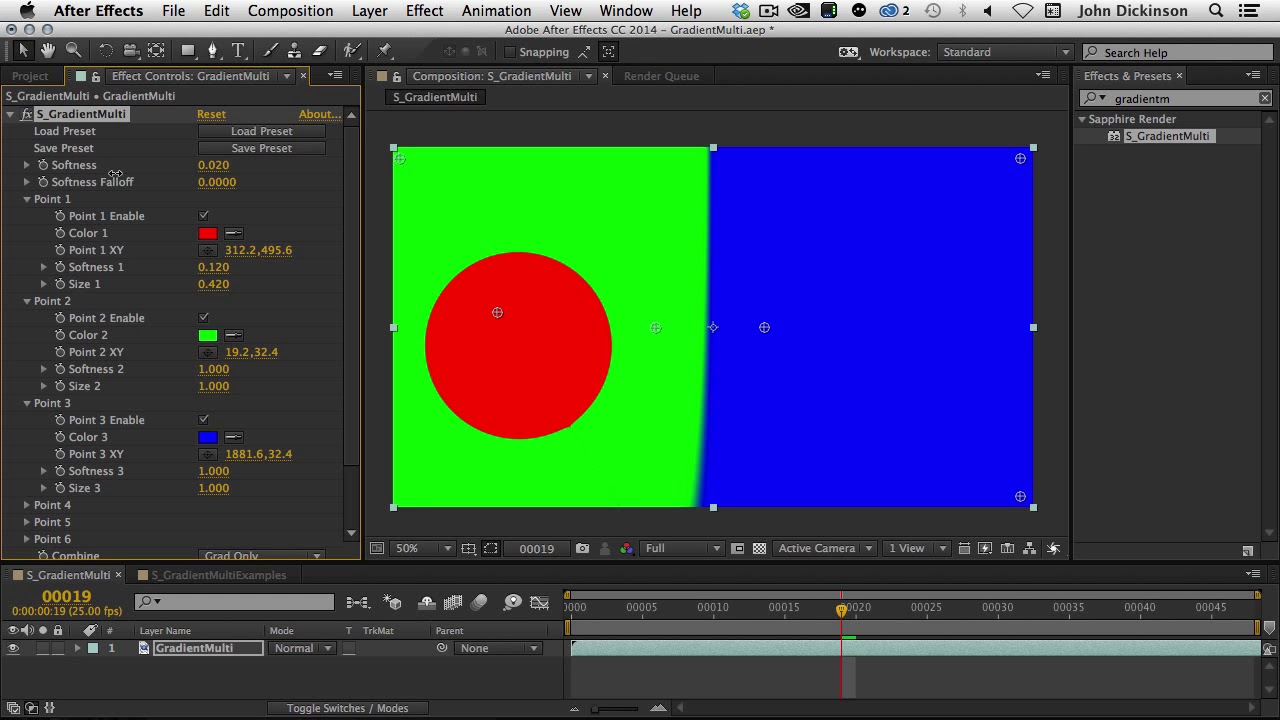 | Unit: Render Sapphire's GradientMulti filter generates a smooth multi-color gradient across the screen using multiple control points, and optionally combines the gradient with a background clip. |
Streaks | Unit: Lighting Sapphire's Streaks filter creates motion blurs in the bright areas of the source causing streaks between the From and To transformations. This can be used to create an extended film exposure effect, or simulate soft beams of light. From and To parameters do not refer to time. They describe the two transformations in space that determine the style of blur applied to each frame. |
LightLeak | Unit: Lighting Sapphire's LightLeak filter renders abstract patterns of color that simulate light leaking through gaps in a camera body. The light leak consists of three distinct elements which can be adjusted individually. |
FeedbackBubble | Unit: Time Sapphire's FeedbackBubble filter combines previous frames with the current frame while distorting by a bubble pattern. The feedback is reinitialized whenever any non-consecutive frame is processed: either the first frame, reprocessing a given frame, or jumping to another frame. You must process multiple frames of a clip in a row to observe the effect, and clearing your image cache before rendering may sometimes be necessary. |
TextureMicro | Unit: Render Sapphire's TextureMicro filter generates a procedural texture that looks a bit like a surface of a rough object under an electron microscope. |
TextureFolded | Unit: Render Sapphire's TextureFolded filter creates an abstract texture resembling folded cloth or liquid that can be animated to give a dynamic turbulent effect. The Fold Speed parameters cause the pattern to automatically undulate over time. |
TextureChromaSpiral | Unit: Render Sapphire's TextureChromaSpiral filter creates an abstract texture by applying a WarpChroma effect to a procedurally generated noise texture. |
Shape | Unit: Render Sapphire's Shape filter draws a shape into the image. It can give a wide variety of shapes, from polygons and circles to stars, flower shapes, and swirled starfish shapes. The main parameters to look at are Points, Pointiness, Roundness, and Swirl. |
MuzzleFlash | Unit: Render Sapphire's MuzzleFlash filter simulates the flash and smoke that is generated when a gun is fired. The flash from several types of gun can be simulated. All guns have a primary flash, and guns with suppressors may have secondary flashes. The gun may easily be fired repeatedly. |
ZGlow | Unit: Lighting Sapphire's ZGlow filter creates glows in areas of the source clip with varying widths depending on the depth values from a ZBuffer input. Separates the input into a number of layers and applies different amounts of glow depending on Width Near, Width Far, Brightness Near, and Brightness Far parameters. |
SpotLight | Unit: Lighting Sapphire's SpotLight filter lights the input clip using one or two spotlights. For each enabled light, the intersection of a 3D light cone with the image plane is calculated using the given light source position, aim location, and beam angle. Ambient light can also be applied to affect the entire source image evenly. A wide variety of lighting shapes can be created by adjusting the parameters provided. |
LensFlare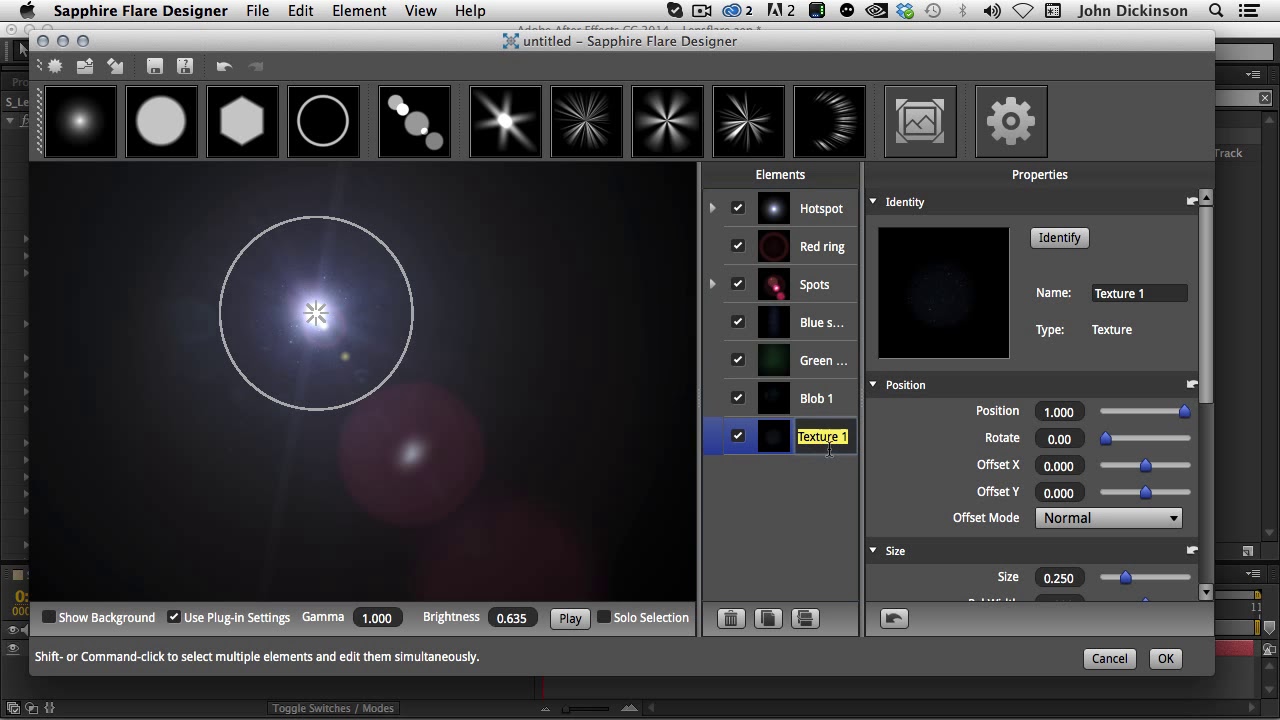 | Unit: Lighting Sapphire's LensFlare filter renders a lens flare image over the background clip, aligning various flare elements between the hotspot and pivot locations. Use the Lens menu to select different types of lensflares. |
GlowRings | Unit: Lighting Sapphire's GlowRings filter generates glows of colored rings around the areas of the source clip that are brighter than the given threshold. Raise the threshold parameter to produce glows in fewer areas. Adjust the Width and Thickness RGB parameters to make glows with different color patterns, and adjust the Width XY parameters to make horizontal or vertical glows. |
GlowRainbow | Unit: Lighting Sapphire's GlowRainbow filter generates rainbow colored glows based on the distances from the edges of the source input. Any edges in the input image, where the brightness crosses the given threshold value, will generate an equal glow into the darker side of the edges. This is best observed when used on images with dark backgrounds. |
Glare | Unit: Lighting Sapphire's Glare filter composites rainbow halos and\/or glint-like rays at locations where the Source clip is brighter than the threshold. Lower the threshold parameter to produce glares in more areas. Use the Style menu to select different glare types. Set the Glare Res parameter to 12 for faster rendering with slightly softer glares. Use the Convolve option for smoother results. Glares are best observed on dark images with a few bright spots. |
GlowEdges | Unit: Lighting Sapphire's GlowEdges filter creates glowing light from the edges of the source clip. This differs from the default Glow in that small or thin objects generate as much glow around their edges as large objects. Also the glow colors are not affected by the colors of the source clip. |
GlowDarks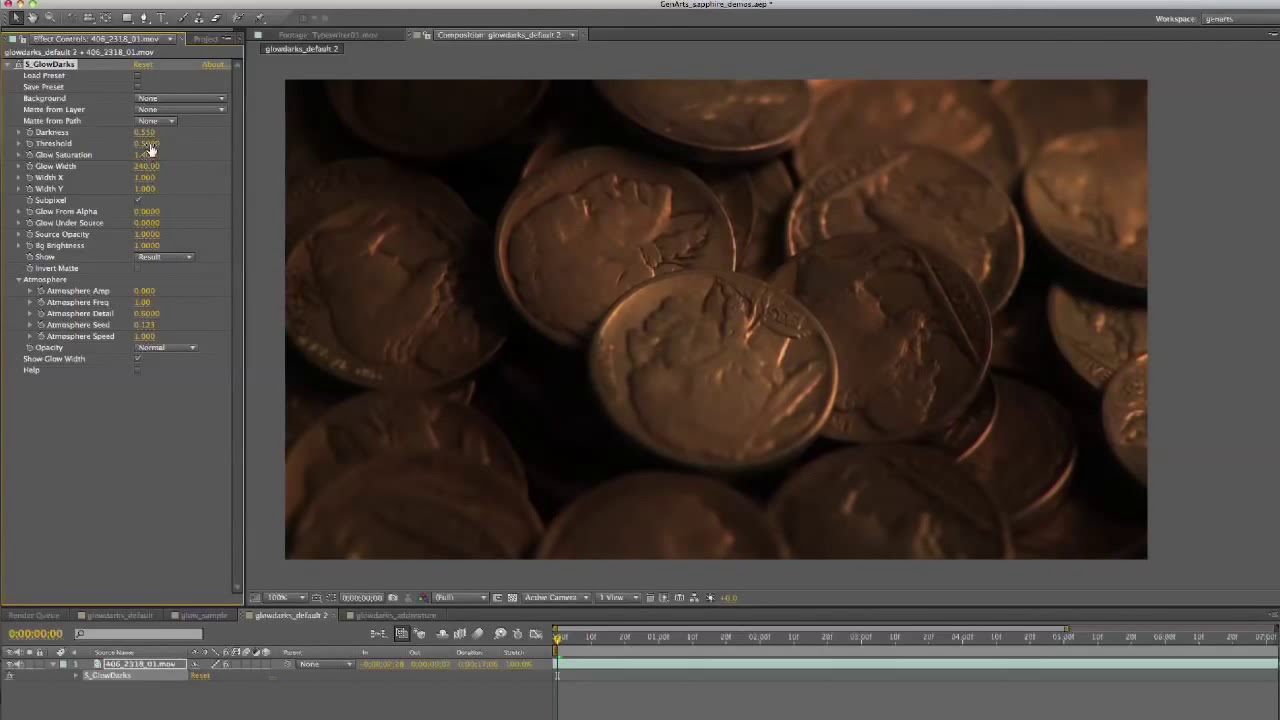 | Unit: Lighting Sapphire's GlowDarks filter takes areas of the source clip that are darker than the given threshold and blurs and combines them with the input clip to give a deep smoky look. Adjust the Darkness, Width, and Threshold parameters to give different types of looks. |
GlowAura | Unit: Lighting Sapphire's GlowAura filter generates radial colored aura lines following the gradient of the source clip. Raise the threshold parameter to produce glows in fewer areas. Adjust the Width, Frequency, Phase, and Twist parameters to make glows with different aura patterns. |
EdgeRays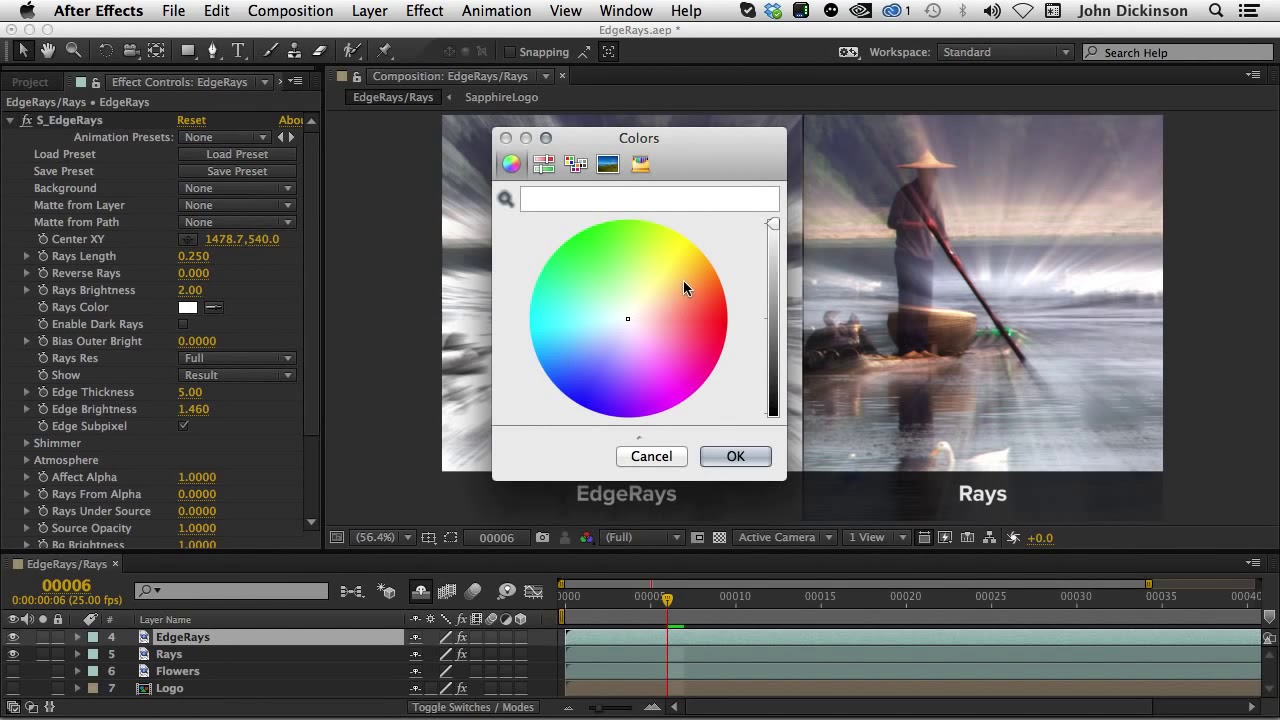 | Unit: Lighting Sapphire's EdgeRays filter generates beams of light emitting from the edges of an input clip. You can provide a Matte input to selectively scale the colors of the rays. If Matte Type is set to Color, you can also use the Matte input to colorize the rays differently in different regions. Set the Rays Res parameter to 12 for faster rendering with slightly softer rays. |
WarpChroma | Unit: Distort Sapphire's WarpChroma filter separates the source clip into spectral bands and warps them by different amounts. The red is warped by the From transformation, the blue by the To transformation, with the other colors of the spectrum in between. The From and To parameters do not refer to time. They describe the two transformations in space that determine the sequence of warps applied to each color. |
Shake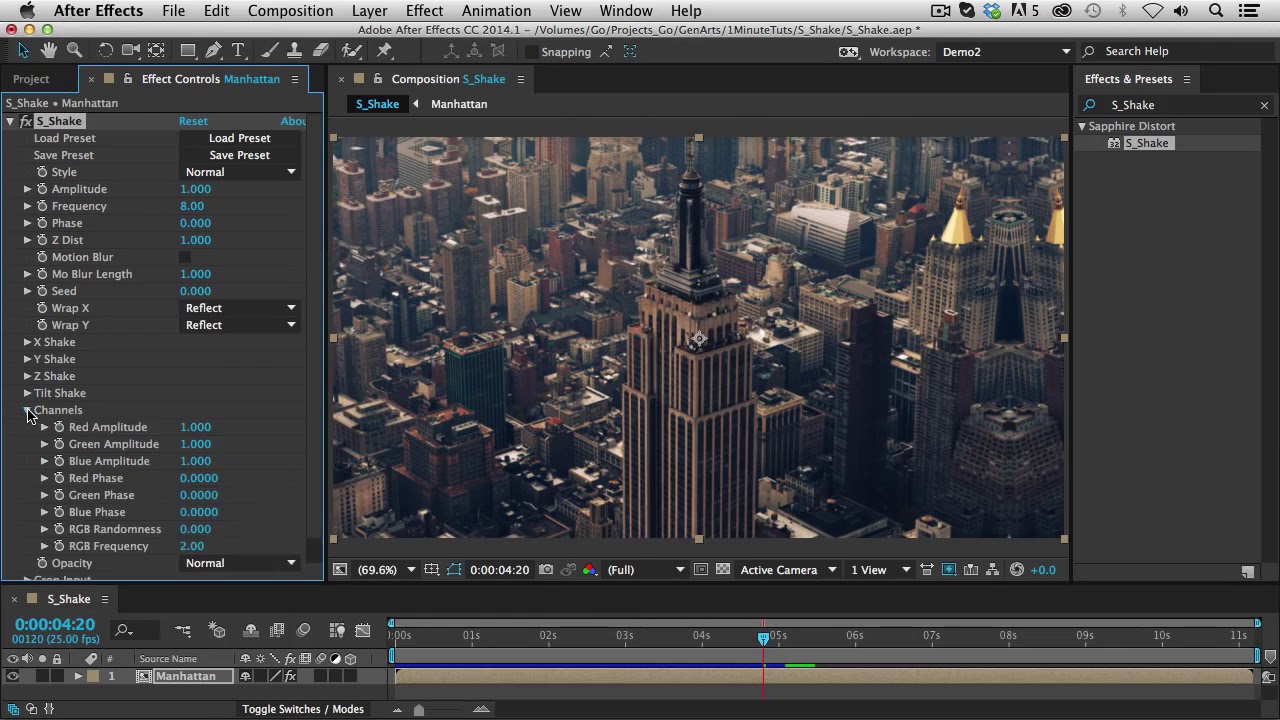 | Unit: Distort Sapphire's Shake filter applies a shaking motion to the source clip over time with translation, zooming, and\/or rotation. The shaking is random but repeatable, so with the same parameters the same shaking motion is generated each time. Turn on Motion Blur and adjust the Mo Blur Length for different amounts of blur. Adjust the Amplitude and Frequency for different shaking speeds and amounts. The Rand parameters give detailed control of the random non-periodic shaking, and the Wave parameters adjust the regular periodic shaking. The X, Y, Z, and Tilt parameters control the horizontal, vertical, zoom, and rotation amounts of shaking respectively. |
DistortBlur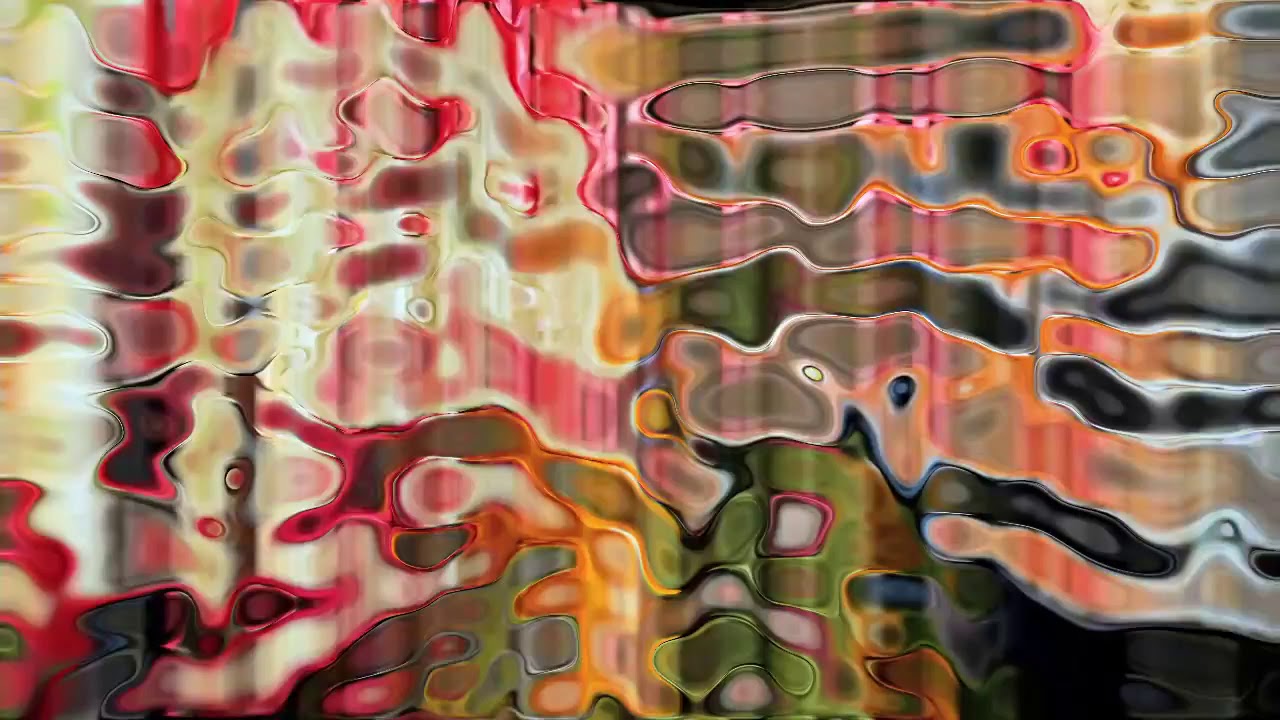 | Unit: Distort Sapphire's DistortBlur filter blurs the source input clip in the direction of the gradient of the Lens input clip. It is best demonstrated when the lens image contains just a few simple shapes. |
Distort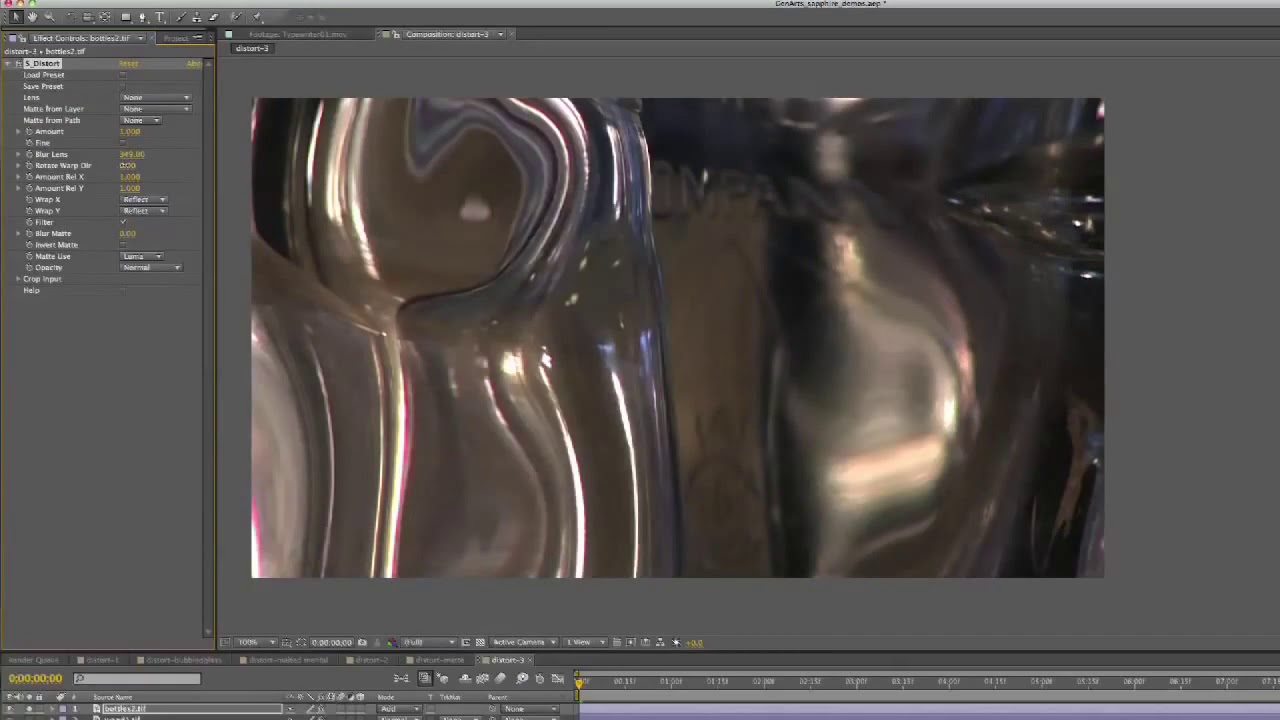 | Unit: Distort Sapphire's Distort filter warps the source input clip using the gradient of the Lens input clip. This can generate optical glass-like effects as if the source clip were being viewed through an arbitrarily shaped lens. It is best demonstrated when the lens image contains just a few bold shapes or a simple texture. |
SoftFocus | Unit: Blur & Sharpen Sapphire's SoftFocus filter combines a blurred version of the source with the original to give a soft focus effect. Adjust the Width and Mix parameters to give different types of looks. |
RackDefocus | Unit: Blur & Sharpen Sapphire's RackDefocus filter generates a defocused version of the source clip using a circle of confusion convolution. This effect is often preferable to a gaussian blur for simulating a real defocused camera lens, because bright spots can be defocused into clean shapes instead of being smoothed away. The iris shape can be controlled using Points, Pointiness and Rotate, and the Use Gamma parameter can adjust the relative brightness of the blurred highlights. |
GrainRemove | Unit: Blur & Sharpen Sapphire's GrainRemove filter smooths the source clip while retaining the edges. To adjust the parameters in this effect, first use the Show:Edges option to inspect which edges will be retained and adjust Edges Threshold, Edges Width, and Edges Scale until the important edges are fairly sharp and bright but not jaggy. Then return to Show:Result and adjust the smooth parameters to remove the appropriate amount of grain. |
Deband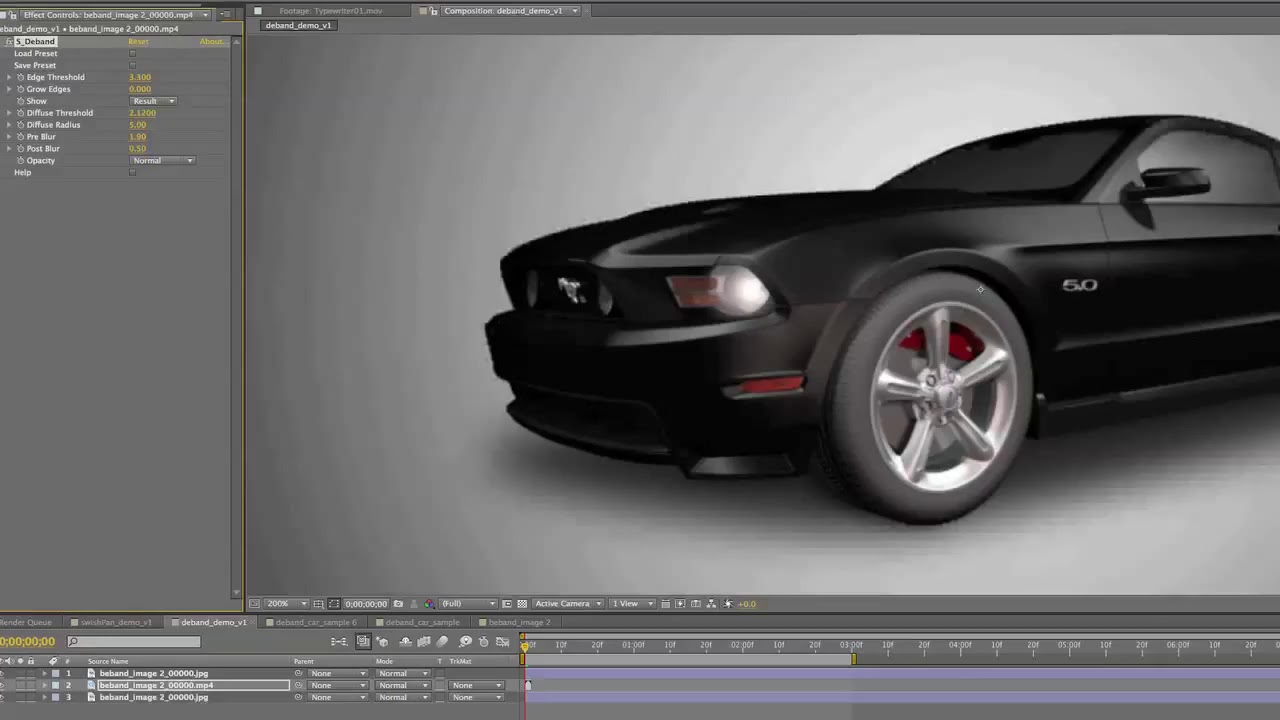 | Unit: Blur & Sharpen Sapphire's Deband filter removes banding artifacts from a clip by diffusing pixels across the banded areas, while keeping the original edges intact. To use this effect, first select Show:Edges and adjust the edge threshold until the banding edges just disappear, leaving only the desired real edges. Then select Show:Result to see the result. If you still see some banding, increase Diffuse Threshold and\/or Diffuse Radius. |
BlurMotion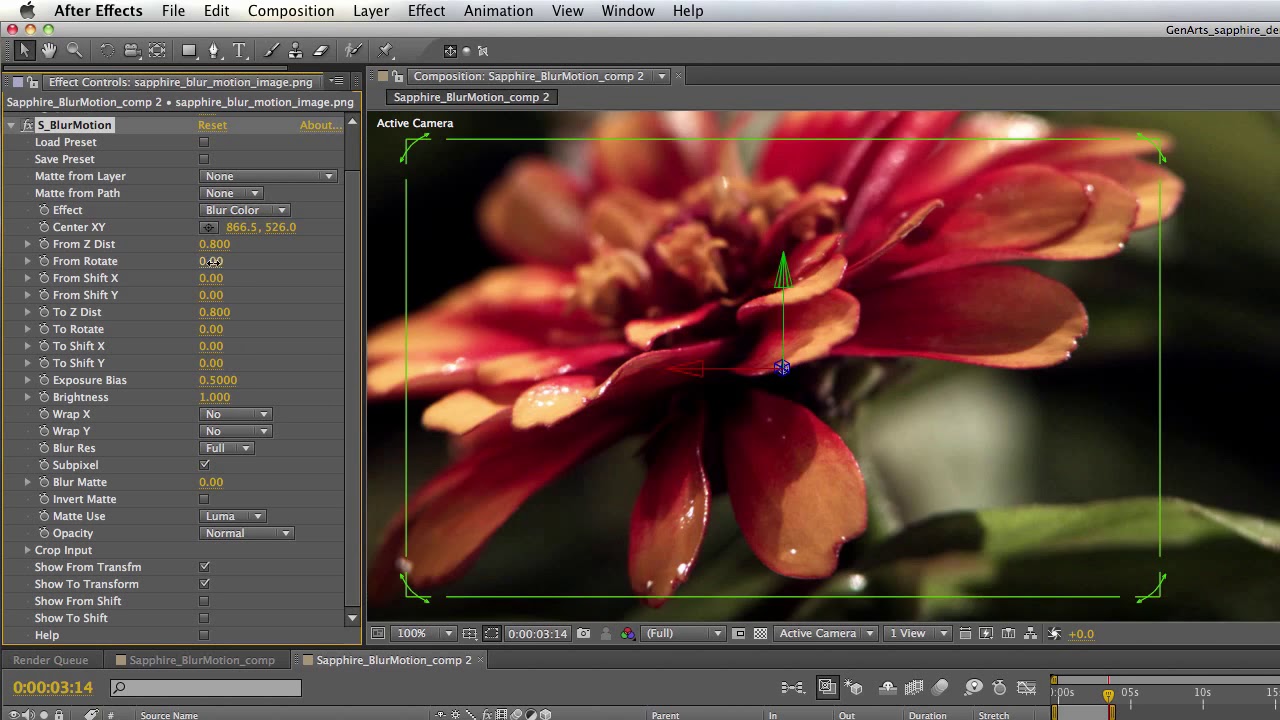 | Unit: Blur & Sharpen Sapphire's BlurMotion filter performs a motion blur of the source clip between the specified From and To transformations. This can be used to perform radial zoom blurs, rotate blurs, directional blurs, or any combination of these. The From and To parameters do not refer to time. They describe the two transformations in space that determine the style of blur applied to each frame. |
Beauty | Unit: Blur & Sharpen Sapphire's Beauty filter applies smoothing, color correction, soft focus, and glow to skin regions. Skin regions are based on the value of Enable Skin Detection and whether a second input is provided. If Enable Skin Detection is on, the plugin generates an internal matte from the Skin Color, Luma and Chroma Range parameters. The second input is an optional matte, that if connected the effect only applies to bright areas of the matte (if Enable Skin Detection is on and a matte is provided the two are multiplied). |
ClampChroma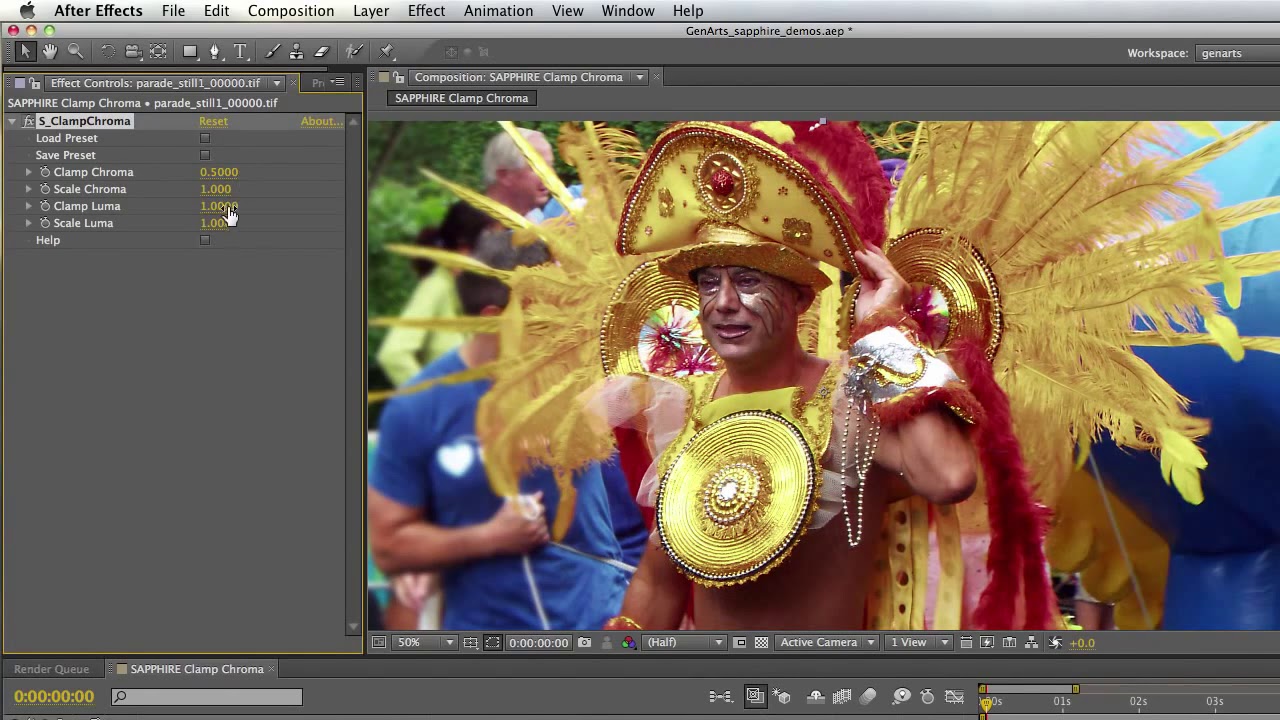 | Unit: Adjust Sapphire's ClampChroma filter reduces the chrominance of the input clip if necessary so it is not above a specified maximum. This effect can be used to make broadcast safe colors. It also can be used to scale the chrominance, clamp the luminance, or scale the luminance. |
GlowOrthicon | Unit: Lighting Sapphire's GlowOrthicon filter darkens the source clip at areas that are brighter than the given threshold, to give an orthicon or dark glow look. Lower the Threshold parameter to produce the orthicon effect in more areas. Adjust the Darkness and Width parameters to give different types of looks. |
GlowDist | Unit: Lighting Sapphire's GlowDist filter generates glows based on the distances from the edges of the source input. Any edges in the input image, where the brightness crosses the given threshold value, will generate an equally bright glow into the darker side of the edges. This is best observed when used on images with dark backgrounds. |
Glow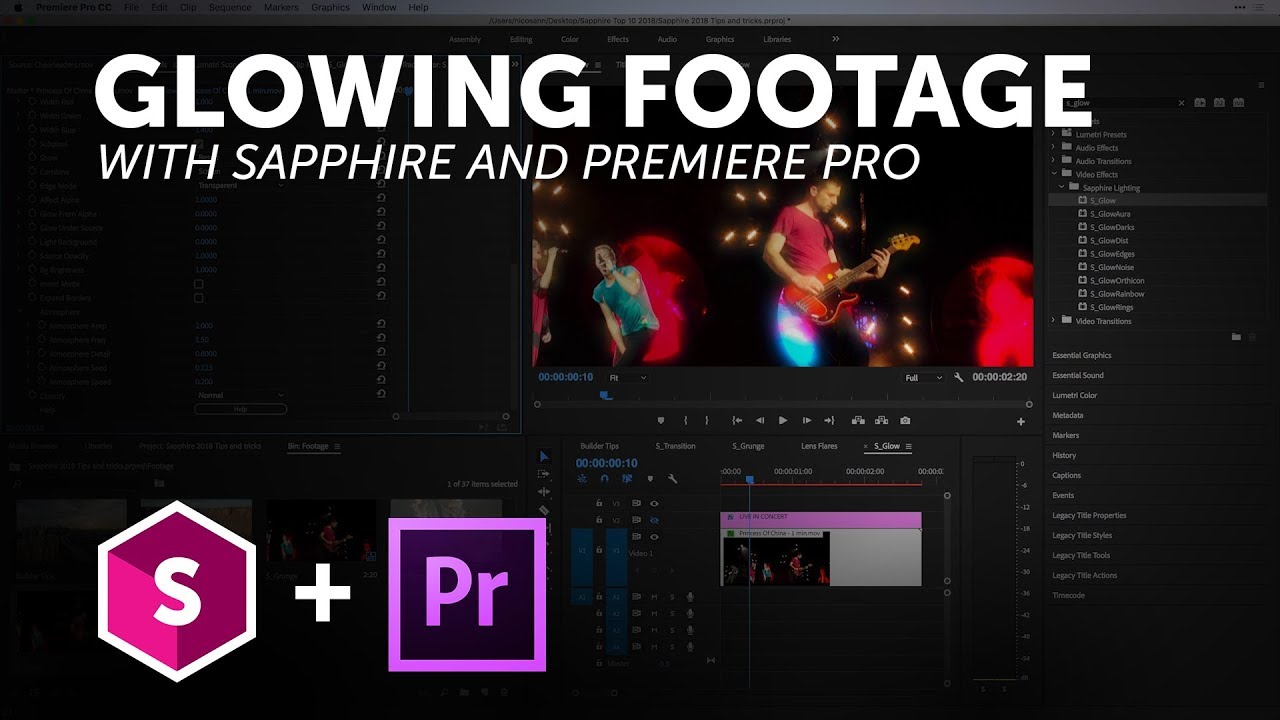 | Unit: Lighting Sapphire's Glow filter generates glowing light from areas of the source clip that are brighter than the given threshold. Raise the threshold parameter to produce glows in fewer areas. Adjust the Width RGB parameters to make glows with different color falloffs, and adjust the Width XY parameters to make horizontal or vertical glows. |
GlintRainbow | Unit: Lighting Sapphire's GlintRainbow filter generates star shaped rainbow colored glints at locations where the Source clip is brighter than the threshold. Lower the threshold parameter to produce glints in more areas. Adjust the Shift Out, Size, and Brightness parameters to make different types of glints. Glints are best observed on dark images with a few bright spots. |
Glint | Unit: Lighting Sapphire's Glint filter generates star shaped glints at locations where the Source clip is brighter than the threshold. Lower the threshold parameter to produce glints in more areas. Adjust the size and brightness parameters to make different types of glints. Glints are best observed on dark images with a few bright spots. |
Flashbulbs | Unit: Lighting Sapphire's Flashbulbs filter simulates lots of flashbulbs going off. With many small flashes, can look like a stadium scene. With a few large flashes, works well on a celebrity red carpet clip. |
GlowNoise | Unit: Lighting Sapphire's GlowNoise filter generates glowing light from areas of the source clip that are brighter than the given threshold. The glows are also attenuated by a solid noise texture to give them a noisy or grainy effect. If the Jitter Frames parameter is positive, the noise will be regenerated for each frame for a fizzling look. If Jitter Frames is zero, two noise textures are combined and slide over each other at a rate depending on the Spread Speed. |
WarpRepeat | Unit: Distort Sapphire's WarpRepeat filter transforms the source input multiple times and averages the results. The From and To parameters do not refer to time. They describe the two transformations in space that determine the sequence of repeated warps applied to each frame. |
WarpPuff | Unit: Distort The Sapphire WarpPuff filter warps the source clip based on its gradient. By default, brighter areas are puffed out and darker areas are shrunk. This is similar to applying Distort effect to an image using itself as the lens. |
WarpBubble | Unit: Distort Sapphire's WarpBubble filter warps the source clip by a smooth noise function. This can be used to create heat diffusion or under water types of effects. The Shift Speed parameters cause the noise pattern to automatically translate over time. Adjust the Amplitude and Frequency parameters to give different types of distortions. |
Median | Unit: Blur and Sharpen Sapphire's Median filter applies a median filter to the source image. Median filters are useful for cleaning up isolated spots and noise. |
EdgeAwareBlur | Unit: Blur and Sharpen Sapphire's EdgeAwareBlur filter allows you to blur regions of similar color while preserving edges between regions of different colors. |
DefocusPrism | Unit: Blur and Sharpen Sapphire's DefocusPrism filter defocuses the color channels of the source clip into rings of different widths. |
BlurMoCurves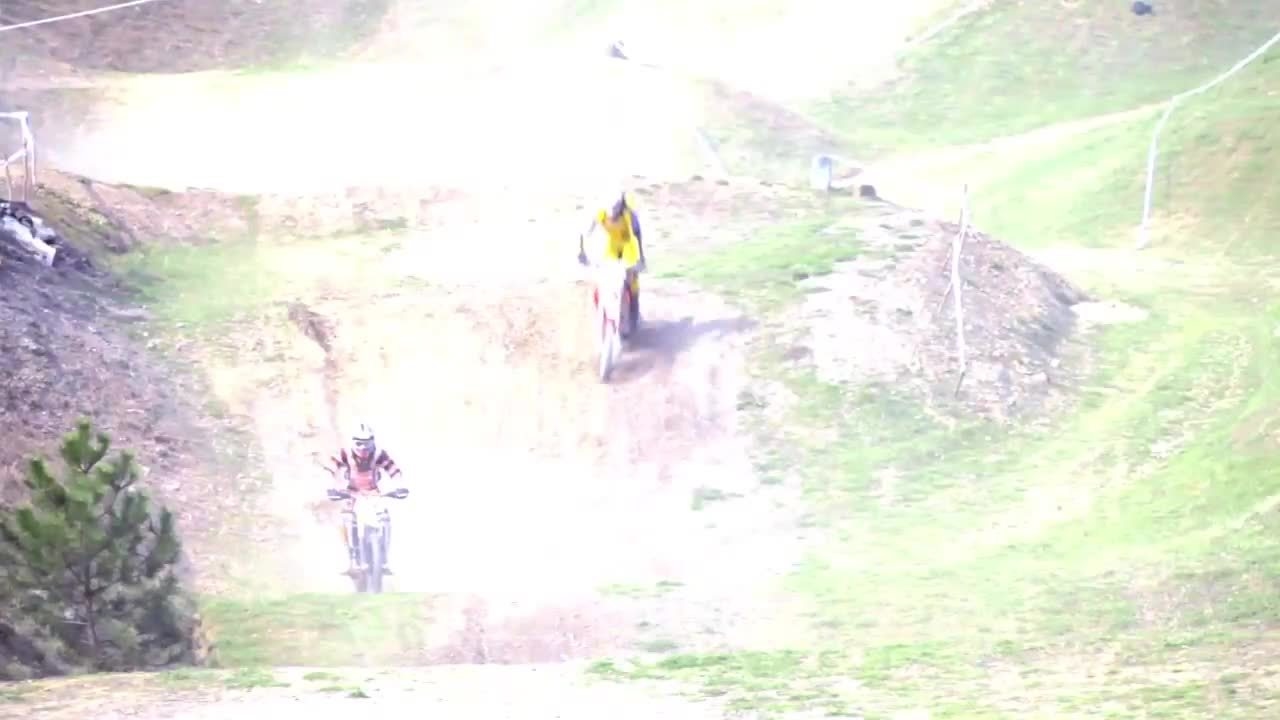 | Unit: Blur and Sharpen Sapphire's BlurMoCurves filter performs a motion blur and optionally transforms the source clip using the animated curves of the Z Dist, Rotate and Shift parameters. If these parameters are constant, no motion blur will occur. |
BlurDirectional | Unit: Blur and Sharpen Sapphire's BlurDirectional filter blurs the source clip in a given direction using a gaussian, triangle, or box filter. It can also blur each channel by different amounts. |
BlurChroma | Unit: Blur and Sharpen Sapphire's BlurChroma filter separates the source into luminance and chrominance components, blurs the chrominance and\/or the luminance independently, and recombines them. You can also scale the luma and chroma independently to enhance or remove either. |
BlurChannels | Unit: Blur and Sharpen Sapphire's BlurChannels filter blurs each channel of the source clip by an arbitrary amount using a gaussian, triangle, or box filter. This effect should render quickly even with very large Width values. Use the Blur Rel X and Y parameters for a more horizontal or vertical blur direction. |
Blur | Unit: Blur and Sharpen Sapphire's Blur filter blurs the source clip by an arbitrary amount using a gaussian, triangle, or box filter. This effect should render quickly even with very large Width values. Use the Blur Rel X and Y parameters for a more horizontal or vertical blur direction. |
TriTone | Unit: Adjust Sapphire's Tritone filter performs an interpolation between three specified colors using the brightness of the source clip. |
Tint | Unit: Adjust Sapphire's Tint filter tints the dark and light regions of the input clip towards given colors. The dark colors are tinted by the Tint Dark color, and the brighter colors are tinted by the Tint Lights color. |
Threshold | Unit: Adjust Sapphire's Threshold filter sets the color channels of the source clip to full on or full off using a given softness and threshold. This can be used to increase the contrast of each color channel independently. |
ShowBadColors | Unit: Adjust Sapphire's ShowBadColors filter identifies all pixels that fall outside a given color range, and flags them with the same color so they can be seen easily. |
Quadtone | Unit: Adjust Sapphire's Quadtone filter performs an interpolation between four specified colors using the brightness of the source clip. |
Monochrome | Unit: Adjust Sapphire's Monochrome filter generates a monochrome version of the source clip using adjustable weights for the red, green, and blue channels. This can simulate the use of a color filter applied to the lens of a black and white camera. For example, use more red weight to darken blue sky areas of the input. The weights are scaled so they sum to 1 before being used to reduce overall brightness changes when they are adjusted. |
Invert | Unit: Adjust Sapphire's Invert filter inverts the colors of the source clip, so black becomes white, and white becomes black. This can optionally also invert luma, chroma, RGB and alpha channels independently and do some basic color correction on the inverted result. |
HueSatBright | Unit: Adjust Sapphire's HueSatBright filter adjusts the hue, saturation, brightness, and/or offset of the input clip. |
HotSpots | Unit: Adjust Sapphire's Hotspots filter generates a hotspot image containing areas of the source clip brighter than a given threshold. The colors of the hotspots should match the original source. This can be used for increasing contrast or finding the bright areas of a clip, but without changing the color saturation or hue of the result. |
Gamma | Unit: Adjust Sapphire's Gamma filter applies a gamma correction to the input clip. The red, green, and blue channels can be adjusted independently. From Gamma just causes the inverse effect of adjusting Gamma. |
DuoTone | Unit: Adjust Sapphire's DuoTone filter performs an interpolation between two specified colors using the brightness of the source clip. |
ChannelSwitcher | Unit: Adjust Sapphire's ChannelSwitcher filter reorders the RGBA channels of the source clip. Allows mapping any source channel into any output channel, with scaling and offset for each output channel. |
System Requirements
| Product | Sapphire 2024 |
| Requirements | macOS: 10.14 or higher Windows: Windows 10 & 11 Linux: Red Hat Enterprise Linux 7 & 8, CentOS 7 & 8 |
| Requirements | Recommended Hardware: Processor: 64-bit Intel or AMD CPU with four or more cores Memory: 8 GB or more Disk: High-speed disk array or SSD storage Monitor: 1920×1080 or higher, including high dpi 4k monitors GPU Acceleration: An NVIDIA GPU with compute capability 3.5 (Kepler) or above. More information can be found here, under "Supported GPUs". We recommend using the latest NVIDIA Studio drivers, where possible. METAL enabled cards are supported on Mac OS. If no GPU is available, Sapphire will render in CPU mode. |
| Licensing Options | Node-locked, Subscription, or floating license. For floating and render license options, contact us. |
| Supported hosts | Adobe After Effects & Premiere Pro Avid Media Composer Autodesk Flame FOUNDRY Nuke Blackmagic Resolve and Fusion SGO Mistika VEGAS Pro For a full list of supported hosts and OS, please click here |
Reviews & Comments
Customer Reviews
Review: Boris FX Continuum 2020.5 and Sapphire 2020.
BorisFX has created THE toolbox for editors. From fixing lighting shifts using Continuum Flicker Fixer, Continuum Gaussian Blur with Mocha Tracking, to even Sapphire's S_Glow - Continuum 2020.5 and Sapphire 2020 are must have plugins for Avid Media Composer, Blackmagic Design's DaVinci Resolve, Adobe Premiere and After Effects, and many more apps.
Read the full review by Brady Betzel at Post Perspective
Would you recommend this product to a colleague? Yes
By: Brady Betzel
Date: May 15, 2020
Change Log
What’s New in Sapphire 2024
Released 2 November 2023
New Effects
- Dust
- PixelMosh
- DissolvePixelMosh
New Features
- Adobe: Improved Support for After Effects MFR
- Adobe: Improved stability for Premiere
- Time based effects now available in S_Effect and S_Transition
- Preset Browser can now render time based effects
- Feedback effects now work correctly even when frames are previewed out of order
- New LensFlares
- New Builder Presets
What’s new in Sapphire 2023.5
Released 14 April 2023
New Features
- Builder Improvements
- Expressions in Effect Builder
- Renaming S_Effect and S_Transition parameters
- Ability to save favorite effects
- Quick access menu
- Autosave inside Effect Builder
- Widgets in Premiere
- Autosave inside Flare Designer
- New LensFlares
- New Builder Presets
New Known Issues
- Premiere: On the first run after Sapphire’s installed, the preset browser may not shut down correctly.
- Not all S_UltraZap presets are visible in S_Effect.
- In After Effects, 2022, the Preset Browser, Flare Designer, and Effect Builder may play back slowly on the first use. To resolve, return to the host and allow After Effects to finish caching the timeline.
- UltraZapMocha: Sometimes, a straight line will appear in the zap. To fix this, add an additional control point in mocha in the part of the mocha spline that corresponds to that straight segment. Adjust the control point until the straight line segment goes away.
- Sometimes Mocha tracks slowly. If this happens, close mocha, re-open mocha, then play through the clip inside mocha. After the clip is cached in mocha, tracking will proceed smoothly. Sometimes if the clip is tracking slowly an “unable to track” error will also pop up.
- If Sapphire 2021.5 OFX is installed at the same time as 2021.0 (either AE or AVX), lensflare presets may not show up inside 2021.0. To fix this, all Sapphire plugins installed on a single machine should be 2021.5. If the second installation of Sapphire cannot be upgraded to 2021.5, the Sapphire 2021.0 plugins may be re-installed to restore the 2021.0 compatible LensFlare presets.
- Mac OS, Big Sur: if you open mocha and then open the preset browser, the preset browser will fail and generate an error. If this happens, the host will have to be restarted to fix the preset browser.
- UltraZap: On an open spline zap may do unexpected things when mixing vary-endpoint and looping parameters.
- S_ZComp: The preset browser can’t open unless an input is connected to the DepthB input.
- Premiere: The new shadow on LensFlare elements may be squished in Premiere if applied to interlaced footage.
- Premiere: Point widgets may respond slowly in Premiere after a Mocha point track has been created.
- Mocha: The Mocha UI does not correctly locate the default OCIO config file shipped with Sapphire. To use the default OCIO config file shipped with Sapphire, use the OCIO environment variable to locate said the config file.
New Compatibility Notes
- Sapphire 2022 has been updated to use CUDA 11 in order to support NVIDIA’s latest Ampere cards. (RTX A4000, A5000, and A6000). As a result some cards from 2012 are no longer supported. Sapphire 2022 works with CUDA compute capability 3.5 and higher.
- LensFlare: A bug was fixed in Sapphire 2022 in LensFlare, where the saturation parameter inside the plugin didn’t apply correctly to all elements. Fixing this means that some elements will look different in 2022 if saturation is set to a value different than 1.0.
- ParallaxStrips and StripSlide: These effects may look different from older versions due to a change in the position calculations.
- FilmDamage: Stamps in FilmDamage were upside down in OFX-compatible hosts when compared to Adobe Products and Media Composer. A parameter called flip_stamps_vertically was added to allow for projects to be both backwards compatible and compatible between hosts. When opening an old project, it will look the same as it did in a prior version. If compatibility between host products is desired in an old project, change the value in flip_stamps_vertically on the OFX host to get a result that matches Adobe and Avid products. New projects will match between hosts by default.
- LensFlare: In previous versions of Sapphire, the saturation parameter did not affect texture elements. This has been fixed with Sapphire 2022, however this means that texture elements in old projects will look different if the project had a saturation value different from 1.0.
What’s new in Sapphire 2023
Released 17 November 2022
New Effects
- UltraGrain
- PrismLens
- DissolveUltraGlow
New Features
- Mocha Improvements
- Metal Support for Aurora
- Metal Support for Median
- New LensFlares
- New UltraGlow presets
New Known Issues
- Premiere: On the first run after Sapphire’s installed, the preset browser may not shut down correctly.
- Not all S_UltraZap presets are visible in S_Effect.
- In After Effects, 2022, the Preset Browser, Flare Designer, and Effect Builder may play back slowly on the first use. To resolve, return to the host and allow After Effects to finish caching the timeline.
- UltraZapMocha: Sometimes, a straight line will apear in the zap. To fix this, add an additional control point in mocha in the part of the mocha spline that corresponds to that straight segment. Adjust the control point until the straight line segment goes away.
- Sometimes Mocha tracks slowly. If this happens, close mocha, re-open mocha, then play through the clip inside mocha. After the clip is cached in mocha, tracking will proceed smoothly. Sometimes if the clip is tracking slowly an “unable to track” error will also pop up.
- If Sapphire 2021.5 OFX is installed at the same time as 2021.0 (either AE or AVX), lensflare presets may not show up inside 2021.0. To fix this, all Sapphire plugins installed on a single machine should be 2021.5. If the second installation of Sapphire cannot be upgraded to 2021.5, the Sapphire 2021.0 plugins may be re-installed to restore the 2021.0 compatible LensFlare presets.
- Dongle Licenses are not currently supported on Mac M1 machines.
- Mac OS, Big Sur: if you open mocha and then open the preset browser, the preset browser will fail and generate an error. If this happens, the host will have to be restarted to fix the preset browser.
- UltraZap: On an open spline zap may do unexpected things when mixing vary-endpoint and looping parameters.
- S_ZComp: The preset browser can’t open unless an input is connected to the DepthB input.
- Premiere: The new shadow on LensFlare elements may be squished in Premiere if applied to interlaced footage.
- Premiere: Point widgets may respond slowly in Premiere after a Mocha point track has been created.
- Mocha: The Mocha UI does not correctly locate the default OCIO config file shipped with Sapphire. To use the default OCIO config file shipped with Sapphire, use the OCIO environment variable to locate said the config file.
New Compatibility Notes
- Sapphire 2022 has been updated to use CUDA 11 in order to support NVIDIA’s latest Ampere cards. (RTX A4000, A5000, and A6000). As a result some cards from 2012 are no longer supported. Sapphire 2022 works with CUDA compute capability 3.5 and higher.
- LensFlare: A bug was fixed in Sapphire 2022 in LensFlare, where the saturdation parameter inside the plugin didn’t apply correctly to all elements. Fixing this means that some elements will look different in 2022 if saturation is set to a value different than 1.0.
- ParallaxStrips and StripSlide: These effects may look different from older versions due to a change in the position calculations.
- FilmDamage: Stamps in FilmDamage were upside down in OFX-compatible hosts when compared to Adobe Products and Media Composer. A parameter called flip_stamps_vertically was added to allow for projects to be both backwards compatible and compatible between hosts. When opening an old project, it will look the same as it did in a prior version. If compatibility between host products is desired in an old project, change the value in flip_stamps_vertically on the OFX host to get a result that matches Adobe and Avid products. New projects will match between hosts by default.
- LensFlare: In previous versions of Sapphire, the saturation parameter did not affect texture elements. This has been fixed with Sapphire 2022, however this means that texture elements in old projects will look different if the project had a saturation value different from 1.0.
What’s New in Sapphire 2022.5
Released 26 May 2022
New Features
- Wigets inside Sapphire’s Effect Designer.
- New LUTs for S_ColorFuse.
- OpenColorIO version 2.1.1.
- Mocha Improvements.
- New Presets for a variety of effects.
- New LensFlares.
Known Issues
- Not all S_UltraZap presets are visible in S_Effect.
- In After Effects, 2022, the Preset Browser, Flare Designer, and Effect Builder may play back slowly on the first use. To resolve, return to the host and allow After Effects to finish caching the timeline.
- UltraZapMocha: Sometimes, a straight line will apear in the zap. To fix this, add an additional control point in mocha in the part of the mocha spline that corresponds to that straight segment. Adjust the control point until the straight line segment goes away.
- Sometimes Mocha tracks slowly. If this happens, close mocha, re-open mocha, then play through the clip inside mocha. After the clip is cached in mocha, tracking will proceed smoothly. Sometimes if the clip is tracking slowly an “unable to track” error will also pop up.
- If Sapphire 2021.5 OFX is installed at the same time as 2021.0 (either AE or AVX), lensflare presets may not show up inside 2021.0. To fix this, all Sapphire plugins installed on a single machine should be 2021.5. If the second installation of Sapphire cannot be upgraded to 2021.5, the Sapphire 2021.0 plugins may be re-installed to restore the 2021.0 compatible LensFlare presets.
- Dongle Licenses are not currently supported on Mac M1 machines.
- Mac OS, Big Sur: if you open mocha and then open the preset browser, the preset browser will fail and generate an error. If this happens, the host will have to be restarted to fix the preset browser.
- UltraZap: On an open spline zap may do unexpected things when mixing vary-endpoint and looping parameters.
- S_ZComp: The preset browser can’t open unless an input is connected to the DepthB input.
- Premiere: The new shadow on LensFlare elements may be squished in Premiere if applied to interlaced footage.
- Premiere: Point widgets may respond slowly in Premiere after a Mocha point track has been created.
- Mocha: The Mocha UI does not correctly locate the default OCIO config file shipped with Sapphire. To use the default OCIO config file shipped with Sapphire, use the OCIO environment variable to locate said the config file.
What’s new in Sapphire 2022
New Effects
- ColorFuse: A new effect that allows artists to get a stylized look by combining up to three LUTs.
New Features
- Photoshop Support: Sapphire 2022 adds new host compatibility to its lineup with support for Adobe Photoshop, available with any new or upgrade license. Featuring over 270 filters and thousands of cross-platform presets, Sapphire for Photoshop brings the power of post production’s most loved filters to new artists, letting them create effects unachievable with native filters, and enabling a more streamlined workflow through the different design stages of production and between various teams and software.
- Sapphire Effect Designer: New tool inside Builder for getting stylized looks with S_ColorFuseLooks.
- UltraZap: UltraZap now supports Zaps along Mocha Splines in a mode called UltraZapMocha.
- Support for NVIDIA Ampere cards (eg. A4000, A5000, A6000).
Windows required driver: 460.82. - UltraGlow: Improved Alpha support for UltraGlow.
LensFlare Improvements
- High Priority Elements: LensFlare now has a new parameter called “Performance”. Elements can now be labelled “Priority Elements”. When the performance parameter is set in the S_LensFlare plugin, non-priority elements will be skipped for a faster render.
- When animating elements in the Flare Designer, elements can now have a minimum size and brightness set.
- Performance and UI improvements in Sapphire Effect Builder, Sapphire Flare Designer, and Sapphire Preset Browser.
- OpenColorIO version 2.
- New Presets for a variety of effects.
- New LensFlares.
New Known Issues
- In After Effects, 2022, the Preset Browser, Flare Designer, and Effect Builder may play back slowly on the first use. To resolve, return to the host and allow After Effects to finish caching the timeline.
- UltraZapMocha: Sometimes, a straight line will apear in the zap. To fix this, add an additional control point in mocha in the part of the mocha spline that corresponds to that straight segment. Adjust the control point until the straight line segment goes away.
(That first one is fixed in an Adobe beta on Adobe’s side so we could wordsmith it regarding that)
New Compatibility Notes
- Sapphire 2022 has been updated to use CUDA 11 in order to support NVIDIA’s latest Ampere cards. (RTX A4000, A5000, and A6000). As a result, some cards from 2012 are no longer supported. Sapphire 2022 works with CUDA compute capability 3.5 and higher.
- LensFlare: A bug was fixed in Sapphire 2022 in LensFlare, where the saturation parameter inside the plugin didn’t apply correctly to all elements. Fixing this means that some elements will look different in 2022 if saturation is set to a value different than 1.0.
- ParallaxStrips and StripSlide: These effects may look different from older versions due to a change in the position calculations.
What’s New in Sapphire 2021.5
New Features
- Support for new After Effects Multi-Frame Rendering pipeline on most Sapphire Effects.
- Native support for Mac M1 machines in Premiere Beta.
- Improved Rays and EdgeRays: These effects now have parameters allowing the rays to be blurred before they are combined with the background.
- Performance Improvements and Bug Fixes in Preset Browser, Sapphire Effect Builder, and Flare Designer.
- New LensFlares.
- LensFlare: Improved flare consistency between thumbnails and the Flare Designer.
- Improved Mocha: Improved Dope Sheet.
What’s new in Sapphire 2020.5
- New! Improved LensFlare Designer
- New! 12 professionally-designed flares and improved Sapphire Lens Flares
- New! Transitions add S_HyperPull and S_HyperPush
- New! Added support for Blackmagic Fusion Studio 16 and the integrated Fusion inside of Blackmagic Davinci Resolve 16
- New! More OFX hosts now support Sapphire Builder
- New! Improved Mocha tracking
- New! Faster render times for many effects
What’s new in Sapphire 2020
- New! FreeLens effect: Inspired by the popular lens whacking camera technique
- New! OpenColorIO (OCIO) color management support
- New! Parameter-driven tracking: Powered by Mocha
- New! Mocha Area Brush tool: Quickly paint over track search areas
- New! LensFlares: 16 new professionally-designed flares
- New! Builder presets: 7 stunning new drag-and-drop presets
- New! Faster renders: Up to 3x speed increases on many effects
What’s new in Sapphire 2019.5:
Released 19 June 2019.
New Effect and Transitions
- S_ParallaxStrips- Brand new for Sapphire 2019.5 effect, S_ParallaxStrips takes any image and divides into strips separated apart in z space. The floating strips can seamlessly strip apart or seamless form a complete image. Angle, size, speed, z-depth, and many more parameters can be adjusted for original and interesting looks.
- S_ParallaxStripsTransition- New for Sapphire 2019.5, S_ParallaxStripsTransition is a new transition using ParallaxStrips to animate between the input and output clips. S_ParallaxStripsTransition breaks the image up into a collection of 3d refracting strips. The strips slowly fade on, then off again.
- S_DissolvePixelSort- New for Sapphire 2019.5, is a new transition based on the S_PixelSort effect. S_DissolvePixelSort is a damage transition that sorts the pixels the dissolve along with different patterns of lines. There are three modes: Linear sorts along parallel lines, Radial sorts along lines radiating from a controllable center point, and Circular sorts along concentric circles. S_DissolvePixelSort sorts the pixels based on the relative values of the pixels. Use “Max Percentage” to control how much of the image is sorted at the peak of the transition.
- S_DissolveDigitalDamage- S_DissolveDigitalDamage is a transition version of DigitalDamage simulating bad digital TV transmission with a dissolve between the incoming and outgoing clips.
New Functionality
- Clip Access for Builder, Flare Designer, and the Preset Browser- All Sapphire 2019.5 external applications, such as the Effect and Transition Builder, Flare Designer, and Preset Browser, now can live preview on any resolution clip.
- New Look and Feel for Builder, Flare Designer, and the Preset Browser- All Sapphire 2019.5 external applications, such as the Effect and Transition Builder, Flare Designer, and Preset Browser, now feature an updated look and feel, complete with modern UI optimized for 4K HDPI monitors.
- Broadcast Monitor Support- The Sapphire Effect and Transition Builder and Flare now support output to a third party broadcast monitor via a Blackmagic or AJA card.
Improved Mocha
- Mask Rendering Performance – Mask rendering with Mocha in Sapphire is now much faster – especially for complex and multi-layered masks. Edge-Snapping – Edge-Snapping on Splines to speed up Masking. Select one or more points and press “ALT+S” to snap points to the nearest edge, or hold “S” to drag-snap.
- Layout Manager – Save, modify, and order custom layouts from the View menu. New layouts will appear in the workspace drop down.
- Autosave Backups – Autosaves now include iterated history to prevent data loss and Autosaves are no longer removed on exit to the host. You can define the location and the number of backups in the Mocha preferences.
- Numerous Bug Fixes and UI Tweaks including foreground mattes now correctly occluding when GPU tracking a background layer.
New Host:
- Sapphire 2019.5 OFX is now happy to support Autodesk Flame, Flame Assist, Flare v2020 or higher. In addition to new effects and transitions, Flame artists will now have access to the Sapphire Effect and Transition Builder inside of Flame with the 2019.5 release.
Compatibility Issues:
- In v19, LensFlares using MutliSpot and MultiStreak elements would look different inside the Flare Designer across operating systems. In v19.5 this was fixed, but as a result Lens Flares may look different from v19 when loaded through the Flare Designer. Old projects will continue to look the same as they did in v19 when loaded into the host or rendered but may look different after loading in the Flare Designer.
Known Issues:
- Preset Browser does not display Feedback or Temporal presets correctly.
- (Sparks) Flame may crash on close when a Mocha mask was used in Sapphire.
- (Sparks) upate_setups has a bug when upgrading Caustics from v2019->2019.5.
- If you have an animated Mocha mask in your plugin when you enter the Preset Browser, the Mocha mask will not animate.
- (OFX – Resolve) Sometimes the Preset Browser, Flare Designer, or Builder will start behind the host.
- Sometimes the preview in the Preset Browser, Flare Designer or Builder doesn’t render with the correct frame.
- The Preset Browser, Flare Designer, or Builder may be slow on the first launch.
- The current time marker in the Preset Browser, Flare Designer or Builder doesn’t always match the current time in the host application.
- (OFX – Resolve) The second input isn’t showing in the Preset Browser or Builder in Sapphire Transitions.
- (not Sparks) “Show Checkerboard” isn’t working inside of Builder.
- (Premiere) The Preset Browser and Effect Builder may not respect clip scaling applied in Premiere.
- (OFX, Linux) The License Tool that runs while running the RPM doesn’t advance after entering the activation key and clicking next. The license installs correctly. After clicking next, you can click cancel to close the tool. Running the License Tool directly from the start menu advances correctly.
- (OFX, Nuke) The Preset Browser and Lensflare Designer may not open if a still is hooked up as an input.
- (OFX, Resolve 16, Mac OS) On older Macs, Mocha may generate an error the first time you try to track. If you close Mocha and re-open it, tracking should work as expected.
- Atmosphere may not look the same between the LensFlare designer and the plugin.
What’s New In Sapphire 2019.4:
Improved stability of Sapphire when using the GPU Fixed S_Effect and S_Transition in Burn, Flare, and Flame Assist
What’s New In Sapphire 2019.3
Fixed a slowdown when Sapphire is first applied on some offline systems using activation-keys
What’s New In Sapphire 2019.2
- Minor installer improvements
- Improved proxy server support for installing and removing licenses
- Mocha Improvements:
- Stability improvements
- Memory usage improvements
- Fixed a crash when the Mocha cache directory is missing
- Fixed a crash opening certain old sapphire v11 mocha projects
- Minor speed improvements in the Preset Browser, Builder and Flare Editor
- Minor preset improvements
What’s New in Sapphire 2019.02 for Autodesk
- Fixed mocha tracking on fields
What’s New in Sapphire 2019.02 for Baselight
- Baselight 5 support
- Fixed a bug where the Preset Browser and Flare Editor sometimes failed to launch
- Fixed thumbnails in the Preset Browser
- Fixed saving presets on Baselight. User saved presets will now be saved inside: /usr/fl/sapphire/
What’s New in Sapphire 2019.02 for Fusion
- Fixed a crash in S_PixelSort on Fusion
What’s New in Sapphire 2019.02 for Premiere
- Fixed a crash that occurred when ctrl-z was pressed on machines with certain hardware configurations
- Fixed Premiere GPU suite integration on MacOS
What’s new in Sapphire 2019
SAPPHIRE LENSFLARE 2019
LensFlare and the Flare Designer have been re-designed and re-imagined for Sapphire 2019. The Flare Designer has been greatly improved and enhanced to increase the ease of use and expand its functionality. The preset browser is now integrated directly inside the Flare Designer, which makes accessing and modifying lens flare presets a breeze. A new lens flare “Component” workflow has been created, which allows artists to easily and intuitively build a complex flare from scratch and helps reveal the power and flexibility of Sapphire’s flare engine. Finally, 27 new professionally designed presets have been added in Sapphire 2019. Watch this introductory video to get up to speed on how to use this amazing new tool.
SAPPHIRE PIXELSORT
PixelSort is a fantastic new Sapphire effect that grew up in the modern digital “glitch art” movement. It’s a fun new way to distort your image in a multitude of different ways and has many deep parameters which can produce some stunning results. PixelSort is also available inside Sapphire Effect and Transition builder. Combine it with other Sapphire effects for a truly original effect, and use it as a transition to up production value in any edit. Watch this short video to learn more about Sapphire PixelSort.
SAPPHIRE WHIPLASH TRANSITION
Sapphire WhipLash is a “sister effect” to one of the most popular Sapphire transitions, S_SwishPan, and it features some amazing new functionality and features that will undoubtedly make it the Sapphire transition of choice. At it’s core, S_Whiplash is a brand new transition that mimics a lighting quick camera pan, blending multiple copies of an image together so it appears as if a great distance is travelled in a short amount of time. S_WhipLash also features a nice soft bounce stop, a smooth finish, or a snapback at the end of the transition. RGB separation blurs can be added for a different look and S_Whiplash can travel in any direction or angle as well as scaling up or down as well. Watch this short video to see what this new and extremely powerful Sapphire transition can accomplish.
ENHANCED MOCHA TRACKING AND MASKING
Sapphire 2019 features major improvements to the integrated Mocha tracking and masking, available within each Sapphire effects and separately as the S_Mocha spark (Autodesk only). For further information on the differences between the integrated Mocha tracking and masking in Sapphire 2019 and Mocha Pro 2019, please click here.
- NEW SPLINE TOOLS FOR ROTO & MASKING
Sapphire 2019 features 4 new Mochas spline tools for masking and rotoscoping, all created to speed up shape creation and to save time. They include the new Magnetic Spline Tool with edge snapping, the new Freehand Spline Tool for fluid drawing, and new preset circular and rectangular shape tools. - NEW LOOK AND FEEL
Editors and artists will rejoice at the completely redesigned Mocha interface. The updated interface makes Mocha easier to learn than ever before and looks great on hi-res and retina enabled monitors! The Mocha Essentials Workspace brings the power of Mocha to novice level users with a simplified, elegant, and easy-to-learn interface. Tracking & masking is now faster by reducing complexity and focusing the Mocha interface on the most essential icons and tools. Switch to Classic for advanced modules and customize workspaces for flexibility. - RETINA & HIGH DPI MONITOR SUPPORT
The new Mocha interface and tools look fantastic on modern high DPI monitors.
IMPROVED EFFECT AND TRANSITION BUILDER
The Effect and Transition Builder has some complimentary new improvements in Sapphire 2019 release. A new animating shape effect has been added, which allows for cool new presets, like multi-color shape wipes and organic transitions with a hand-drawn look. PixelSort and Whiplash have been added as well, which can be used to create original new effects. Watch this short video for an overview of the new Builder presets in Sapphire 2019.
Learn more about Sapphire Builder on the Details Page
GPU SPEED IMPROVEMENTS
Boris FX is proud to say Sapphire 2019 is the fastest version of Sapphire ever! Optimized for peak GPU acceleration for CUDA enabled NVIDIA cards, Blackmagic Resolve colorists and Adobe Premiere Pro CC editors will see the greatest benefit from this across the board performance increase.
Tutorials

Bringing Still Images to Life with Photoshop & After Effects
If you've ever wanted to know how to make still images come to life, as you've seen in documentaries, Nick Harauz from Boris FX shows you how!
More...
Ghostly Text Reveal, Sapphire in AE, incl Project File #Halloween
John Dickinson breaks down a ghostly text reveal that he created using Sapphire and Particle Illusion in After Effects.
More...
Create Transparent Ghostly Effects with Mocha & Particle Illusion #Halloween
Ceate transparent ghostly effects using Mocha Pro and Particle Illusion to transform an actress into a ghost.
More...
Discover the Power of Using AI Image Generators with Boris FX Silhouette
Elizabeth Postol shows you how you can work directly with AI image generators when compositing in Boris FX Silhouette.
More...
Design a Picture-in-Picture Preset with the Sapphire
Harry Frank gives you step-by-step details on how to create a Picture-in-Picture Preset with Boris FX Sapphire Effect Builder.
More...
Indie Filmmaking in Resolve: Filmmaker Damien LeVeck
Watch Boris FX Live on Wednesday, December 14 where the team interviews award-winning indie filmmaker and Sapphire power user Damien LeVeck.
More...
In Depth: Creating Space - A Galaxy of Resources for your Epic Space Film (Updated!)
Space, the final frontier! Learn to create stars, galaxies, moons, and more for your next space-themed film or science fiction short.
More...
Sapphire 2022.5 Effect Builder Breakdown
John Dickinson breaks down of one of the MANY stunning presets he created using Sapphire 2022.5 Effect Builder inside Adobe After Effects.
More...
May the 4th Be With You: A Star Wars Tutorials Roundup
It's May the 4th, aka Star Wars Day! Today we celebrate May the 4th with a roundup of Star Wars-inspired tutorials from over the years.
More...
Burning Question: What in the heck is OFX? Updated #OFX #openfx
OpenFX, or OFX, plugins are exploding on the market with hosts like DaVinci Resolve, Vegas, Flame, Baselight, and others. Learn more!
More...
Create the Dune Look with Boris FX, Cinema 4D, After Effects
Create the Dune Look with Maxon Cinema 4D, Adobe After Effects, Boris FX Continuum, and Sapphire with John Dickinson.
More...
Design Movie Trailer Graphics - Wakanda Forever!
John Dickinson shares his clever creative techniques in this Movie Trailer Graphics tutorial. Download free demos of Boris FX tools today!
More...
Create a Sound Blast Driven By Music, a 4 Part Series from Boris FX
In this tutorial series, Ben Brownlee takes you through how to create a sound blast by using music data, using Boris FX plugins.
More...
In Depth: Lens Flares for Video
Lens Flares add drama and presence to scenes. In this article, I'll be comparing some lens flare tools for your favorite NLEs and Motion Graphics tools
More...
Burning Question: How Do I Create an Infinite Zoom?
An infinite zoom is an effect that creates a seemingly endless camera zoom. Learn to create this eye catching effect in Adobe After Effects.
More...
Boris FX Live: Virtual IBC 2020 Presentations, Day 3 is Live!
Watch Boris FX Live presentations for Virtual IBC! They are featuring customer presentations, sneak peeks of 2021 releases, giveaways.
More...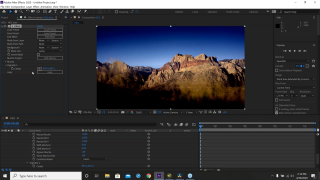
Sneak Peek: Sapphire 2020.5 First Look
Get a one-hour Sapphire 2020.5 First Look sneak peek at the upcoming Sapphire 2020.5 release with Product managers Brian Fox and Alan Lorence.
More...
Sapphire 2020: Introduction to New Features for Avid Media Composer
Kevin P. McAuliffe shows Avid Media Composer editor's new features in Sapphire 2020. For example, S_FreeLens, Mocha parameter tracking for effects, more.
More...
Why Your 3D Renders Look Fake - 5 Tips
Designer Darren Thomas explains why your 3D renders look fake and offers 5 tips to improve realism. Perfection is your enemy, and technology will only get you so far, as real life is messy and imperfect.
More...
Boris FX Webinar Replay: 2019.5 Releases (SIGGRAPH Preview)
In this webinar replay, learn about all the new features inside Sapphire, Continuum and Mocha Pro 2019.5, from Ben Brownlee, the new Director of Learning and Content at Boris FX. You may remember him from Curious Turtle training videos.
More...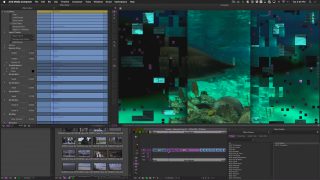
Avid: Using the Updated Sapphire Builder
In this tutorial, Damien LeVeck of Skubalon Creative explains what's new in the Sapphire Builder (2019.5) for Avid and then shows you how to create a cool stylized effect when working with footage that needs to fit a specific aspect ratio.
More...
Creating Fog in AE with Sapphire + Create Z Depth Pass for DOF & Fog
Jonathan Winbush explains how to make fog with Boris FX Sapphire using your depth map in After Effects. Bonus tutorial: Create Z Depth pass for DOF and Fog.
More...
Sapphire 2019.5 Overviews for Builder, S_ParallaxStrips, S_PixelSort, S_DissolvePixelSort
Boris FX has some new tutorials for Sapphire 2019.5 that include Overviews for Builder, S_ParallaxStrips, S_PixelSort, and S_DissolvePixelSort.
More...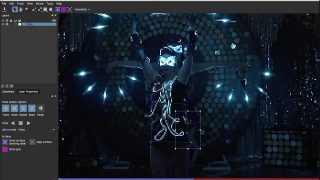
Changing Day to Night with Sapphire and Mocha
Nick Harauz and Ian Robinson show Premiere Pro and After Effects artists how Sapphire and Mocha can accomplish advanced sky replacement.
More...
The Cleansing Hour: Using Mocha Pro & Sapphire for Feature Film VFX
Damien LeVeck shows how he used Boris FX Mocha Pro and Sapphire with Avid Media Composer for high-end horror VFX on his film The Cleansing Hour.
More...
In Depth: Time Effects - Time Displacement aka Slit Scan, with Examples
Learn all about the Time Displacement filter, which creates an effect known as slit scan, a trippy looking time manipulation that can be used to represent a time travel, a warp in the space time continuum, a drug trip and much more.
More...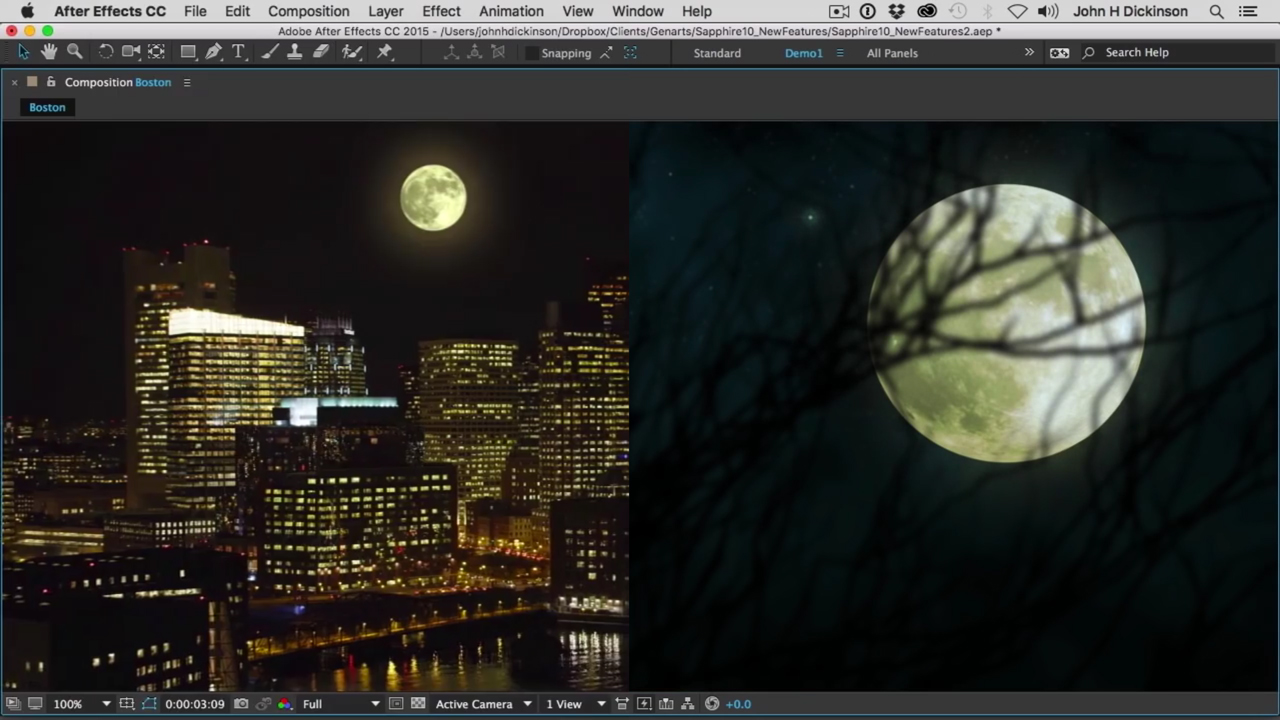
Sapphire Luna - Create a Photorealistic Moon Rendering
All manner of nightmarish creatures lurk under the light of the moon. But how do you add the moon to your creature feature scene? Watch this in-depth tutorial from John Dickinson of Motionworks.net, and learn how to use Luna in Sapphire to create a photo-realistic moon, in any phase you need.
More...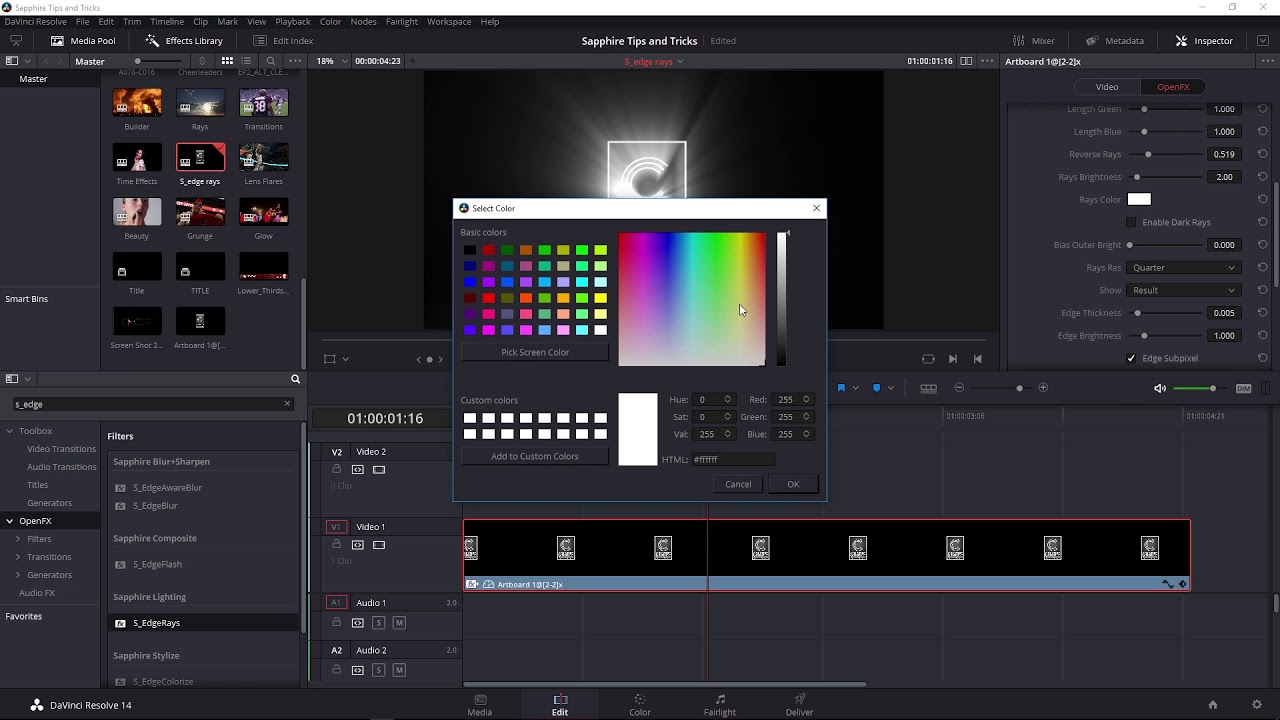
Create Beautiful Volumetric Lighting in Davinci Resolve with Sapphire EdgeRays
Create photorealistic lighting effects with Blackmagic Davinci Resolve and Sapphire Edge Rays. For more cool lighting effects, Check out Boris FX Sapphire for Davinci Resolve, After Effects, Premiere Pro, and other hosts.
More...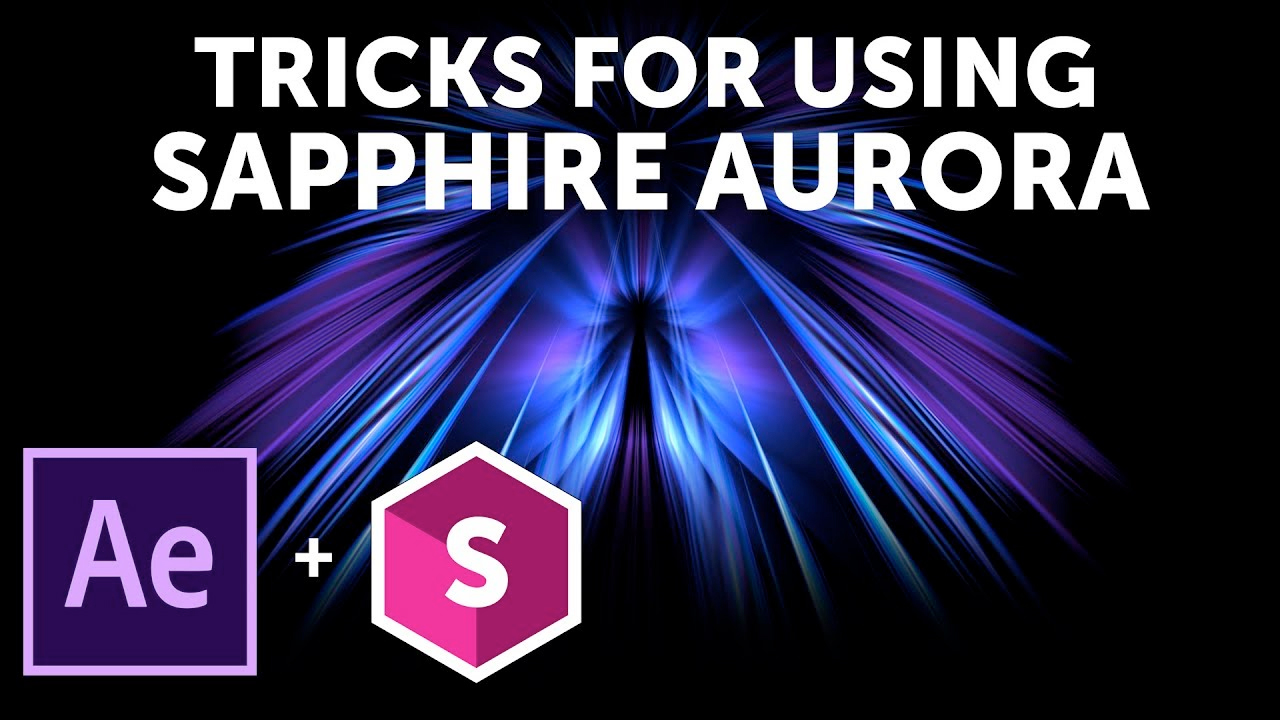
Boris FX Sapphire: Tricks for Using Sapphire Aurora
Sapphire Aurora is an amazing VFX plug-in with many uses besides producing high-quality aurora borealis light streaks. Watch how motion graphics guru John Dickinson uses S_Aurora to achieve some stunning results in Adobe After Effects. Create beautiful looks combining Aurora with other effects using the Sapphire Effect Builder.
More...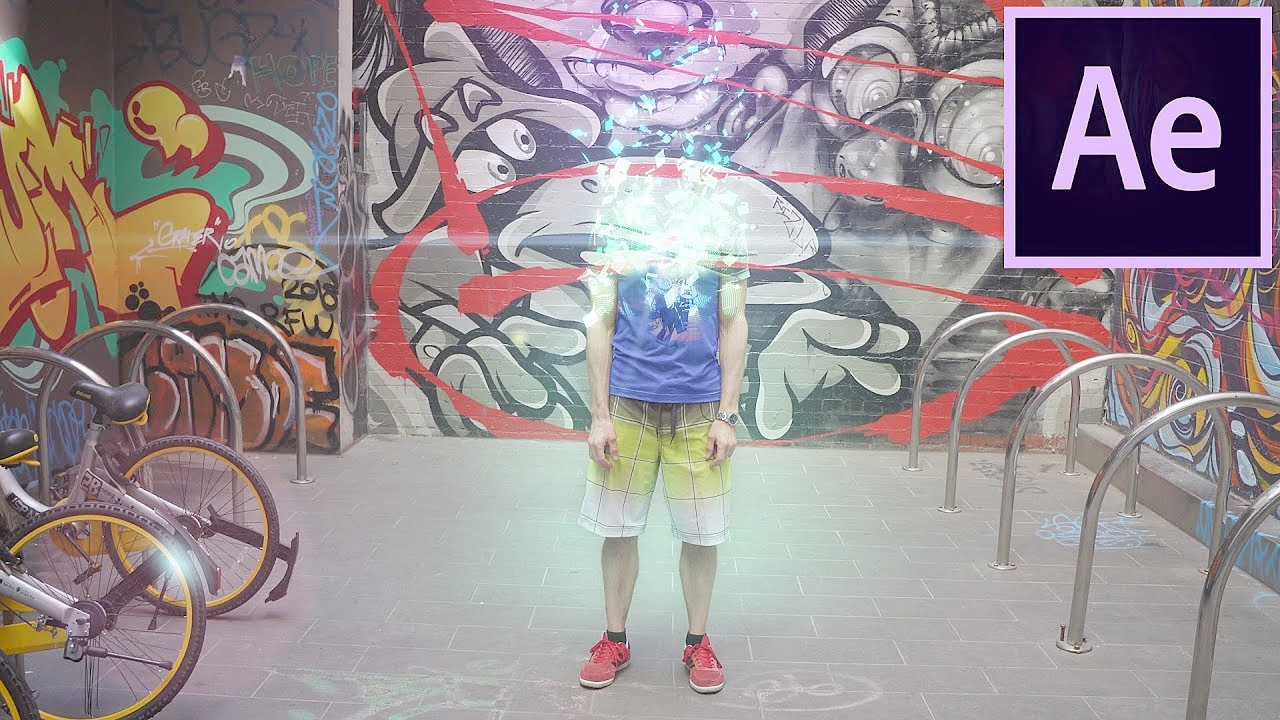
Remove a Person from a Scene with Mocha Pro
Learn how to remove a person from a scene using the Mocha Pro Remove Module. Plus this tutorial also shows you how to create a disintegrate/transporter beam effect à la Star Trek using VFX in Sapphire and Continuum. It even comes with the project file and footage.
More...
Lens Flares in Avid Media Composer with Boris FX Sapphire
Learn to create Lens Flares in Avid Media Composer with Boris Sapphire in these two tutorials, one from Kevin McAuliffe and the other from Nick Harauz.
More...Lens Flares in Avid Media Composer with Boris FX Sapphire
Learn to create Lens Flares in Avid Media Composer with Boris Sapphire in these two tutorials, one from Kevin McAuliffe and the other from Nick Harauz.
More...
Boris FX: Getting Started With Sapphire #gettingstarted
This tutorial covers how you can use Sapphire effects, create custom effects, leverage Mocha in Sapphire, and get started creating awesome work with the Sapphire VFX plug-in for Adobe After Effects, Adobe Premiere Pro, Nuke, Avid, Flame, and other hosts.
More...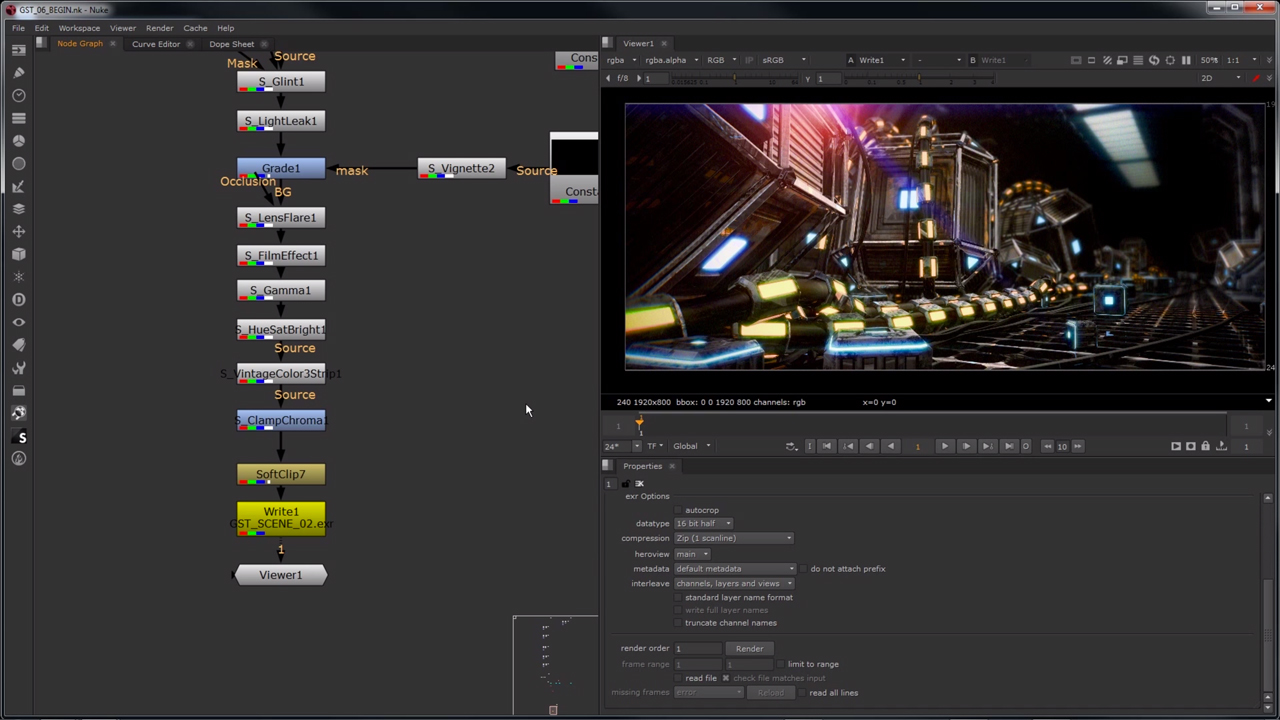
An Introduction to Sapphire for Nuke
In this tutorial, learn how to set up textures for objects in Nuke using sapphire plug-ins, learn different ways to post-process those textures, use sapphire nodes for color correction and more.
More...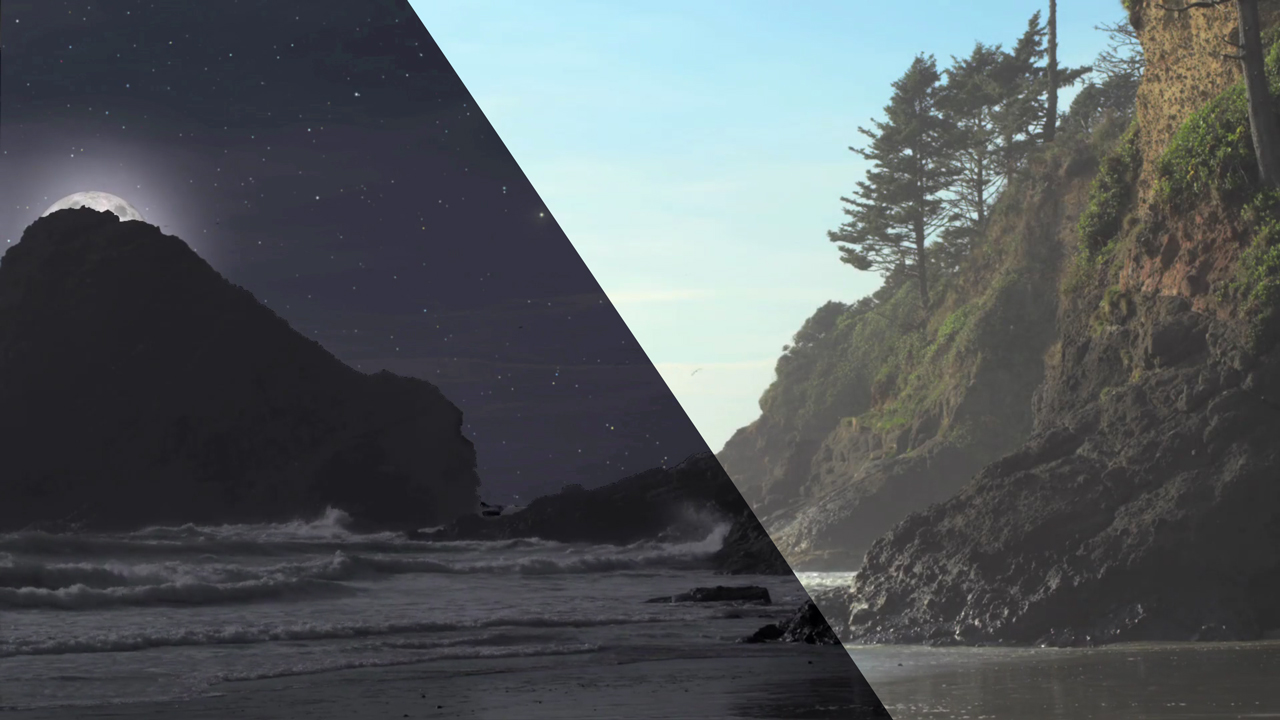
Boris FX | Let’s Edit with Media Composer: Day for Night with Continuum & Sapphire
Editor Kevin P. McAuliffe shows Media Composer editors how to take day time footage and transform it into night using Continuum’s Color & Tone tools and sister product Sapphire’s Night Sky and Luna.
More...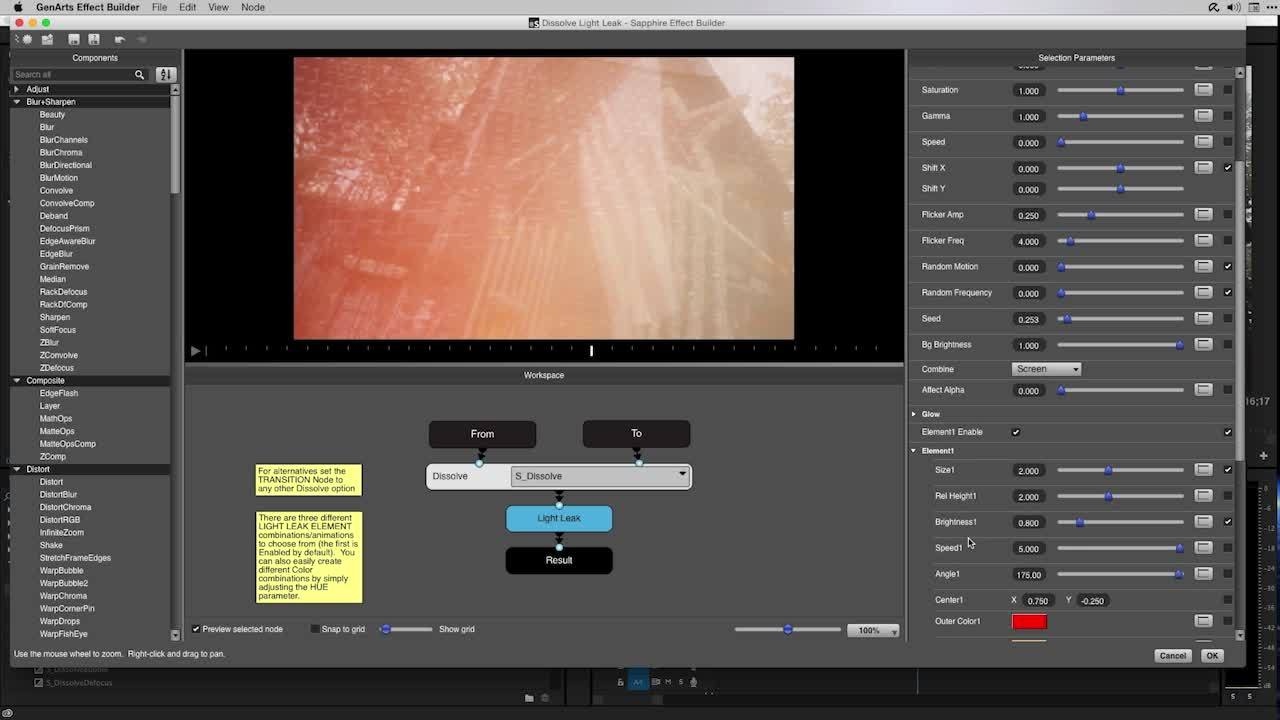
Sapphire Transition Builder in Premiere
Create custom transitions with Sapphire Transition Builder in Premiere Pro. Nick Harauz of clipsandhandles.com shows you how!
More...
Sapphire QuickTips: Grunge
In this tutorial, learn how to add some grungy effects to your video and text with Sapphire.
More...
Tutorial: Let’s Edit with Avid Media Composer: Sapphire Builder, Part II
Kevin P. McAuliffe gives an introduction on how to use GenArts Sapphire Builder in Avid Media Composer. Sapphire Builder is a super cool piece of software that gives users endless effects, right within Media Composer!
More...
Sapphire for After Effects Top 15 from John Dickinson
Don't miss these great tutorials from John Dickinson on Sapphire for After Effects, covering the top 15 effects in the package.
More...
Case Study: The Cleansing Hour Main Title Design - Sapphire for Motion Graphics Designers
John Dickinson from Motionworks has a walk-through tutorial breaking down how he made the main titles for the short horror film “The Cleansing Hour.”
More...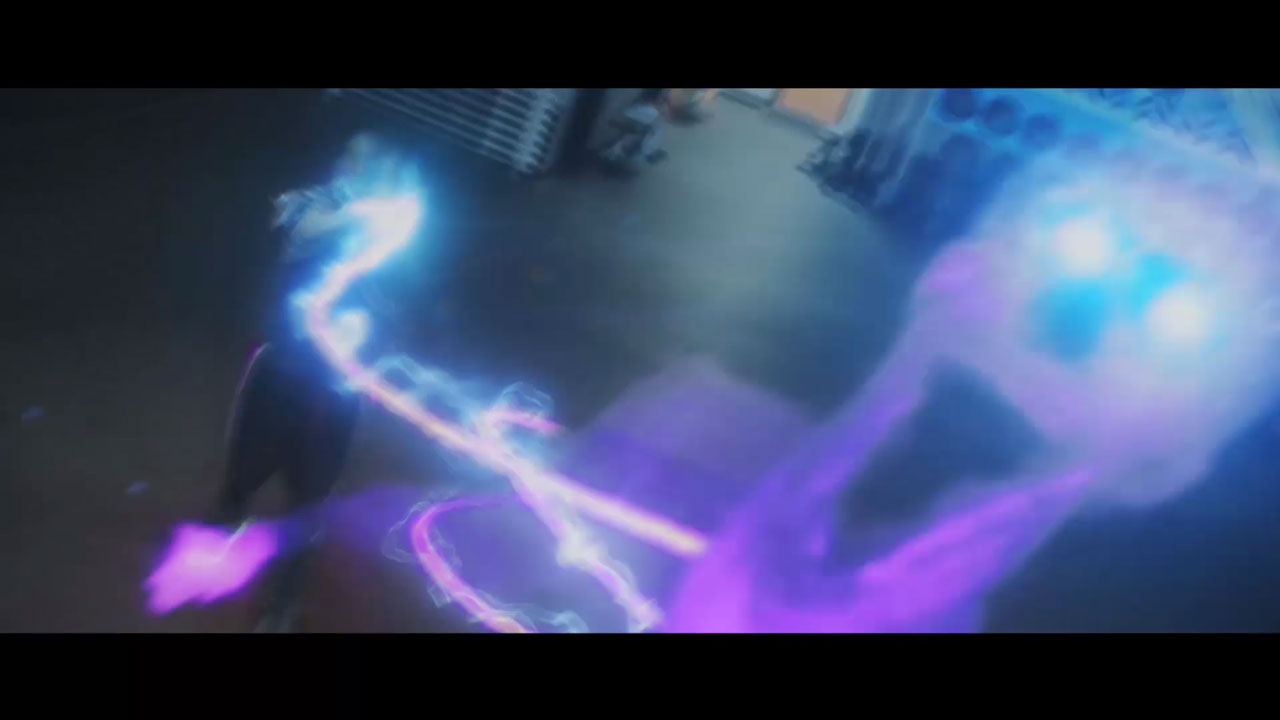
Tutorial: Halloween Themed Tutorial Round Up
Demons are rising, ghosts are haunting and blood is flowing with these Halloween themed tutorials that we have collected to help take the horror out of making frightening creations. Updated: October 25, 2016.
More...
Modern Horror Trailer Effects with Sapphire Builder
Alex at GenArts shows you how to create a chilling Modern Horror look using Sapphire’s Effect Builder. Very creepy indeed!
More...
GenArts Sapphire - Lighting Effect Tips with S_Rays
Learn how to use both Rays and Edge Rays within Sapphire to create compelling visual effects.
More...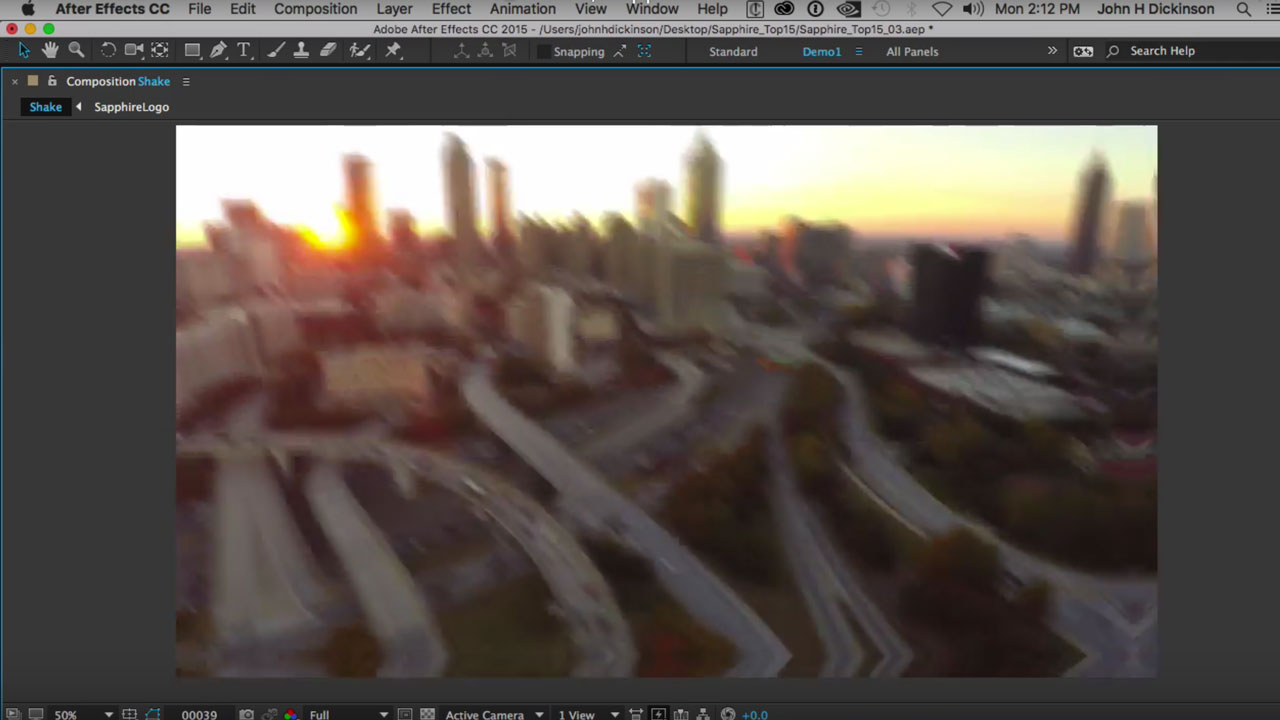
Genarts Sapphire S_Shake - Custom Camera Shake
Learn how to create a custom camera shake with varying levels of intensity with Sapphire’s shake effect.
More...
Getting Started with Sapphire #gettingstarted
New to Sapphire? Here are some tips for getting started.
More...
Replace a Bland, Overcast Sky with a Gorgeous Sky in After Effects
Take a bland, colorless sky and make it into a vault of heaven! Create an alluring azure sky with fluffy clouds, a sublime sunset or an moody moonlight scene. I’ll give several options, utilizing plug-ins from CoreMelt, Video Copilot, Boris FX, Red Giant, SUGARfx and Imagineer.
More...How to use 3rd Party Transition Plug-ins in Adobe Premiere Pro
Have you ever wondered why your third party transition plug-ins for Premiere Pro don’t show up under Video Transitions, like the native Transitions effects do? I have a work around for you, using an Adjustment Layer.
More...In Depth: Noise and Grain Plug-ins for After Effects, Final Cut and Other NLEs, Part 2 of 2
Here is the rundown of noise and grain reduction plug-ins on the market for After Effects and other NLE’s, rated on speed, accuracy and quality, and ROI.
More...You may also be interested in these products


Boris FX Sapphire Annual Subscription
From $495.00
SALE: $371.25
NAB Sale - Save 25% - Ends April 26th 2024
Boris FX Sapphire Upgrade and Support Plan
From $495.00
SALE: $371.25
NAB Sale - Save 25% - Ends April 26th 2024

Boris FX: Continuum and Sapphire Bundle - Upgrade & Support
From $695.00
Upgrade From $521.25

'%3e%3cg id='Final-Copy-2_2_' transform='translate(1275.000000, 200.000000)'%3e%3cpath class='st0' d='M7.4,12.8h6.8l3.1-11.6H7.4C4.2,1.2,1.6,3.8,1.6,7S4.2,12.8,7.4,12.8z'/%3e%3c/g%3e%3c/g%3e%3c/g%3e%3cg id='final---dec.11-2020'%3e%3cg id='_x30_208-our-toggle' transform='translate(-1275.000000, -200.000000)'%3e%3cg id='Final-Copy-2' transform='translate(1275.000000, 200.000000)'%3e%3cpath class='st1' d='M22.6,0H7.4c-3.9,0-7,3.1-7,7s3.1,7,7,7h15.2c3.9,0,7-3.1,7-7S26.4,0,22.6,0z M1.6,7c0-3.2,2.6-5.8,5.8-5.8 h9.9l-3.1,11.6H7.4C4.2,12.8,1.6,10.2,1.6,7z'/%3e%3cpath id='x' class='st2' d='M24.6,4c0.2,0.2,0.2,0.6,0,0.8l0,0L22.5,7l2.2,2.2c0.2,0.2,0.2,0.6,0,0.8c-0.2,0.2-0.6,0.2-0.8,0 l0,0l-2.2-2.2L19.5,10c-0.2,0.2-0.6,0.2-0.8,0c-0.2-0.2-0.2-0.6,0-0.8l0,0L20.8,7l-2.2-2.2c-0.2-0.2-0.2-0.6,0-0.8 c0.2-0.2,0.6-0.2,0.8,0l0,0l2.2,2.2L23.8,4C24,3.8,24.4,3.8,24.6,4z'/%3e%3cpath id='y' class='st3' d='M12.7,4.1c0.2,0.2,0.3,0.6,0.1,0.8l0,0L8.6,9.8C8.5,9.9,8.4,10,8.3,10c-0.2,0.1-0.5,0.1-0.7-0.1l0,0 L5.4,7.7c-0.2-0.2-0.2-0.6,0-0.8c0.2-0.2,0.6-0.2,0.8,0l0,0L8,8.6l3.8-4.5C12,3.9,12.4,3.9,12.7,4.1z'/%3e%3c/g%3e%3c/g%3e%3c/g%3e%3c/g%3e%3c/svg%3e) Your Privacy Choices Notice at Collection
Your Privacy Choices Notice at Collection