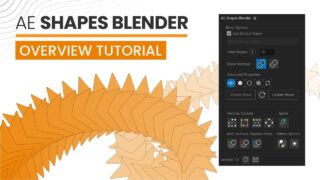
1.x AE Shapes Blender
EDIT in Admin Edit in WP
Downloads
Download demos and trial versions, product documentation, free presets and more.
You may download a free Demo after logging in.

With AE Shapes Blender you can blend shapes together easily in After Effects. Lots of features allow you to control the spine path the way you want them to blend and offset the paths easily, create and animate beautiful loops.
AE Shapes Blender allows you to blend shapes together easily in After Effects. Just select 2 or more shape paths and click on the button to create the blend. You can choose between advanced and simple properties to control the blend.
AE Shapes Blender Key Features
- Blend Methods
- Blend Directly
- Blend Along Spine
- Advanced Properties
- Stretch
- Scale
- Offset
- Loop
- Fill
- Stroke
- Opacity
- Twist
- Replace Spine
- Freeze/Unfreeze Blend
- Reverse Blend Order
- Other Paths Options (Applicable on any selected paths or blends)
- Match Vertices
- Shift Vertex
- Reverse Paths
- Open/Close Paths
ADVANCED PROPERTIES
Advanced properties allows you to have more controls over blended paths. If you don’t enable this then only simple controls will be added. You can easily change the properties for each control in the “Effects Controls” panel of master paths layer.

OFFSET CONTROLS
It will add 2 controls for master and blended paths to the layer. You can offset the paths using these controls.
In the master controls you can decide either to use spine to control the paths direction or blend them directly. You can stretch, scale and offset the master paths along the spine. Master path’s offset controls will only work if the spine is enabled. If you want to rotate the paths with the spine then enable rotate along spine checkbox and all blend paths will follow the spine direction.
In offset controls for blend paths you can set stretch, scale and offset values for the blend. These controls will work even if you don’t have spine enabled or blending directly. You can also loop between the blended paths to create seamless loops or backgrounds with loop controls.
FILL CONTROLS
Fill controls allow to add 1 or 2 fills to the blended shapes. In 2 colors fill interpolation, the transition will be applied from one color to the other. You can also change opacities for the fills using one or two interpolations.
STROKE CONTROLS
In the stroke controls you can set the stroke colors, widths and opacities using one or two interpolations.
OPACITY CONTROLS
With the opacity controls you can control the overall opacity of blended paths or can trim out the shapes from start or end of the blend using opacity start and opacity end sliders. You can also apply feather with the fall off slider to both start and end opacities and it will help you in creating seamless loops. Make sure to disable limit opacity to shapes checkbox for applying it to loops.
TWIST CONTROLS
Using twist controls you can transition the twist from start to the ends of the blended paths. One value needs to be in negative direction form the other.
CREATING THE BLEND:
Select 2 or more shape’s paths properties. Make sure paths are converted to bezier paths if they are primitives.
For creating the blend it is recommended that the paths have similar number of vertices and close statuses. In case these are differnt then the script will automatically detect and ask to fix automatically.
Click on “Create Blend” button and the blend will be created with 4 layers to control the blend.
- Calc Layer – Contains the calculations.
- Spine Layer – The layer for spine path. Change the path to control the blend.
- Blend Layer – This is the only layer that will render and consist all the blended paths.
- Master Layer – Master paths reside in this layer and if changed the whole blend will be affected.
BLEND METHODS
There are 2 blend methods to use for the blend and you can change later if you want:
Blend With Spine – In this method the paths will stick to the spine and you can change the direction using spine path. If you want to move the paths you need to edit the spine paths.
Blend Directly – In this method the paths will blend directly with each other.
MATCH VERTICES
You can match the vertices of 2 or more paths using this option. You can also select any paths outside the blend and it will work as well. It will calculate the distance between each point on path and will choose the largest one to add point on. You can decide to match the vertices incrementally or in decremental way.
SHIFT VERTEX
This option will shift the vertex of any selected path or paths to forward or backward upon your choice. It won’t make any difference if you apply to the whole blend. But if you change any one of that you can see the difference as the path points blend with each other according to their position on paths.
REVERSE PATH
To reverse the direction of any selected path or paths from inside or outside the blend. It will reverse all the points value on path while preserving the actual shape.
ADD PATHS
Using this option you can add any selected paths to the selected blend. It will detect and ask to match the vertices and close statuses if finds any difference in those.
REMOVE PATHS
To remove any selected path / paths from the blend. You need to be in edit mode of that path or select the path property from the master paths layer and click on this button to remove it. You can also remove the shape group manually from layer’s contents.
REPLACE PATHS
You can replace any path from blend with any other path. It will also ask to match vertices and close statuses if any difference is found. You can also select more than one paths from blend and to replace and will select the first matched pairs.
REPLACE SPINE
This option will replace the spine with any other path and it will update the spine layer with that new path. All you need is the selected path property and any layer from the blend and it will detect its spine automatically to replace.
REVERSE ORDER
To reverse the order of the blended paths from top to bottom or bottom to top. These will be more visible in blend that uses fills. In strokes you may not notice the shapes order.
FREEZE / UNFREEZE BLEND
You can freeze or unfreeze the blend that will bake out all the expression to the static values. You won’t be able to change any property unless you unfreeze it. This option will help you to freeze the blend if you don’t want to animate it and will improve performance. You can also freeze the blend temporarily while working on a render intensive project.
Download – Complete User Guide – AE Shapes Blender
Description
System Requirements
After Effects 2024, 2023, 2022, 2021, 2020
Change Log
1.0.3 – Aug 16, 2022
1.0.2 – Jun 29, 2022
(Fixed ‘ExtComms’ error handling.)
Minor bug fixes.
1.0.1 – Mar 28, 2022
- Fixed issue causing expression error while adding additional paths to the blend.
- Fixed issue with strokes showing under the fills.
FAQs
Tutorials
AE Shapes Blender Tutorial #gettingstarted
Watch this tutorial to learn how to use AE Shapes Blender to create blends using paths and how to set their properties. This tutorial also explains how the script and its additional functionality work.
More...'%3e%3cg id='Final-Copy-2_2_' transform='translate(1275.000000, 200.000000)'%3e%3cpath class='st0' d='M7.4,12.8h6.8l3.1-11.6H7.4C4.2,1.2,1.6,3.8,1.6,7S4.2,12.8,7.4,12.8z'/%3e%3c/g%3e%3c/g%3e%3c/g%3e%3cg id='final---dec.11-2020'%3e%3cg id='_x30_208-our-toggle' transform='translate(-1275.000000, -200.000000)'%3e%3cg id='Final-Copy-2' transform='translate(1275.000000, 200.000000)'%3e%3cpath class='st1' d='M22.6,0H7.4c-3.9,0-7,3.1-7,7s3.1,7,7,7h15.2c3.9,0,7-3.1,7-7S26.4,0,22.6,0z M1.6,7c0-3.2,2.6-5.8,5.8-5.8 h9.9l-3.1,11.6H7.4C4.2,12.8,1.6,10.2,1.6,7z'/%3e%3cpath id='x' class='st2' d='M24.6,4c0.2,0.2,0.2,0.6,0,0.8l0,0L22.5,7l2.2,2.2c0.2,0.2,0.2,0.6,0,0.8c-0.2,0.2-0.6,0.2-0.8,0 l0,0l-2.2-2.2L19.5,10c-0.2,0.2-0.6,0.2-0.8,0c-0.2-0.2-0.2-0.6,0-0.8l0,0L20.8,7l-2.2-2.2c-0.2-0.2-0.2-0.6,0-0.8 c0.2-0.2,0.6-0.2,0.8,0l0,0l2.2,2.2L23.8,4C24,3.8,24.4,3.8,24.6,4z'/%3e%3cpath id='y' class='st3' d='M12.7,4.1c0.2,0.2,0.3,0.6,0.1,0.8l0,0L8.6,9.8C8.5,9.9,8.4,10,8.3,10c-0.2,0.1-0.5,0.1-0.7-0.1l0,0 L5.4,7.7c-0.2-0.2-0.2-0.6,0-0.8c0.2-0.2,0.6-0.2,0.8,0l0,0L8,8.6l3.8-4.5C12,3.9,12.4,3.9,12.7,4.1z'/%3e%3c/g%3e%3c/g%3e%3c/g%3e%3c/g%3e%3c/svg%3e) Your Privacy Choices Notice at Collection
Your Privacy Choices Notice at Collection