

Professional Editing, Color, Effects and Audio Post!
Open Timeline IO
Support for the OpenTimelineIO (OTIO) format makes importing and exporting timelines from other NLE applications faster and easier. OTIO supports metadata for clips, timing, tracks, transitions and markers, as well as information about the order and length of cuts and references to external media.
Take your video production to the next level with Blackmagic Design’s DaVinci Resolve Studio! With features like the DaVinci Neural Engine for automatic AI region tracking and stereoscopic tools, plus more Resolve FX Filters and Fairlight audio plugins than ever before, get professional-level results. And its advanced HDR grading capabilities ensure that you can create stunning images every time. With DaVinci Resolve Studio, you’ll have one app for everything you need to expertly craft your projects – from start to finish!
DaVinci Resolve Studio – Hollywood’s #1 Post Solution
High-end professionals working on feature films and television shows use DaVinci Resolve more than any other solution! That’s because it’s known for incredible quality and creative tools that are light years beyond the competition. You get DaVinci’s Emmy™ award-winning image technology with 32‑bit float processing, patented YRGB color science, and a massive wide-gamut color space for the latest HDR workflows. You also get the legendary quality of Fairlight audio processing for the best sound in the industry! With DaVinci Resolve, you get the same tools professional colorists, editors, VFX artists, and sound engineers use every day to finish your favorite films and streaming television shows!

In Depth: DaVinci Resolve Free vs. Studio

Is the DaVinci Resolve Studio version worth the investment over the free version? Yes, it is! Learn why you should upgrade to Resolve Studio.

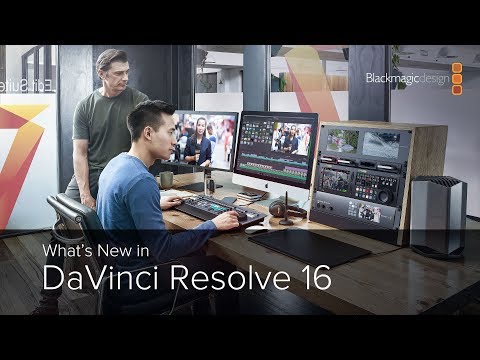
What’s New in Blackmagic Design DaVinci Resolve Studio 19

DaVinci Resolve 19 features powerful new DaVinci Neural Engine AI tools and over 100 feature upgrades! New AI tools include text-based timeline editing, music remixing, dialogue separation, and UltraNR noise reduction. IntelliTrack AI lets you use video to track the Fairlight audio panner. ColorSlice vector grading and film look creator offer richer grading vibrance and color density. Plus there are new features for live TV production and broadcast. DaVinci Resolve now supports the real-time selection of live camera recordings for instant replay to air with slow motion and stingers. Multi-source is the fastest way to see your cameras and edit the timeline while the cameras are still recording!
Cloud Collaboration

DaVinci Resolve is the only solution that lets you grow and build your own multi-user post-production studio! The project libraries are built for real-time local and remote collaboration. The Blackmagic Cloud website allows you to host and access your projects from anywhere in the world. Now you can collaborate with editors, colorists, visual effects artists, and sound engineers all working together at the same time. Best of all, you no longer have to import and export files, translate projects, lose work, or conform and manage changes. DaVinci Resolve is the only application in the world that lets everyone work together in parallel on the same project simultaneously!
Blackmagic Cloud
DaVinci Resolve 19 supports Blackmagic Cloud, so you can host your project libraries on the DaVinci Resolve Project Server in the cloud. Share projects and work collaboratively with editors, colorists, VFX artists, and audio engineers on the same project at the same time, anywhere in the world!
Blackmagic Cloud for Organizations
The Organizations app lets larger companies define a single organization or company within Blackmagic Cloud. Now you can create groups or teams and quickly share projects with an entire group rather than one by one. You can also manage storage access, share Presentations, and create a single sign-on!
DaVinci Resolve Studio Licenses
The Organizations app also lets you buy or rent DaVinci Resolve Studio licenses. This makes it easier for companies to assign and manage the allocation of licenses within large groups. Licenses can be costed against specific projects and then removed when it’s complete.
Blackmagic Proxy Generator
The new Blackmagic Proxy Generator App automatically creates and manages proxies from camera originals. Create a watch folder and new media is automatically converted into H.264, H.265 or ProRes proxies to accelerate editing workflows. You can extract proxies into a separate folder for offline work!
Simplified Proxy Workflow
Switch between camera original footage and proxies in a single click. With Blackmagic Proxy Generated proxies, DaVinci Resolve knows where in the file tree to find them, instantly linking to the camera originals in the media pool. Edit with proxies, then relink to camera originals to grade!
Blackmagic Cloud Camera Sync
Multiple Blackmagic cameras can now upload proxy files, followed by the camera originals, to Blackmagic Cloud. With automatic sync to DaVinci Resolve projects, you can start editing and grading quickly using proxies, speeding up your workflow. It’s a fast, seamless and automatic way to collaborate.
Intelligent Media Management
DaVinci Resolve 19 adds intelligent media location management so that when you are collaborating you can quickly link media to your unique file paths. Now you don’t need to manually relink or search for assets when you work remotely. So you have more time for creativity and less time on file admin!
Presentations Review
Export your timeline to the Blackmagic Cloud using the new Presentations feature. With Presentations, multiple people can review your timeline, leave comments, and even share a live chat. Comments will appear as markers on your DaVinci Resolve timeline, allowing you to act on feedback quickly.
Timeline Locking within Bins
Collaboration with other editors at the same time is now even easier with the new timeline locking operation. This automatic operation prevents two users selecting the same timeline by locking it to the first user without the need to lock the whole timeline bin. Multiple editors can now work on different timelines in the same bin at the same.
Cut and Edit
Multi Source
Multi Source lets you see all your live cameras, or even just clips in a bin with a common timecode, in a multiview screen to look for any point of interest. You can scrub, play and select shots to add to the timeline or simply play to air. You can even switch live from any of the available angles.
Point of Interest
When watching live cameras or a multiview of clips and a signifiant event occurs, capture the moment with a POI marker. The POI is placed on all the clips at that same time so you can quickly find the event on every camera angle, play them to air and even automatically build a highlights timeline.
Replay Palette
The pace of live TV is frantic so the replay controls are clear and quick to navigate. Set a POI with a single key, select a camera and cue the event. Then select run to play to air automatically via ATEM. You can switch cameras or once it’s done, simply dump the playout to prepare the next replay.
Auto Stinger
Stingers are moving graphics and sound transition to let the viewer know you have switched from live to a replay, then back, or even just switched to a new scene. Select auto stingers from the media pool and play in real time at the head and tail of a replay, even when the replay is in slow motion.
Text Based Timeline Editing
Improvements to the transcription workflow make it possible to edit clips based on their transcribed text directly on the timeline! The analyzer is now able to detect multiple voices, allowing you to assign names to different speakers and refine text based search and text replacement operations.
AI Speech to Text Transcription
The transcribe feature automatically transcribes video and audio clips! Simply select the clips in the media pool and use the menus to select audio transcription and then transcribe. You can mark in and out points to edit or delete text, generate sub clips, add markers and even remove silence.
Improved Cut Page Editing
The addition of three new menus to the Cut page timeline allows for quicker and more flexible editing. Use the timeline options, timeline actions and edit actions to toggle ripple editing, trim edit points to the playhead, trim to and resync audio, and change the appearance of the timeline and more!
Automatically Create Subtitles
The auto subtitle feature on the Cut and Edit pages transcribes timeline speech to text automatically into a subtitle track on the timeline. To activate, simply click ‘create subtitles from audio’ in the timeline menu. Once analyzed, click the individual captions to modify them in the inspector.
Scene Cut Detection
Scene cut detection is now possible directly on the Cut timeline. Simply navigate to the timeline menu and click ‘detect scene cuts’. Selected clips will be analyzed for content and cut points automatically placed on every new edit in the rendered clip. Customers can modify or remove trim points as needed.
A/V Split Audio and Video Edits
On the Cut page, drag the lower part of a clip to separately adjust the audio track, allowing the dialogue to be heard before or continue after the video clip is seen. Editors can creatively focus visual attention on the scene using audio to add interest, drama and even tension to dialogue scenes.
Open Timeline IO
Support for the OpenTimelineIO (OTIO) format makes importing and exporting timelines from other NLE applications faster and easier. OTIO supports metadata for clips, timing, tracks, transitions and markers, as well as information about the order and length of cuts and references to external media.
AI Based Voice Isolation
The AI based voice isolation track FX let’s you remove loud, undesirable sounds from voice recordings. Isolating dialog from background sounds in a recording, you can eliminate everything else from moderate noise to aircraft and explosions leaving only the voice. Voice isolation is perfect for interviews and dialogue recordings from noisy locations.
Built-in Dialogue Leveler
The dialogue leveler track FX in the inspector processes and smoothes dialogue recordings without the need for tedious level adjustments on clip gain or automation curves. Controls include real time scrolling waveform display, focus presets and three process options which allow you to easily achieve natural sounding results.
Color
UltraNR Noise Reduction
UltraNR is a new DaVinci Neural Engine-driven denoise mode in the Color page’s spatial noise reduction palette. Use it to dramatically reduce digital noise from a frame while maintaining image clarity. Combine with temporal noise reduction for even more effective denoising in images with motion!
Film Look Creator
The new Film Look Creato,r lets you add cinematic looks that replicate film properties like halation, bloom, grain, flicker, gate weave and vignetting. Adjust exposure in stops and use subtractive saturation, richness and split tone controls to achieve looks usually found on the big screen!
ColorSlice Six Vector Grading
The ColorSlice palette uses subtractive color processes to adjust image color density, saturation, and hue, allowing you to produce rich filmic colors and looks. Parameters in each customizable vector slice let you enhance and deepen color without spill, in a way that looks naturally pleasing.
Marker Overlays and Annotations
The Color page viewer now supports marker overlays and annotations for timeline and clip markers. Open the marker interface to leave written notes with your visual feedback. Select a marker color and thickness, and draw directly in the viewer or use the arrow tool to point to areas of interest.
Composite Mode within Nodes
Corrector nodes in the color page node editor now features composite mode. These composite modes will allow you to affect how node values blend into the pipeline without the need of a layer mixer. This means that your node graph looks cleaner and it’s faster and easier to follow the signal flow.
Automatic Depth Map
The new depth map effect lets you instantly generate a 3D depth matte of a scene to quickly grade the foreground separately from the background, and vice versa. You can bring attention to action in the foreground, help interview subjects stand out, or add atmosphere in the background of a scene!
Fusion
Advanced Volumetric Rendering
uVolume lets you directly import volumetric VDB files into Fusion eliminating time consuming conversions. It also adds creative control of imported effects such as smoke, fire, clouds and explosions. You get complete control over density, temperature and color parameters of the VDB file in DaVinci!
MultiPoly Tool
The new MultiPoly tool displays all of your masks in a single list eliminating switching between nodes for faster, more accurate rotoscoping! Perfect for complex projects, you can view, select, add to and modify specific shapes, toggle their visibility and adjust parameters all from one location.
Universal Scene Description
Fusion now supports Universal Scene Description files for easier collaboration between VFX artists. USD data such as geometry, lighting, cameras, materials and animation can be imported. Fusion’s new USD tools let you manipulate, re-light and render files using Hydra-based renderers such as Storm.
Fusion Multi-Layer Tool
The new multi-merge tool lets you merge numerous media sources into a single multi layer stack, so it’s easier to create composites by merging clips, stills or graphics using layers. Each layer has its own controls, so you can still change individual properties like position, size and apply modes.
Fairlight
AI Audio Panning to Video
The new IntelliTrack AI point tracker lets you automatically generate precision audio panning by tracking people or objects as they move across 2D and 3D spaces! With AI audio panning to video, you can quickly pan multiple actors in a scene, controlling their voice positions in the mix environment!
AI Fairlight FX
The AI based dialogue separator FX lets you rebalance dialogue against background sound and the reverberant sound of the room. You get controls for voice, background and ambience so you can reduce, remix or remove competing sounds. It’s perfect for field recordings and interviews in busy locations.
Fairlight Ducker Track FX
The ducker track FX lets one track auto adjust the level of another track without the need for setting up complex side chain compression or automation curves. You can automatically set music or background noise to lower when dialog is present, then fine tune the audio mix with advanced controls.
Ambisonic Surround Sound
Record, mix, monitor and deliver full sphere Ambisonic surround soundtracks! Fully integrated native operation with 1st to 5th order busses and tracks, native effects processing, 2D and 3D spherical panning, binaural and channel based monitoring, dynamic in-viewer metering and head tracking support.
Fairlight Track Groups
Combine related audio tracks or mixer channels into groups, enabling shared mix automation or editing operations. When creating groups, you can determine the parameters they will share. Groups can be nested, or temporarily suspended to quickly switch focus to smaller groups or individual tracks.
AI Audio Classification
The DaVinci Neural Engine can classify audio clips based on their content, making editing choices faster when reviewing unfamiliar materials. After analysis, audio clips appear in collections bins for dialogue, music and effects with detailed sub categories such as explosions, water or insects.
Automatic Binaural Rendering
The Dolby Atmos deliverable toolset has been expanded to support rendering of a binaural output from a complex Dolby Atmos mix. Now a Dolby 7.1.4 mix can be rendered to playback in a pair of headphones while maintaining the immersive sound experience from just two audio channels.
Innovative Space View 3D Display
DaVinci Resolve supports the latest industry standard audio formats natively, including immersive audio formats like Dolby Atmos, Auro 3D, MPEG-H, NHK 22.2, and SMPTE. The space view scope displays a real time view of every object and its relationship to the room and other objects in 3D space.
Next Generation Engineering
DaVinci Resolve 19 features some of the most cutting-edge technology in the industry today. The DaVinci Neural Engine is an advanced machine learning system powering many of the software’s most powerful tools, and it is fully supported in the Apple M series. The inclusion of the latest version of Dolby Vision means that users can view HDR on supported monitors, including on laptops. The future-proof DaVinci Wide Gamut and Intermediate log grading environment allow you to work on media from any source. You can deliver to every projection, monitoring, and archiving standard in use today. Plus DaVinci Resolve is the only software that you can use to edit and grade 8K footage in real time!
Laptop HDR Monitoring
Increased Dolby Vision support now includes the latest version of Dolby Vision, which offers HDR viewing on Apple displays that feature high dynamic range options. This includes XDR displays and even the latest laptops, which means you can review, grade, and deliver HDR footage from anywhere!
Atmospheric Simulation
Quickly generate randomized noise data to replicate different types of atmosphere and particle-like effects. Use the presets to generate smoke and mist effects. Advanced parameters let you create a distinct appearance or movement in the noise. You can even warp images using the displacement map!
Edge Detection
Improved edge strength and filter controls in the edge detection effect produce more natural results than ever. The gamma control allows for cleaner edges and a smoother rolloff. The half-edge setting displays either the light or dark side of the edge, allowing for unique sharpening and halo effects.
DaVinci Wide Gamut Color Space
DaVinci wide gamut and intermediate are timeline color space and gamma standards that provide a universal internal working color space. It’s larger than what cameras can capture, even larger than BT.2020, ARRI wide gamut and ACES AP1. You’ll never lose image quality, no matter where it comes from!
8K Real-Time Color Correction
Only DaVinci Resolve supports 8K digital negative debayering editing and grading in real time! Working directly on RAW footage when compositing and grading ensures the most accurate results, to avoid limited resolutions, compression artifacts, and banding that might impact your creative decisions!
Technology and Creativity
DaVinci Resolve provides some of the most intelligent AI and advanced feature algorithms available in post production! These tools produce quick, accurate results that will elevate the visual quality of your project while saving you hours of time. The magic mask needs only a single stroke to locate and track people, features, and objects. Smart reframe repurposes footage to dramatically different aspect ratios by recognizing the action in a scene and panning within it. Tools like object removal and the patch replacer allow you to remove unwanted equipment from a scene with the click of a few buttons. Plus the tracker has been the industry leader for over 20 years.
AI Tools
IntelliTrack AI Tracking
The new IntelliTrack AI is powered by the DaVinci Neural Engine, optimizing tracking and stabilization in the color and Fusion pages. It can also be used in Fairlight to track on screen subjects and automatically generate audio panning within a scene, saving time and producing more immersive audio!
Music Remixer FX
The music remixer track FX lets you adjust music to fit with the style of your show. Controls include mute and level adjustments for voice, drums, base, guitar and more! You can turn a vocal piece into an instrumental, automate changes and refocus the music mix to the instruments you want to hear.
Person Mask
The magic mask palette uses the DaVinci Neural Engine to detect people, tracking their movement in a shot. This person mask produces clean traveling mattes for secondary grades or effects. You can make characters stand out in an under lit shot, or invert the person mask and stylize the background.
SuperScale
This unique upscaling algorithm creates new pixels when increasing the resolution of an image. The newly generated data has more detail in upscaled images than standard resizing controls. Ideal for scaling archival footage into modern resolutions, or upscaling HD footage to match a 4K or 8K project.
Smart Reframe for Social Media
Now you can use 16:9 HD or Ultra HD and quickly create square or vertical versions for posting to Instagram and other apps! The DaVinci Neural Engine automatically identifies action and repositions the image inside a new frame so you don’t have to do it manually. You can even fine tune the results!
Stylize with Open FX Library
The Open FX library features over a dozen stylize effects that can artistically modify the content of the image. Ranging from the creative, like pencil sketch, halation and abstraction, to the practical like blanking fill, these effects analyze the content of a shot to produce striking imagery.
Face Refinement
The sophisticated face refinement filter uses facial feature recognition to automatically detect and track faces! Use its many parameters for general beauty work, like skin smoothing, for correcting unflattering color casts, and for retouching individual features like eyes, lips and cheeks.
Dead Pixel Fixer
Dead pixels in a camera sensor will often appear as static white dots and could affect hundreds of shots before they are noticed! Click on the white dots in the viewer, and the dead pixel fixer will use the surrounding pixel data to cover them up, rescuing your footage and preventing reshoots!
Object Removal
The perfect tool for covering up moving objects in an otherwise static shot, object removal analyzes a scene and uses the background information to paint out unwanted data. Create a Power Window on a new node, track the unwanted object, and link to the effect node. Watch it vanish before your eyes!
Patch Replacer
Sample an area of your scene to quickly cover up unwanted elements, like boom mics or even blemishes on a face. The patch replacer has a fantastic auto-grading feature that will seamlessly blend the covered area with the surrounding color data, even when there is movement or changes in the light.
Tools for Content Creators
Vertical Resolution for Social Media
For content creators on TikTok, Instagram, X, YouTube shorts, Snapchat, and more, there is now a selection of square and vertical video resolutions available in the project and timeline settings. Combine with Smart Reframe to quickly setup your timeline for vertical or square-resolution videos.
Upload Directly to Social Media
Link your social media accounts to DaVinci Resolve in order to upload videos directly to YouTube, Vimeo, and Twitter as you export. Compression settings have been developed based on each site’s best recommendations, meaning your videos will be optimized for visual quality and playback speed.
Import ATEM Mini Projects
Live production projects from ATEM Mini ISO models can be opened as a timeline. The sync bin with multiview lets you fine-tune edits from the original live production or even replace shots. You can use the ISO recordings from ATEM or relink to Blackmagic RAW camera files for finishing in Ultra HD!
Advanced Noise Reduction
Two powerful tools restore noisy digital footage, even if captured in low light. The GPU-accelerated temporal noise reduction algorithm removes noise while intelligently retaining areas of high detail. While the spatial noise tool analyzes the remaining noise pattern to lift it from the image.
Optical Flow Speed Change
The advanced retiming algorithm analyzes a scene’s content, building new frames so you can slow down and extend the action in a sequence without repairing or blending frames into each other. Every frame created with optical flow is sharp, and intelligently constructed from existing visual data.
Mix 2,000 Tracks in Realtime!
Fairlight Audio Core is a low-latency, next-generation audio engine that intelligently manages workloads by using all CPU cores. That means sound elements can be split into as many tracks as needed. You get up to 2,000 tracks, each with real-time EQ, dynamics, and 6 plug-ins, all on a single system!
Color Warper for Refined Grading
The mesh-based warping tool lets you adjust two color parameters at once. You can adjust both hue and saturation or chroma and luma. Adjustments are made by dragging control points, with smooth falloff for clean, natural-looking adjustments. It’s a new way to transform color in your images!
Track and Follow Objects
The tracker palette lets you effortlessly follow objects and people to apply secondary grading or effects. When a window is placed on a subject, the tracker can follow its contents in 3D space, resulting in a quick and accurate mask. You can easily emphasize vital elements of a scene!
Hardware and Software Integration
Streamline your workflow with editing keyboards, grading panels and audio consoles designed to work with DaVinci Resolve software. Faster than just software, dedicated features are placed directly at your fingertips. Adjust multiple parameters simultaneously on the same panels used in Hollywood!
All-In-One Solution for Post Production
DaVinci Resolve is divided into “pages”, each gives you a dedicated workspace and tools for a specific task. Editing is done on the cut and edit pages, visual effects and motion graphics on the Fusion page, color correction on the color page, audio on the Fairlight page, and media organization and output on the media and deliver pages. All it takes is a single click to switch between tasks!


Edit
The world’s fastest and most advanced professional NLE
The edit page is the world’s most advanced professional non-linear editor. The familiar track layout, dual monitor design, and traditional workflow make it easy for new users to learn while still being powerful enough for professional editors. It’s perfect for larger projects such as feature films, television shows, streaming, commercials, documentaries, and more. The edit page features drag-and-drop editing, context-sensitive automatic trimming tools, fully customizable keyboard shortcuts so you can work faster, and a library full of hundreds of titles, transitions, and effects that you can add and animate. You also get complete media management, organization, and timeline management tools.


Cut
Designed for editors to turn around work fast!
The cut page is perfect for projects with tight deadlines that you have to turn around quickly. The cut page has a streamlined interface that’s fast to learn and designed for speed. Features, such as source tape, dual timelines, fast review, and smart editing tools help you work faster than ever. The sync bin and source overwrite tools let you quickly edit multicam programs. It’s also great for documentaries and now live broadcast editing and replay. Multi Source is the fastest way to see your cameras and edit to the timeline while the cameras are still recording! Everything on the cut page is action-based so every click does something. That means you’ll spend more time editing and less time hunting for commands.


Color
Hollywood’s favorite color corrector!
The DaVinci Resolve color page is Hollywood’s most advanced color corrector and has been used to color and finish more high-end feature films and television shows than any other system! It’s also approachable with features designed to make it easier for new users to get great results while they continue to learn the advanced tools. For example, primary control sliders will be familiar to anyone who’s used image editing software, making it easy to adjust contrast, temperature, midtone detail, saturation, and more. The color page has an incredible range of primary and secondary color grading features including PowerWindows™, qualifiers, tracking, advanced HDR grading tools, and more!


Fusion
Cinematic quality visual effects and motion graphics!
The Fusion page lets you create cinematic visual effects and broadcast-quality motion graphics right inside DaVinci Resolve! Fusion features a node-based workflow that makes it faster and easier to create sophisticated effects and animations than you could ever create using a layer-based approach. You get hundreds of 2D and 3D tools for visual effects and motion graphics, along with advanced animation curve and keyframe editors that allow you to create incredibly organic and realistic animations. Fusion has everything from point, planar, and 3D camera tracking to rotoscope and keying tools for creating photorealistic composites, stunning animated titles, 3D particle systems, and more!


Fairlight
Professional tools designed for audio post-production
The Fairlight page features hundreds of pro tools for audio post-production. It’s like having a professional digital audio workstation (DAW) built into your editing and color system! Familiar keyboard-based editing tools let you work extremely fast. The Fairlight Audio Core lets you work with up to 2,000 tracks at a time with real-time effects, EQ, and dynamics processing! You get sample-accurate editing tools, advanced ADR and Foley, and Fairlight FX such as reverb, de-esser, hum remover, and more. IntelliTrack AI tracking lets you use video to track the Fairlight audio panner and you can mix and master stereo, 5.1, 7.1, and even immersive 3D audio formats including 5th order ambisonics!


Media & Delivery
Incredibly wide format support, finishing. and mastering!
The media and delivery pages have everything you need to import, manage, and deliver final projects. The media page is a dedicated full-screen workspace that lets you prepare footage, sync clips, organize media into bins, and add metadata before you start editing. Use the clone palette to ensure every bit of data in the camera media cards is copied during backup. During edit or grading, stream video outputs to a remote client monitor via DeckLink. You can output and upload files to YouTube, Vimeo, and X from anywhere page using the quick export tool. The Deliver page gives you total control over all encoding options and formats, along with a render queue for exporting multiple jobs!


Resolve FX
DaVinci Resolve Studio 19 features over 100 GPU and CPU-accelerated Resolve FX such as blurs, light effects, noise, image restoration, lens flair, stylize, and more! Version 19 adds even more plugins such as background defocus for portrait shots and film look creator. Film look creator alters color shading, vibrance, hue, and the luminance of an image so you can easily apply many film looks. You can even add film grain! There are improvements to the face refinement box and profile handling, additional controls for skin refinements, smoother sub-pixel animation, and finer control for directional blur. All Resolve FX effects can be applied and animated in the cut, edit, Fusion, and color pages!

DaVinci Neural Engine
The DaVinci Neural Engine uses state-of-the-art deep neural networks and machine learning, along with artificial intelligence to power features such as facial recognition, object detection, smart reframing, speed warp retiming, super scale up-scaling, auto color/color matching, and more! The DaVinci Neural Engine is entirely cross-platform, using the latest GPU innovations for AI and deep learning to provide unparalleled performance and quality. The DaVinci Neural Engine provides simple tools to solve complex, repetitive, and time-consuming problems. For example, it enables facial recognition to sort and organize clips into bins based on people in the shot, to reframe shots, and more.

Works with 3rd Party Plug‑Ins and Storage
With all the different workflows and systems available, you need a post-production solution that’s compatible and open enough to handle anything! DaVinci Resolve can be used with any type of storage ranging from direct-attached hard drives to NAS and SAN systems. You can extend DaVinci Resolve with third-party Open FX and audio plugins, or add third-party title and motion graphics templates. New workflow integration and encoding APIs let developers integrate workflow and asset management systems with DaVinci Resolve. Plus, it works with all major file formats and postproduction software, making it easy to move files between DaVinci Resolve, Final Cut Pro, Media Composer, and Premiere Pro.

DaVinci Resolve Studio Related articles
Description
DaVinci Resolve Studio and Fusion Studio
Resolve includes Fusion, but there are some limitations.
Fusion is the world’s most advanced 2D and 3D compositing, VR and motion graphics software and its built right into DaVinci Resolve! Featuring a massive toolset with paint, rotoscope, titling, animation, keying, 3D particles, support for importing and rendering 3D models, optical flow tools, stereoscopic 3D, retiming and stabilization, third-party Open FX plugin support, and much more. Fusion 17 Studio also includes unlimited distributed network rendering a Studio Player, along with a bin server for multi user collaboration that lets you track, manage, review and approve shots on large projects.
Click the comparison chart link below to see the differences.
Resolve Features In Depth
Collaboration
Designed for Collaboration from the Ground Up!
DaVinci Resolve is the world’s only complete post production solution that lets everyone work together on the same project at the same time. Traditionally post production has a linear workflow with each artist handing off to the next, introducing errors and mountains of change logs to keep track of each stage. With DaVinci Resolve’s collaboration, each artist can work on the same project, in their own dedicated page with the tools they need. Now Blackmagic Cloud lets editors, colorists, VFX artists, animators and sound engineers simultaneously work together from anywhere in the world. Plus they can review each other’s changes without spending countless hours re‑conforming the timeline.
Blackmagic Cloud Collaboration
DaVinci Resolve 18 supports the revolutionary Blackmagic Cloud, a whole new way of collaborating using cloud based workflows. Simply create a Blackmagic Cloud ID to log into the DaVinci Resolve Project Server and set up a project library for your project. You can assign any number of collaborators to a project, using Blackmagic Cloud to share projects. Multiple people can work on the same timeline! When changes are made, you can see and accept them in the viewer, changes are only applied when you accept updates. A single click can relink files, update timelines, or view changes. Built in timeline compare tools let you merge changes into a master timeline so others can continue with edits.
Blackmagic Cloud ID
Creating your Blackmagic Cloud ID is easy and there’s no charge! Simply click on the cloud icon in the DaVinci Resolve project manager to go to the Blackmagic Cloud website. Or you can go to the cloud icon on the Blackmagic Design website. Once you have your ID you can log in and set up your DaVinci library. This is where you create or upload projects to the cloud server. Simply select a server close to you and name your library. With your project library set up, create or import your project into Blackmagic Cloud and you are ready to start collaborating. Invite others with their Blackmagic Cloud ID to share the project and you can instantly have dozens of people all working on the project!
Media Sync Using Dropbox
Why pay for expensive subscription cloud storage with monthly charges for unused space, or dedicated share SANs with bandwidth limited VPNs? Sharing your media with your friends or other collaborators can also be done with media sharing tools such as Dropbox. You can select to sync media between computers, so everyone has a local copy of the project and can work fast. Everyone working on the project will automatically see changes made by others. New files added to Dropbox will also be automatically synced and appear in the project. You can use your local drive, or if you have multiple projects and need more space you can use network storage drives such as the new Blackmagic Cloud Store.
Blackmagic Proxy Generator
Camera original media is growing larger as sensor resolutions increase. So a new workflow is needed. The Blackmagic Proxy Generator, free with DaVinci Resolve, automatically creates proxies from camera originals. Simply select a size and type for your proxy, H.264, H.265 or ProRes and then select a folder or multiple folders as watch folders. Any original media placed there, even within a file tree, has proxies generated and placed in sub folders. These proxies are automatically linked by DaVinci Resolve to the original media. The proxy folder will also include audio files, image files, anything but camera originals. You can also extract proxies for offline work to share via Dropbox.
Use Your Own Storage
DaVinci Resolve is the only complete post solution that lets you use the storage of your choice. You don’t need to buy expensive, proprietary storage or hire an entire IT department to use or manage it! DaVinci Resolve 18 gives you the flexibility to use your own locally attached drive, or you can use network storage such as the new Blackmagic Cloud Store. The Blackmagic Cloud Store and Cloud Store Mini are very fast, high capacity network disks that are designed to handle large media files used on Hollywood feature films. The design uses advanced flash memory so easily handles lots of simultaneous users. Or turn any USB‑C disk into network storage using the Blackmagic Cloud Pod!
On Set Cloud Workflows
On set to cloud workflows have traditionally locked users into a restrictive subscription and expensive cloud storage. Blackmagic Cloud puts you in control of your workflow and is charged based on monthly usage. While on set, camera originals are copied to your local Blackmagic Cloud Store where you can sync sound and create a timeline. The Blackmagic Proxy Generator is watching for these new clips and auto generates proxies. While these are synced via Dropbox you can color grade the clips and publish the timeline. All collaborators can open your timeline using their Blackmagic ID and the Dropbox synced proxy media to see your grades live while providing feedback with the built in chat.
Blackmagic Cloud Presentations
Currently in private beta, Presentations is a new feature that is also accessible using your Blackmagic Cloud ID. You get feedback on your work in progress without the complications of VPNs or the security risk of shipping files. Publish a timeline or clip directly from DaVinci Resolve into Presentations, or manually upload and then authorize a list of Blackmagic IDs that can have access to review. Presentations that have been uploaded can be reviewed at any time, even within a video conference or chat window. Shared markers and comments are automatically and bidirectionally relinked with DaVinci Resolve. Now it’s easier than ever to gather frame accurate and collaborative feedback.
Private Project Server App
When security is paramount and you need to use VPNs and firewalls to meet accreditation regulations, or you’re setting up a collaborative workgroup within a private network, the DaVinci Resolve Project Server application gives you full control. This major update in version 18 offers a significant speed increase when opening and saving projects, and for sharing them across a private network. Share projects with editors, colorists, VFX artists, audio engineers on and off site to allow artists to continue to work remotely from home or while traveling on another job. DaVinci Resolve Project Server is free so you can share the same project or timeline with people simultaneously around the world.
Bin and Timeline Locking
Automatic bin and timeline locking let multiple people work without overwriting each others work. One user can create bins for organizing footage, add metadata and create string outs while another works in a different bin. Bins and timelines are “read only” until unlocked by the current user.
Secure Built In Chat
DaVinci Resolve features built in chat so team members can talk about shots, review tasks and share creative ideas without leaving the software. Editors can quickly message assistants, audio engineers, colorists and VFX artists to talk about work, producers can get status updates and more.
Visual Timeline Comparison
The revolutionary timeline comparison tool lets you visually see the differences between two versions of a timeline. You’ll be able to see exactly where footage has been added, deleted, moved or trimmed. This makes it super fast and easy to see, review and accept new changes as they are made!
Shared Markers
DaVinci Resolve lets you create private or shared markers. Personal markers are private and can only be seen by you, while shared markers can be seen by other people working in the project. This makes it easy for you to annotate clips, write notes and share ideas between other users.
Individual Monitoring and Caching
Each user in a collaborative project can generate and manage their own cache files and set their own monitoring preferences to optimize the performance of their specific system. You can also open collaborative projects in read only mode to review cuts or copy items without affecting other users.
Matching Grades Between Colorists
While the editors are creating the timeline and adding effects, the colorists and their assistants can select any clip and start grading simultaneously! Individual clips are auto locked while they are being graded so they can’t be overwritten, and each colorist knows who is grading which shot.
Live Save Changes Automatically
DaVinci Resolve features live save, which allows multiple users to constantly save small and incremental changes to the project’s database while working in real time. This means no-one loses the work they’ve completed since the last back up if they are interrupted or forget to save as they go!
All In One Solution for Post Production
DaVinci Resolve is divided into “pages,” each of which gives you a dedicated workspace and tools for a specific task. Editing is done on the cut and edit pages, visual effects and motion graphics on the Fusion page, color correction on the color page, audio on the Fairlight page, and media organization and output on the media and deliver pages. All it takes is a single click to switch between tasks!

Edit
The world’s fastest and most advanced professional NLE.
The edit page is designed to be easy and intuitive for new users, yet powerful enough to give professional editors all the tools and control they need! You get drag and drop editing for quickly building a story and moving shots around, as well as traditional three point editing tools used by industry editors. Plus, DaVinci Resolve is faster because it features an automatic trim cursor that changes depending where you click in the timeline, so you don’t have to waste time continually going back and forth changing tools. The edit page also includes dozens of transitions, effects and titles that make it easy to create professional work for broadcast television, feature films and online streaming!
Quickly Import Video
Getting files into DaVinci Resolve is as easy as dragging and dropping! The media pool at the top left of the screen contains all the clips in your project. To get started, simply find files you want to import on your hard drive, drag them into the media pool and start editing. You can even drag entire folders with subfolders into the media pool and maintain their structure. DaVinci Resolve is designed to work with virtually all professional video and audio file formats ranging from H.264 and H.265 to ProRes, DNx, Blackmagic RAW, EXR and more. Whether you’re shooting on an iPhone or using a high end digital film camera, you’ll never have to waste time copying, transcoding or moving files.
Mark Clips
Marking clips using “in” and “out” points lets you refine the portion of the clip you want to use in the edit. Double click a clip to load it into the source viewer on the left. Drag the playhead to the frame you want, then click the in and out buttons at the bottom right corner of the viewer to mark the start and end points of the clip. You can also use the I and O keyboard shortcuts for a faster workflow. Audio and video can be marked separately to create split edits where the audio starts before or after the video. Turning on audio waveforms lets you visually see where sentences start and stop, and you get tape style audio scrubbing so it’s easier to find the part of the clip you want.
Edit Clips Into the Timeline
You can drag and drop clips directly into the timeline or the timeline viewer on the right, where you will see an overlay with editing options. The edit overlay gives you instant access to the most popular types of edits, letting you quickly choose between insert, overwrite, replace, fit to fill, place on top, append at end, and ripple overwrite without having to remember shortcut commands. Once you’re familiar with the different types of edits, you can use the buttons for the most common edit types on the toolbar or use keyboard shortcuts to work even faster. After you’ve placed a few clips on the timeline, you can rearrange them using the swap and shuffle commands.
Insert
Inserts a clip into the timeline at the location of the playhead and pushes everything else down to make room for it. If the playhead is in the middle of a clip, it will split the clip and place the new clip in the middle.
Overwrite
The overwrite edit is one of the most common types of edits. When you perform an overwrite, it will place a new clip on the timeline at the location of the playhead, writing over whatever clip or clips were there before.
Replace
Replaces a single clip on the timeline with one of the exact same length. The “out” point of the clip you are editing into the timeline will be changed so it fits perfectly, making it the same duration as the one it replaces.
Fit to Fill
Fit to fill takes the portion of the clip that you have marked and adds a speed change to speed it up or slow it down. The speed change is automatically calculated so it fits into the space you have selected on the timeline.
Place on Top
The place on top command puts the clip you’re adding to the timeline on the next available video track at the location of the playhead. Place on top is great for adding titles, graphics or creating picture in picture effects.
Append at End
Append at end places the source clip after the last edit on your timeline, regardless of where the playhead is located. You can also use it to add multiple clips from the media pool to the end of your timeline all at once!
Ripple Overwrite
Ripple overwrite replaces a shot of one length with a shot of a different length. Longer clips replace the clip in the timeline and push everything down to make room, while shorter clips pull things in so there are no gaps.
Automatically Trim and Tighten
Trimming lets you adjust the timing between clips so you can fine tune your edit. The smart trim tool automatically switches between ripple, roll, slip and slide based on the location of the mouse pointer. This makes DaVinci Resolve faster because you don’t have to waste time going back and forth to switch trimming tools. Select the trim icon in the toolbar, then click anywhere inside a clip or at the edge of a clip on the timeline. You’ll see the cursor change to different types of trim tools as you move your mouse. This is known as context sensitive trimming. You can trim during live playback, hear audio while trimming and even trim multiple points on different tracks at the same time!
Roll
A roll trim works on both the left and right sides of an edit at the same time. While one side is shortened, the other side is extended by the same number of frames so the overall length of your timeline remains the same.
Ripple
Rippling will extend or shorten the beginning or end of a clip. When you ripple an edit point, everything to the right of the edit is pushed down the timeline or pulled in to accommodate the clip’s new duration.
Slip
Slipping changes the portion of a clip that you see in the timeline by moving its “in” and “out” points. The white outline shows the full source clip duration, so you can fine tune it without affecting the surrounding edit.
Slide
Sliding changes a clip’s position on the timeline without changing its length. The clips on the left and right get shorter or longer as you slide the clip in the middle. You can think of a slide like a roll between 3 clips.
Transitions and Effects Library
The effects library has extensive broadcast quality transitions and special effects plug-ins. Simply click the effects library icon at the top left of the page to open it, select the effect you want and drag it onto a clip in the timeline or onto the cut point between clips when adding transitions. Transition duration can be changed by dragging the edges of the transition in the timeline or by changing it in the inspector at the top right. The effects library features over 30 different transitions such as wipes and dissolves, along with over 65 GPU and CPU accelerated effects, including blurs, flares, warps and more! Plus you can add 3rd party OpenFX plug‑ins for even more creative options!
Incredible 2D and 3D Titles
To create 2D or 3D titles, open the effects library at the top left of the screen, find the text generator or Fusion title template you want, and drag it into the timeline above your video tracks. Then use the inspector to type your text and adjust parameters such as font, size, color and more. The basic title generators let you build simple titles and lower thirds from scratch. The subtitle generator can be used to create perfectly timed subtitles. There are also dozens of Fusion title templates, which are professionally designed, pre-built 2D and 3D animated titles that you can customize to create professional looking cinematic titles without having to be a motion graphics expert!
Animate Any Clip or Effect Setting
Clip settings can be viewed in the inspector at the top right of the screen. You can change or animate any setting over the clip’s duration using the diamond keyframe buttons. Simply select a clip to see its parameters, adjust a setting, click the keyframe button, move the playhead to a different frame and repeat the process! You can also use the on screen controls to animate common transform parameters such as position, size and rotation. For even more control, click on the small keyframe and curve icons on the animated clips in the timeline to open the keyframe and curve editors. These allow you to move keyframes, adjust timing and set animation ease controls for virtually all parameters.
Create a Soundtrack
The edit page features a complete set of professional Fairlight audio controls and plug-ins. You can set levels in the timeline by clicking on the level bar in the middle of an audio clip. The inspector features a level slider too, along with controls for panning, pitch and a full 4 band parametric equalizer. To change the level on an entire track, simply adjust the track’s fader in the mixer. The mixer has visual meters that let you monitor signal levels, ensuring the audio is not too quiet or loud. There are also over 20 Fairlight FX in the effects library that you can use to clean up dialog, remove hum and more. Plus you can switch to the Fairlight page at any time for even more options!
Deliver for Web, Broadcast or Cinema
The Quick Export option is the fastest way to deliver a file. To output your program, go to the Quick Export file menu and select Quick Export for one click access to the most popular delivery options. If you enter your account information, quick export will render and upload the finished video to your YouTube, Vimeo or Dropbox accounts, all in a single step! You can also create your own custom presets. Simply switch to the Deliver page, adjust your settings, and save it as a new preset, render and export from there! DaVinci Resolve can deliver files in a wide range of formats for the web, television broadcast, online streaming and even digital cinema packages for theatrical distribution.
Fine Tune Your Edit with Advanced Creative Tools!
Once you have mastered the basics, you will find that the edit page features an incredibly rich set of features that give you total creative control over every aspect of your work! You will be able to mix and master your soundtrack, add speed ramps, work with advanced editing and trimming tools for more sophisticated projects, use facial recognition to organize clips based on different characters, create picture in picture effects, work with multi cam footage, and so much more! Plus, DaVinci Resolve works with just about every type of video and audio file, and gives you a variety of different ways to manage your footage, which is especially useful when you are working on larger projects.
Dramatic Speed Ramps
The retime control command lets you create fast or slow motion footage from any clip. Variable speed changes, or speed ramps, allow the playback speed to change over time. For example, an action clip may start at normal speed, ramp down to slow motion for a few seconds, and then speed back up. You can create speed ramps in the timeline using the graphical curve editor for both frame position and playback speed. Simply move frames to any point in time and adjust the speed between them! Control the quality of retimed footage by choosing between optical flow, frame blending and nearest frame rendering. DaVinci Resolve Studio has advanced speed warp for incredibly fluid, crystal clear quality!
Picture in Picture Effects
You can create picture in picture effects using the on screen controls in the viewer or by adjusting clip transformation settings in the inspector. The on screen controls can be enabled in the pop up menu at the bottom left of the timeline viewer. Just stack two clips in the timeline, select the one on top, and use the on screen controls to resize and reposition the clip anywhere in the frame. You can animate the effect by clicking the diamond keyframe button in the inspector, moving the playhead and then changing the position, rotation or scale of the clip. You can even drag a drop shadow from the effects library onto the clip in the timeline to make the picture in picture stand out!
Dynamic Zoom
Dynamic zoom is an incredibly easy and fast way to reframe and add gentle push in or pull out animations to any shot. Dynamic zoom is ideal for adding extra drama and interest to shots which would otherwise be just static. Best of all, you don’t have to know anything about animation to use it! Just select a clip in the timeline, then turn on dynamic zoom in the inspector. When you have selected the clip, green and red boxes will appear in the viewer over your image. The green box shows where the shot will be framed at the beginning of the clip and the red box shows where it will be framed at the end. Simply drag and resize the boxes to your desired start and end positions, then press play!
Image Stabilization
The inspector features built in stabilization and lens correction controls for every clip in the timeline. The edit page uses image warping and translation to smooth out or even lock down unwanted camera motion in a clip, while preserving the motion of individual objects in the frame. You’ll see options for camera lock, zooming, crop ratio, smoothing and strength in the inspector. These let you determine how much stabilization you want to apply. For example, you might just want to remove a camera bump or two, naturally reduce the slight shakiness often found in handheld shots, or lock it down entirely so it looks like a static shot. Just choose your settings and click the stabilize button.
Smooth Jump Cuts
Jump cuts occur when you have two different parts of the same clip next to each other on the timeline. For example, if you cut a sentence or phrase out of the middle of an interview clip you’ll end up with a cut that visually jumps from the interviewee sitting in one position to a slightly different position. Normally, you would try to cover these types of cuts with another camera angle or B roll, because they’re visually jarring. The smooth cut transition uses advanced optical flow image analysis to remove the jump cut so it looks like one continuous take. It is applied like any other transition. Just drop it between two clips on the timeline and adjust the duration until it’s perfect!
Professional Trimming
The edit page features more advanced trimming tools than any other system! You get context sensitive cursor tools, as well as dynamic JKL trimming which lets you trim during looping playback. Asymmetric trimming is perfect for quickly opening or closing gaps in the timeline because it lets you trim in different directions at the same time. You can also select and trim multiple clips on the same or different tracks. There are track targeting, locking, and sync tools in the headers at the left of the timeline so you can manage sync relationships when working on complex multitrack edits. Plus, there are trim commands that let you quickly extend or shorten an edit, trim to the playhead and more!
Stacked and Tabbed Timelines
The fastest way to edit clips and scenes between timelines is to use the stacked and tabbed timeline features. Simply click the timeline view options icon at the top left of the timeline window to activate tabs. Timelines can be stacked vertically so you can drag and drop clips between them, or tabbed across the top of the timeline window so you can quickly switch to a new scene, copy the clips you need, switch to another timeline and paste them in! This lets you have multiple timelines open at the same time, which is essential when you’re working in larger, more complex projects or when you’re working with assistant editors and other collaborators in the color, Fusion or Fairlight pages.
Timeline Curve Editor
Animation doesn’t just refer to moving objects! Any setting can be changed over time. For example, you can animate the opacity of a clip from 100% to 0 over the course of a few seconds. When you do this in the inspector, the rate of change is constant, or linear. The curve editor lets you see keyframe positions and animation curves directly under each clip in the timeline. Simply click on the curve icon at the bottom right corner of the clip to open the curve editor. Using the drop down list on the left side, select the parameter you want and use the bezier tools to create your own custom ease in and out curve. Keyframes can be copied, pasted, moved in groups and edited as needed.
Audio Overlays and Scrubbing
A visible audio waveform in the source viewer simplifies the process of marking interview and dialogue clips! Click the option menu, which looks like three dots, at the top right of the viewer to enable audio waveform overlays. This allows you to quickly navigate to different parts of a clip based on spikes, silent areas or other visual cues in the audio waveform. Tape style audio scrubbing makes it possible to understand dialog while playing back at slower speeds. The combination of tape style scrubbing and audio waveform overlays lets you quickly and precisely find the parts of the clip you want. It’s also easier to create split edits where the audio starts before or after the video.
Adjustment Clips
Adjustment clips make it easy to add an effect or color correction over multiple clips in the timeline. They work from the top down, so any effect you add to an adjustment clip will be applied to all the clips below it. For example, if you want to add the same analog film look to a series of clips in the timeline, drag a new adjustment clip from the effects library and place it on a higher video track over your clips. Trim it to the desired length, add the analog damage effect and adjust its settings in the inspector. All of the shots under the adjustment clip will have the same effect! You can even custom name adjustment clips and drag them back into a bin in the media pool for use later!
Multicam Editing
While the cut page features super fast syncing and smart multicam edit tools for fast turn around projects, the edit page features a full multicam interface with everything you need for editing larger, more complex projects with 4, 8, 16 or more cameras. The multicam viewer lets you see all cameras playing back at the same time. It also features keyboard and mouse controls for fast cutting and switching with separate audio or video only options, and highly accurate syncing via audio waveform, timecode or in/out points. Once edited, you can refine your trim points and change clip angles in the timeline. You can even step into the multicam clip to trim and color correct angles independently!
Custom Keyboard Shortcuts
DaVinci Resolve lets you customize and save your own keyboard shortcuts. There are even built in presets for other application shortcuts, which makes it easier if you’re switching to DaVinci Resolve from other editing software! Virtually every command and tool, including context sensitive menu items, can be assigned a keyboard shortcut. Simply select keyboard customization from the DaVinci Resolve menu at the top left of the screen. The visual interface lists all available commands and currently assigned shortcuts. Press on any key to see what is in use and what else is available. Once you’re done, you can save your own preset and even export it for use on other DaVinci Resolve systems!
Subtitles and Closed Captioning
The edit page includes an intuitive set of tools for closed captioning and subtitles including support for importing timed text TTML, SRT, XML and embedded MXF/IMF subtitles. You can relink subtitle entries in the media pool or create them from scratch, without the need for expensive third party software. Subtitles appear in the timeline above of your video tracks and can be moved and trimmed like any other media. You can switch between subtitle tracks for different languages and add multiple captions per track. In the inspector, adjust track styles, change font, color, size, position and more! Subtitles can be rendered into the final video or exported as separate TTMLs, SRT or VTT files.
Markers and Annotations
Markers are small indicators on a clip or timeline that can act as reminders about things you need to work on, shots that you like and more. Markers can be color coded, have a title, text description and keywords, and they can be set to any duration you’d like. Annotations are on screen notes or images used to leave comments or feedback on clips. You can enable annotations in the pop up menu at the bottom left of the timeline viewer. There are tools for highlighting, drawing and even typing or adding basic shapes. Markers and annotations help to keep you organized when working on larger projects and when collaborating with others. Annotations can even be shared with remote collaborators.
Organize Media In Bins
When you add clips into the media pool, you can create folders called “bins” to organize them. Select “New Bin” from the file menu and then simply drag the clips you want into the bin. Making bins is as easy as creating folders on your hard drive! The media pool has buttons to switch between icon and list view, along with a search tool for finding media, and a sidebar that displays the master bin hierarchy. You can also create smart bins that automatically sort footage based on metadata such as camera, date, scene and more. DaVinci Resolve Studio even features advanced facial recognition technology powered by the DaVinci Neural Engine to automatically create bins for individual characters!
Advanced Facial Recognition
DaVinci Resolve Studio features advanced facial recognition technology that helps you automatically organize footage into bins based on facial features of the people in each scene. Simply select a group of clips, right click and choose “Analyze for People”. The DaVinci Neural Engine uses machine learning and AI to detect different faces in your clips and automatically create bins based on the people in each shot. People will automatically appear in the list of smart bins in the media pool sidebar. You can name and manage them by opening the “people” window from the workspace menu. Facial recognition lets you organize footage faster than ever, leaving you with more time to focus on the edit!
Cut
Designed for editors to turn around work fast!
The cut page is perfect for projects with tight deadlines that you have to turn around quickly. It’s also great for documentary work. The cut page has a streamlined interface that’s fast to learn for new users and designed for speed. Features such as source tape, dual timelines, fast review, and smart editing tools help you work faster than ever. The sync bin and source overwrite tools are the fastest way to edit multicam programs, making it easy to create perfectly synchronized cutaways! Everything on the cut page is action-based so every click does something. That means you’ll spend more time editing and less time hunting for commands. Plus, the scalable interface is great for portable editing!
Designed for Speed
With a second page for editing, DaVinci Resolve is free to introduce new innovations to edit faster than using traditional edit software. The cut page can sometimes confuse experienced editors as it’s a little different! However you can simply switch between cut and edit pages to use any combination of edit tools! In the cut page everything is live with only a single click to complete each task. The source tape lets you visually scroll all your clips at once to eliminate wasting time with media management. The sync bin allows non real time multi-cam so you can edit in higher resolutions! The cut page even supports small monitors! This means you spend more time shooting and less time editing!
Hardware and Software Combined!
Traditional edit software might look familiar, however it hasn’t changed much in 30 years! Traditional software is designed for a computer mouse, so won’t support hardware panels well. The dual timeline is perfect for a dedicated hardware controller and the search dial allows fast scrolling for editing and trimming. You see the whole timeline and edit point simultaneously! Plus there’s no annoying horizontal and vertical scroll bars! The single viewer with source tape eliminates clicking thousands of clips to select shots. Even trimming is live and uses the search dial for amazing speed and accuracy. Plus all edits are intelligent, so most of the time you don’t need in or out points!
Dual Timelines
Zooming in and out of edit timelines is very slow! The dual timeline means you never have to zoom again! The upper timeline shows you the entire program while the lower timeline shows you a zoomed in area of where you’re working. This means the lower timeline is always zoomed to the perfect amount so the trim tools work perfectly. Both timelines are fully functional, allowing you to move and trim clips in whichever timeline is most convenient. Simply drag between timelines to move a clip anywhere in your edit. Only the dual timeline lets you see both your edit as well as the whole timeline at the same time!
Automatic Trim Tools
Trimming is incredibly fast because trim tools are selected automatically! Simply move the mouse around the edit point and each trim tool will be selected based on the mouse position. The mouse icon will change so you know what trim tool has been selected. When you start trimming, a trim editor will appear in the viewer so you can trim with greater accuracy. In the trim editor, the clips are laid out in a film strip with each frame visible, so frame accurate edits are simple and fast. That means there are 3 places you can trim, the upper timeline, the lower timeline and the trim editor! All edit modes are supported, including trim in and out, roll edit, transition duration, slip and slide.
Intelligent Editing
The cut page features the “smart indicator” that points to where edits will be performed, which also means most of the time you don’t need to waste time placing in or out points on the timeline. This allows you to work faster as the smart indicator will move from edit to edit as you scroll the timeline. For example to insert a clip, simply select the portion you want in the viewer and then click the smart insert button on the toolbar. The clip is added at the nearest edit point and the timeline will ripple! Most edit modes work without in or out points so it’s faster to insert or append clips, create close‑ups, add synchronized cutaways from b‑roll and more.
Smart Insert
Inserts a clip at the edit point located nearest the playhead and pushes everything else down the timeline to make room for it. Select a new source clip from the media pool, set in and out points, then click the smart insert button on the toolbar!
Append at End
Append at end lets you add a clip or group of clips to the end of a timeline, regardless of the location of the playhead! Just choose the clips you want and then click the append at end button on the toolbar to add them to the end of your timeline.
Place On Top
Place on top adds a new clip to the next upper track in the timeline. When you select a clip in the media pool and use the place on top command, the new clip will be added above the current track on your timeline at current timeline scroll position.
Close Up
The close up command uses AI and machine learning in the DaVinci Neural Engine to automatically find faces in a shot and zoom into them. This lets you quickly cut in and add close up shots without having to manually zoom in and reframe the shot!
Ripple Overwrite
Ripple overwrite replaces a clip on the timeline with a new clip, even if the new clip is a different length. If the new clip is a different duration, the timeline will be rippled longer or shorter to make space for the new clip.
Source Overwrite
Source overwrite is the fastest way to make synchronized cut aways from different camera angles! Set an in and out point on the cutaway you want, then source overwrite will add the clip on the track above, perfectly synchronized to the layer below.
Source Tape
Finding a clip in a bin with thousands of files can be slow and frustrating! With source tape, you no longer have to waste time hunting through bins to find the clip you need. Simply click on the source tape button and all of the clips in your bin appear in the viewer as a single long “tape”. This makes it easy to scroll through all of your media because you’re doing it visually! Simply scroll your media, find a shot you like, then edit it into the timeline! Plus it won’t switch to the timeline after an edit, so you can keep scrolling the source tape and adding shots you like to the timeline. If you’re working with unknown media then the fast preview lets you fast play the whole source tape.
Professional Trimming
DaVinci Resolve has a range of trim tools for fine tuning your edit to make it perfect. To trim in or out, simply drag to the left or right of the transition point and move the ends of the clips! Trimming the in or out point will also ripple the timeline duration automatically. If you want to slip a clip in the space it has in the timeline, then just click the slip icon located at each clip’s mid point. To roll and edit point, just click in the middle of the transition and slide it forward and back. You also get an A/B trimmer in the viewer once you start trimming. Plus when trimming, the clip audio will automatically zoom in so you can position your edit perfectly against dialog or music.
Roll
A rolling trim works on both the left and right sides of an edit at the same time. While one side of the edit is shortened, the other side will be extended by the same number of frames. That means the overall length of your timeline remains the same.
Trim
To trim in or trim out, simply drag on either side of the edit point, and the source or destination clips can be trimmed and you can see the effect on the edit instantly. Trimming the clips will automatically ripple the timeline duration.
Slip
Slipping changes the portion of a clip that you see in the timeline. The space for the clip stays the same, but the clip moves up and down. A white outline shows the full source clip duration, so you can see the clip’s handles as you adjust it.
Slide
Slide uses the same icon as slip, however you shift click. This allows you to move a clip up or down the timeline without affecting its duration. The clips on the left and right will get longer or shorter. It’s like a rolling edit with 3 clips!
Duration
If you need to adjust the duration of a transition such as a dissolve or wipe, then you can click the edge of the transition icon at the edit point. Now you can drag the duration length directly. A tool top will show a numerical duration time value.
Trimming with Audio
Clicking the new audio trim icon on the left side of the upper timeline will allow you to see a magnified view of the audio waveform while you are trimming. You can see waveforms and trim audio in the lower timeline and in the graphical A/B trimmer.
Viewer Trimming
The cut page features a large, graphical trimmer that lets you view and trim edit points with extreme accuracy. Also known as an A/B trimmer, this graphical view lets you see both clips in an edit at the same time. Double click any edit point to open the graphical trimmer in the viewer. The left clip is called the “A” clip and will be displayed on top, while the “B” clip on the right side is displayed below. You can see exactly where the trim point is and adjust each side with numeric frame counters and nudge tools. That means you can trim in 3 locations, the lower timeline, the upper timeline and the trim editor! When you’re done, click anywhere in the timeline to close the trim editor.
Sync Bin for Multicam Editing
The sync bin is the world’s fastest and most innovative way to select the perfect cutaway when doing multi camera shoots. Using the sync bin is easy and it’s much better than a traditional multi-cam feature. Just select the sync clips icon and DaVinci will find all clips that sync to the timeline and display them in a multiview. Simply scroll up and down the timeline and you will see all the clips that sync to the point in the timeline so you can pick the best cutaway. Then click the view with the mouse and then adjust the in and out points to select the cutaway you want. Now use the source overwrite edit mode to add this selected clip to the timeline, perfectly synced to the clip below!
Clip Inspector
The inspector allows you to change audio and video settings, plus it includes keyframe buttons that let you animate over time. There are tabs at the top for video, sizing, audio, effects, file metadata and transition controls. The video tab lets you set blend modes, stabilize shots, correct lens distortion and more. In the sizing tab, you can reposition, crop and scale images. The audio tab lets you adjust sound levels, pan, pitch and EQ. The effects tab displays all of the options for effects you’ve applied and the file tab lets you edit and view clip metadata, as well as access RAW image controls.
Transform, Color, Audio and Text
While the full inspector provides control over a wide range of settings and keyframe animation, the tool strip in the viewer is designed to give you faster access to more common settings and controls. It’s perfect when you need to make a quick adjustment! Click the tools icon at the bottom left of the viewer to display the consolidated tool strip under the image. You’ll see icons for transformation tools used to create picture in picture effects, cropping, audio level adjustments, speed changes, stabilization, lens correction, dynamic zoom and more. That means you’ll be able to quickly make basic adjustments without ever having to open the inspector or leave the cut page!
Transitions and Effects
Instantly access and apply over 100 transitions, effects and title templates! Because DaVinci Resolve is used on high end Hollywood films, the effects are true simulations of lenses and the way light behaves. Transitions include dissolves, iris effects, motion and shape transitions, wipes and more. Effects are organized into categories such as blurs, color, lighting, stylize, warping, texture, and more. Any effect or transition can be previewed by hovering the mouse over the effect title and moving the cursor left to right. That lets you preview an effect applied to your clip before you use it! To add an effect or transition, simply drag it to a clip and adjust its settings in the inspector!
Stunning 2D and 3D Titles!
The cut page features title generators that let you build simple titles and lower thirds from scratch. Click on titles at the top left of the screen, select the type of title you want and drag it to the timeline. You can use the inspector to type your text and adjust parameters such as font, size, color and more. There are also dozens of professionally designed and animated Fusion title templates. You’ll see both 2D and 3D animated titles in the title library that you can hover over with the mouse to preview. Fusion title templates let you create cinematic titles without having to be a motion graphics expert! You can even download and install additional third party title templates.
Detect Boring Shots and Jump Cuts
You could risk losing your audience if you hold a shot for too long! The boring detector automatically analyzes and highlights clips in the timeline that may be too long. It can also highlight quick jump cuts that may be distracting to viewers. To set up the boring detector, click on its icon on the left of the upper timeline. The top of the window lets you define the maximum length for shots before they are considered boring. The bottom lets you decide the minimum number of frames for jump cuts. When you click the analyze button, grey highlights appear on boring sections of the timeline and red highlights appear on jump cuts, making it easy to spot the sections you need to work on!
Works with Small Screens
The new cut page is designed to work well on smaller laptop screens. The user interface automatically scales and reconfigures itself to give you the highest amount of usable space so you can edit quickly and get your program finished! When you move to a larger display the user interface scales up beautifully, giving you even more room to keep working. That means you won’t have to open and close windows or slide things around as you work. There are even menus for importing media and rendering finished edits so you can complete all work in the cut page and you don’t need to use the other pages! Every feature on the cut page has been designed to save space and allow editing on smaller monitors.
Import and Sort Media
The cut page works with virtually all native camera formats, so you don’t have to convert media files or create proxies before you start editing. The media pool at the top left of the screen features buttons to quickly import individual files or entire folders of clips. When you bring in a folder with subfolders, they’ll be imported with the same structure. You can click the buttons at the top of the media pool to switch between icon, filmstrip, a customizable list, or slate view. Each view can be sorted and the new slate view displays a thumbnail along with the most relevant clip information such as shot, scene, take, name, or timecode. Metadata can also be edited in the new inspector.
Quick Export
When you’re on a tight deadline you need to be able to deliver finished programs fast. The quick export tool lets you quickly render and upload your finished program to online services such as YouTube, Vimeo, Twitter and more. To set it up, just login to the service you want from the DaVinci Resolve preferences menu. You’ll find presets for YouTube, Vimeo and Twitter, along with presets for creating ProRes masters and exporting H.264 or H.265 files. You can also create your own quick export presets for saving local files. Best of all, the quick export menu is now available on all DaVinci Resolve pages so you can instantly render out a finished edit without using the deliver page!
Color
Hollywood’s favorite color corrector!
The DaVinci Resolve color page is Hollywood’s most advanced color corrector and has been used to color and finish more high-end feature films and television shows than any other system! It’s also approachable with exciting new features designed to make it easier for new users to get great results while they continue to learn the advanced tools. For example, new primary control sliders will be familiar to anyone that’s used image editing software, making it easy to adjust contrast, temperature, midtone detail, saturation, and more. The color page has an incredible range of primary and secondary color grading features including PowerWindows™, qualifiers, tracking, advanced HDR grading tools, and more!
Balance Image Color
Balancing color is the first step in the color correction process. This is done with the primary correction tools, which are located at the bottom left of the screen. Primary tools affect the entire image and you use them to adjust brightness and color levels to remove unwanted tints and to create a neutral starting point. Each wheel is mapped to a different part of the tonal range. You can simply click and drag inside a wheel to adjust that range’s color, then use the master dial below the wheel to change its overall level. This palette also has adjustment controls, primary bars and log controls. Once shots are balanced, you can begin the creative grading process to create unique “looks”.
Primary Wheels
The primary color wheels let you adjust balance and brightness in overlapping tonal ranges called lift, gamma and gain (also known as shadows, midtones and highlights). The offset wheel adjusts the whole image.
Primary Adjustment Controls
The primary palette contains incredibly powerful primary adjustment controls that let you quickly adjust image contrast, saturation, hue, temperature, tint, midtone detail, color boost shadows, highlights and more. They’re an indispensable set of creative tools that you’ll use every day! For example, midtone detail lets you adjust contrast in areas with high edge detail to increase or decrease image definition or sharpness. Color boost, also referred to as vibrance, intelligently adjusts areas of an image with low saturation, resulting in a subtle and more natural looking increase of color. Whatever your grading experience, these tools will help you quickly produce amazing results!
Primary Bars
The primary bars are an alternative to the primary wheels that allow for more subtle changes to individual color channels and luminance. They’re great when you need to make minor adjustments to color and balance.
Log Grading
The log grading wheels have more tightly defined tonal ranges for shadows, midtones and highlights than the primary wheels. They’re designed for film style grading and let you adjust one tonal area without affecting others.
Auto Balancing and Matching
Balanced and matched shots make content from different cameras look consistent. You can use the auto balance tools to quickly balance a group of similar shots. Simply click the auto color button at the left of the color wheels palette to balance the shot’s color and contrast. You can also match the color between different shots. Select a clip, right click on another clip, and select “Shot Match to This Clip” from the menu. Resolve will match the color, contrast and brightness of the clip you’re working on with the one you’ve selected. If a shot contains a chip chart, click on the color match icon in the toolbar, select the type of chart used, line it up on the image and click match!
Adjust Contrast and Color with Curves
While the primary wheels give you broad control, curves let you sculpt the color and contrast of an image with much finer detail. Curves can be displayed by clicking on the first icon in the center palette. Each curve lets you adjust a customizable region of the image based on hue, luminance or saturation. The default “custom” curves let you adjust red, green, blue and luminance curves independently, while displaying a live histogram to help guide adjustments. There are also five curves that let you select one thing, such as hue, and change another aspect of it such as luminance or saturation. For example, Hue Vs Sat lets you select a hue and then change the saturation of that hue.
Custom Curves
Curves let you adjust luminance and color based on tonal areas you define. For example, you can create smooth cinematic contrast adjustments, boost the red in your highlights while lowering it in the shadows, and much more.
Hue Vs Hue
The Hue Vs Hue curve lets you change any hue to any other hue. It’s great for subtly altering elements that require minor adjustments. For example, a sky that appears a bit too cyan can be made into a richer shade of blue.
Hue Vs Sat
The Hue Vs Sat curve lets you alter the saturation of any hue within the image. This allows you to quickly boost the saturation of elements you want to catch the viewer’s eye, while reducing the saturation of those you don’t.
Hue Vs Lum
The Hue Vs Lum curve lets you alter the lightness of elements of a specific color. It’s ideal for darkening specific hues to add richness and depth, or for lightening colorful elements to which you want to draw attention.
Lum Vs Sat
The Lum Vs Sat curve increases or decreases saturation in different tonal areas of the image with a nice smooth falloff. For example, you can boost saturation in the midtones while reducing it in the shadows to add depth.
Sat Vs Sat
The Sat Vs Sat curve is used to adjust a specific range of saturation without affecting the rest of the image. Simply click in the viewer to choose a value and increase saturation to make it “pop” or decrease to tone it down.
Secondary Color Correction
Selecting a specific area for color correction is called “secondary grading.” For example, you might want to change the color of a shirt without affecting the rest of the image. The qualifier palette lets you select and adjust part of an image based on hue, saturation or luminance. To start, click the eyedropper in the toolbar and then click and drag on the viewer to select the area you want. The selection is highlighted in the hue, saturation and luminance strips. Click the magic wand icon in the viewer to see the selection or “key”. Use the controls in the qualifier palette to enhance the selection, then use the wheels, curves and other tools to adjust the image until it’s perfect!
Target Objects Using Power Windows
While qualifiers target an area of the image based on color, luminance, or saturation, Power Windows let you define a selection by drawing shapes around specific objects in a scene. When you click on the Power Window icon, the palette shows you different geometric shapes, along with a pen tool and a gradient tool. Click on the icon for the shape you want and it will appear in the viewer. Drag the on screen controls to adjust its size, soften the edges, and place it exactly where you want. There are also options for manually adjusting size, pan, rotation, softness and much more. Once it’s set, you can apply color corrections to the area inside or outside of the shape!
Track and Follow Objects
The tracker lets you automatically animate Power Windows to follow moving objects in a scene. To open the tracker palette, click on the cross hair icon in the toolbar. You’ll see a playhead, along with options for analyzing the pan, tilt, zoom, rotation, and 3D perspective of the shot. With your Power Window still selected, choose the options that best match the camera’s movement, move the playhead to the beginning of the clip, and click the track forward button. The clip is analyzed and the Power Window will be automatically animated to follow the object in your shot! The tracker can also be used to stabilize images or to attach effects, such as a lens flare, to specific objects in a scene.
Work with Nodes
Nodes are the building blocks of color correction in DaVinci Resolve. The first node is usually used for image balancing, while additional nodes are used for more creative work. For example, your first node may be a primary correction, the second might isolate and improve the sky, and a third node could smooth out skin tones. Nodes let you create unique looks without compromising image quality as you would grading with layers. The node editor at the top right is like a flow chart. The image starts at the left and is passed through each color correction or effect node until it reaches the output on the right. Nodes can be connected by dragging the output of one to the input of another.
Enhance Images with Resolve FX
Open FX
The color page features a library of over 85 GPU and CPU accelerated Resolve FX plug-ins that you can use to enhance images and add effects. They’re organized by category in the Open FX library at the top right of the screen. There are a variety of different blurs, color effects, glows and lens flares, vignettes, refinement and beauty tools, image restoration, sharpening, stylize, texture, transformation and warpers that you can add to any shot. To add an effect, drag it to any node. The library will switch to an inspector showing you the settings for that plug-in. You can adjust and keyframe different values similarly to the edit page! Third party Open FX plug-ins also show up in the library.
Professional Scopes
Color is displayed inconsistently on every screen, and even our eyes can interpret an image differently under various lighting conditions. Professional scopes give you a consistent way to see image data. The scopes palette, located at the bottom right of the screen, features five different scopes that give you objective tools for measuring and evaluating color in an image. They can be used to check tonal ranges, adjust skin tones, balance footage and match clips to one another. Scopes let you see the relative strength and range of color components such as luminance, chrominance, saturation, hue, color gamut, white point, individual RGB channels and more.
Parade
The parade scope helps you quickly see if one color channel is stronger than the others. It can be set to display multiple waveforms for a variety of video signals in an image such as RGB, YRGB and Y Cb Cr, making it easy to spot and fix imbalances.
Waveform Monitor
Similar to the parade, the waveform displays the luminance and color values overlaid on top of each other at the current frame. When the colors line up, they appear white, which indicates that each channel has an equal intensity.
Vectorscope
The vectorscope monitor displays a circular graph of your image data that represents its hue and saturation levels. It is commonly used to check if skin tones are shifted toward unflattering colors such as green, yellow or magenta.
Histogram
This histogram provides a graphical representation of each channel’s tonal distribution. This lets you evaluate tone, understand whether detail has been blown out in the highlights or crushed in the shadows, and to adjust brightness and contrast.
CIE Chromaticity
The chromaticity scope helps determine if colors are within the boundaries of your project’s delivery format as specified in project preferences. For example, when working in HD, colors falling outside of the Rec. 709 HD colorspace triangle will be clipped on HDTVs.
Save, Copy and Re-use Grades
The color page “gallery” lets you organize, share and re‑use grades in several ways to help speed up your workflow. The fastest way to copy a grade is to simply middle click a clip in the film strip to copy its grade to the current shot in the viewer. You can also save grades by right clicking anywhere in the viewer and creating a “still.” Stills can be organized into albums and are stored in the gallery, which is located at the top left of the screen. The “Apply Grade” command lets you copy a saved grade to another shot. If you have a series of shots from the same camera, you can select them, right click and create a group. Now, when you grade one of the shots they’ll all be graded!
Compare Shots
Using wipe and split screen modes in the viewer is a great way to compare shots. You can compare a string of clips in a scene to each other, to variants of grades in the gallery or to versions of grades within a single clip. Clicking on “image wipe” in the top left of the viewer lets you view frames from two different clips. There are options at the top right for displaying wipes horizontally, vertically, mixed, as an alpha, as a difference matte, and even as a picture in picture. When you click on split screen, it lets you display multiple full frames in the viewer at once, based on a wide variety of criteria, which you can select from the drop down menu at the top right.
Find Mismatched Shots
The lightbox, which can be turned on by clicking its icon at the top right of the screen, displays every clip in your timeline as a thumbnail with grades applied. This is a great way to see how your shots look side by side and evaluate how the grade is affecting the story. It’s also a great tool for spotting differences between shots, or to simply see if there are any shots that you missed! Use the zoom slider to see a range of clips or the complete timeline. As the story progresses, you should see the color palette and the mood of the grade reflected in each scene. Any clip that “pops” out probably needs more attention. Just select a thumbnail and turn off the lightbox to jump to that clip’s grade!
Take Your Grading to the Next Level!
The color page has an extremely versatile and deep set of features designed to help you create great looking images. Whether you’re a video editor that’s new to color, an aspiring colorist, or a seasoned Hollywood colorist, you’ll find creative tools for expressing your vision, along with technical tools that help you work faster and deliver the highest possible quality images. You get a complete color management system and support for the latest HDR formats with tools specifically designed for high dynamic range work. In addition, you get powerful face retouching and beauty tools, paint for removing blemishes or unwanted objects, advanced noise reduction, film grain, restoration tools and more!
Next Generation HDR Grading
DaVinci Resolve Studio features the world’s most advanced tools for grading the latest wide color gamut and high dynamic range (HDR) images. HDR grading is made possible thanks to 32-bit image processing, industry standard HDR output and Resolve color management. You get Dolby Vision, HDR10+ and new HDR Vivid metadata palettes, HDR mode node adjustments, HDR colorspace transforms supporting ST.2084 and HLG tone mapping, and HDR monitoring using built-in scopes. DaVinci Resolve 18 adds an entirely new, next generation HDR Primary Grading Palette with customizable zone based exposure and color controls, along with perceptually color-constant image processing, giving you total control over HDR grades.
New HDR Color Wheels
Modern digital cinema cameras can capture 13 to 19 stops of dynamic range, which offers incredible potential for producing imagery that closely mimics human vision. However, extremely bright highlights or very dark shadows can be challenging to balance using traditional tools. The HDR palette allows you to address the different tonal ranges of the image, from shadows and highlights, to super blacks and specular whites. You can also create new color wheels and define your own custom tonal ranges in each image, enabling you to adjust tonality and colors based on the media’s unique requirements. The HDR grading palette gives you a level of creative control that has never been possible before!
Color Warper
The standard curve tools let you sculpt color and contrast in a variety of creative ways. The new color warper goes even further, allowing you to set a Hue vs. Hue color grade for specific saturations. This lets you give a completely new feel to images! It also allows you to warp color based on luminance, or brightness. When you click the color warper palette, you’ll see a web or grid display of all the hues and saturations in an image. Simply select any hue or range of hues on either the web or directly in the image viewer, then drag that range to another hue and saturation point on the web in the palette. It’s an entirely new, innovative way to transform color in your images!
Native RAW Image Editing
DaVinci Resolve works with virtually all native camera RAW formats. That means you can work with files directly from the camera’s sensor instead of compressed pixel data. Simply choose a RAW file and click the RAW icon located on the left side of the toolbar. The RAW palette gives you total control over highlight recovery, white balance, gamma, exposure, color temperature, tint, sharpness and more. RAW image processing is completely non-destructive and processes the clips before the node editor input. You’re simply re-interpreting the camera’s original sensor data. This allows you to change things, such as exposure, after the image has been shot, all without affecting image quality!
Refine and Retouch Faces
The face refinement tool in DaVinci Resolve Studio will find faces, automatically create masks for different parts of a face, and track them for you! That means you don’t have to manually isolate and track different parts of the the face. This saves you countless hours of work so you can focus on the creative aspects of refining and retouching faces. Simply drag the face refinement plug-in from the library onto a node and click analyze. Once it’s finished, use the sliders in the inspector window to sharpen and brighten the eyes, remove bags, lighten a brow, smooth out the cheeks or forehead, add blush, color lips and more! You can also use the beauty plug-in to gently smooth out skin if needed.
ResolveFX Ultra Beauty
ResolveFX Beauty now features an ultra beauty mode that gives you advanced control when performing corrective beauty work. Developed with feedback from professional colorists, the tool features stronger filtering algorithms that produce more natural results. Simply drag and drop the beauty effect on a corrector node, and ultra beauty will activate as the default mode. You can easily address general imperfections with the smoothing parameter without affecting facial features, and then recover texture to produce a result that truly compliments the face. Perfect for scenes with harsh lighting that accentuate imperfections like corporate interviews, or even the bride and groom in wedding videos.
Remove Unwanted Objects
You can remove unwanted objects in a shot using a combination of Power Windows, tracking, and the object removal plug‑in found in DaVinci Resolve Studio. First, draw a window around the object you want to remove and track it. Next, add a new node and connect the alpha channel output from the tracked window into the new node. Finally, add the object removal plug‑in and click on the “scene analysis” button. The DaVinci Neural Engine analyzes the shot, using machine learning and AI to determine how to remove the object from the scene. You can adjust the search range, blend mode and clean plate settings until the object disappears!
Clone Part of an Image
The patch replacer lets you quickly paint parts of an image to clean it up. It’s like an image clone or rubber stamp tool that copies pixels from one location to another. It’s perfect for removing blemishes, painting out a piece of garbage, or hiding a small mark in an otherwise clean shot. Just drag the patch replacer from the plug‑in library onto a node. The two on screen controls show the area you’re cloning and the part of the image it’s being applied to. Adjust position and size by dragging the on screen controls. Other settings such as the shape, softness and replacement detail, can be changed in the settings inspector. Add an FX tracker to attach it to a moving shot and you’re done!
Mix RGB Color Channels
The RGB mixer lets you adjust the presence of red, green and blue within the color channels of an image. Simply drag the sliders to increase or decrease the amount of color in any given channel and use the buttons at the bottom left to swap the color channels. The RGB Mixer can be used to modify LUTs, experiment with color casts or to tweak the appearance of on screen graphics. It’s also effective for working with black and white imagery. Click the “Monochrome” checkbox and then adjust the luminance of the RGB channels. You can achieve dramatic and elegant artistic results such as making trees look white against a black sky simply by raising the green channel and reducing the blue.
Incredible Light Effects
In addition to color correction and creative grading tools, the color page features plug-ins and tools for adding extremely realistic, organic lighting effects to your footage. You get individual tools for aperture diffraction, glows, lens flares, lens reflections and light rays. Simply drag a Resolve FX light tool from the library onto an empty node and adjust its settings. You can use them to create subtle light bleeds, gentle light bounces off of a lens, heavenly glows, or dramatic lens flares that look like they were all shot in camera. There are even pre-sets that allow you to simulate the golden hour of late afternoon sun, instantly create car headlights, sci‑fi flares and much more!
Image Restoration Tools
The color page has 8 unique image restoration tools in Resolve FX Revival. Simply drag and drop any of them onto a node to use them. There’s an automatic dirt removal tool for reducing or eliminating dirt and scratches, along with a dust buster plug‑in for removing dust and a deflicker plug‑in, all of which are great for cleaning up old film scans. The chromatic aberration plug‑in can reduce color fringe and artifacts caused by inferior lenses, the dead pixel fixer removes dead or stuck pixels, and the deband filter will smooth out pixelated gradients from digital cameras and highly compressed footage. The object removal and patch replacer let you quickly paint small objects out of an image.
Advanced Noise Reduction
The color page features some of the world’s most advanced temporal and spatial noise reduction, enabling you to clean up noisy images and dramatically improve clarity. They’re located in the motion effects palette at the bottom left. Temporal and spatial reduction can be applied in varying amounts to the chroma and luma noise in an image. Temporal noise reduction analyzes multiple frames to isolate the unwanted noise from the details you want to keep. Spatial noise reduction lets you smooth out areas of noise within a single frame, while preserving detail so it doesn’t become too soft. In general, it’s better to start with temporal and slowly add spatial until you get the results you want.
Professional Color Management
Color management lets you control the conversion of color between digital film cameras and scanners, computer monitors, broadcast displays and digital cinema projectors. The goal is to achieve more consistent decoding of the camera images and the display of colors across various formats and monitors. DaVinci Resolve supports its own system of color management and the Academy Color Encoding System (ACES) as defined by the Academy of Motion Picture Arts and Sciences. To set it up, open project settings from the file menu and click on color management. You get options for setting up color science, along with input, timeline and output color transformations, tone mapping, LUT application and more.
Grade Faster with Grouped Clips
Speed up your workflow by separating different parts of the grading process into groups of clips with similar needs. Normally all grades happen at the clip level. When you use groups, you can grade the group before the individual clip grades, as well as after it. For example, you can place all clips from a particular scene into their own group then use the pre‑clip group mode to balance all of the clips. Then use standard clip mode to address the unique requirements of each shot within that group. You can grade the group after individual clip grades to apply specific looks or effects to the whole group. Group grading saves you time as you can change a grade on one clip and they all change!
Share Grades on Multiple Clips
Shared nodes offer the same functionality as standard corrector nodes, with the added ability to be active on multiple clips at the same time. Begin by creating a corrector node and apply some changes such as a creative look, a vignette for an interview, or a secondary color correction in a wide shot. Then, right click and save the node as a shared node with a unique label. From now on, this shared node will be available any time you right click in the node editor and select “add node”. By default, shared nodes are locked to prevent accidental changes across multiple clips. Once unlocked, you can make changes that will transfer across all of the other clips sharing the same node.
Stereoscopic 3D
DaVinci Resolve’s stereoscopic tools support a variety of industry standard 3D workflows. Capture and format raw 3D video, edit stereoscopic clips and grade the resulting program to deliver spectacular 3D imagery. Use the stereoscopic palette to adjust stereo specific properties to ensure that every clip is uniquely optimized for 3D viewing. The stereo align feature can even automatically correct camera alignment for left and right eye images for more accurate convergence in 3D space. When working with UltraStudio or DeckLink capture and playback devices, you can set preferences to display one or both eyes on a single output monitor or dual displays with perfect synchronization between eyes!
Fusion
Cinematic quality visual effects and motion graphics!
The Fusion page lets you create cinematic visual effects and broadcast-quality motion graphics right inside of DaVinci Resolve! Fusion features a node-based workflow that makes it faster and easier to create sophisticated effects and animations than you could ever create using a layer-based approach. You get hundreds of 2D and 3D tools for visual effects and motion graphics, along with advanced animation curves and keyframe editors that allow you to create incredibly organic and realistic animations. Fusion has everything from the point, planar and 3D camera tracking to rotoscope and keying tool for creating photorealistic composites, stunning animated titles, 3D particle systems, and more!
The Fastest Way to Create Effects
Whether you’re working solo or are a professional editor, colorist or finishing artist, Fusion lets you complete shots faster. That’s because instead of sending out graphics, retouch jobs, or full blown visual effects shots to another system, all of the tools you need are built in. You can seamlessly move between the edit, Fusion and color pages with a single click. Fusion lets you quickly design lower thirds, animate 3D infographics or pull perfectly clean keys on a green screen shot. Multiple masks can be created, tracked and then passed to the color page, saving time and making intricate secondary color corrections such as realistic sky replacements, easier and better looking than ever.
Nodes Are Easier Than Layers
Fusion uses a flow chart called a node tree that visually maps out how effects are connected and work together. Nodes are like building blocks that represent effect tools, generators, transforms, masks and more. There are no confusing stacks of nested layers and hidden menus! You build effects by stringing nodes together one after the other. The MediaIn node represents the clip from the edit timeline. To add a blur, drag the blur node from the toolbar to your flow chart and connect it in sequence after the media in. Simply drag the output from the MediaIn node and connect it to the input of the blur node. Tools can be combined in any order, letting you create an unlimited number of effects!
The Fusion Workflow
There are five simple operations in the Fusion workflow that are the basis for all of your work. You merge images together, insert effects, use masks to isolate effects, adjust settings and fine tune your animations. You start by merging images together in either 2D or a true 3D workspace. Next, insert effects in between nodes. After that, you can create masks to limit effects to specific areas of the image, then adjust tool settings in the inspector. Lastly, you can fine-tune your animation by using the spline and keyframe editors. Once you’ve mastered these basics, you’ll be able to combine techniques to create virtually any type of visual effect or motion graphic animation that you want!
Merge Images
The merge node lets you layer, or composite images together. To do this, drag a merge node from the toolbar into the node tree. Use the yellow control to connect a background image and the green control to add a foreground. Media can be dragged in from your bins.
Insert Effects
Fusion includes over 200 filters and effects called “tools” in the effects library. To add a tool, drag it into the node tree at the bottom of the screen. You can insert an unlimited number of tools at different points in the node tree to create the desired effect.
Create Masks
Masks let you define the visible area of an effect on an image. For example, to blur out an unwanted logo, add one of the mask tools, draw a shape around the logo and connect it to the blue mask input of the blur node. You can even track the mask to follow the logo!
Adjust Settings
The inspector on the right displays all of the controls or properties for the currently selected tool. You can adjust settings and animate them over time using the keyframe buttons. The cut, edit, Fusion and Fairlight inspectors are similar and all work the same way.
Fine Tune Animations
You can access the spline (or curve) and keyframe editors by clicking on their buttons at the top of the Fusion page. These panels give you advanced controls for creating and manipulating custom animation curves, as well as for positioning keyframes across time.
Animate 2D and 3D Titles
Text can be designed in either 2D or 3D. For 2D text, drag a Text+ node into the node tree and type your text to get started. You’ll find advanced yet familiar text controls in the inspector for font, size, alignment, spacing, kerning, leading and more. Click on the shading tab to stylize text with gradient or video fills, outlines, drop shadows and glows. Adding a Text 3D node gives you similar formatting controls along with 3D extrusion, custom beveled edges and more. To add textures, surface properties and reflections, just connect a replace material node to the text 3D node. You’ll find controls in the inspector to animate entire blocks of text, lines, words or even individual characters!
Add and Track Infographics
The Fusion page allows you to quickly and precisely add and track infographics. First, connect a tracker to your clip, use the on screen controls to place the tracker over the part of the image to which you want to attach the graphic, then click track forward. After the track is complete, click on the operation tab and change the operation to “match move”. This turns the tracker into a merge node! Import your multi layered Photoshop files using the import menu or by dragging them in from the media pool. Connect the graphic to the green foreground input on the tracker node to complete the composite. Now, as you animate your graphics, they’ll move in sync with the tracked object in your scene.
Paint Out Unwanted Objects
The vector paint tool includes multiple brush types and stroke styles that can be edited and animated at any time. Paint can be used for creative and corrective purposes. For example, you can paint leaves swirling in the wind or clone out an unwanted boom mic hanging in a shot! To clone out an object, add the paint tool from the toolbar and connect it to a clip. The tools at the top of the viewer let you set the paint stroke to operate on a single frame or a range of frames. Select clone mode in the inspector, then option click in the viewer an area to sample. Then paint over another part of the image to clone it out! Paint strokes can also be set to follow tracked moving objects in the shot.
Replace Signs, Screens And Billboards
Fusion’s powerful planar tracker lets you add new screens to a smartphone, replace a sign on the side of a moving truck, add a new billboard to a shot and more. All you have to do is connect a clip to the planar tracker, draw a shape around the area you want to track and click the track forward button in the inspector. A tracking cloud will be created with a precise motion path that contains position, rotation, scaling, and perspective changes. The planar tracker node includes built in corner pinning, making it easy to connect the new screen or sign into the node and position the four corners. You can even use the tracker data to animate mask shapes, making rotoscoping tasks incredibly fast!
Remove Green and Blue Screens
Fusion’s Delta Keyer quickly removes green and blue screen backgrounds so you can place actors into settings that are impossible to shoot. Setting up your key is simple. Start by dragging the Delta Keyer from the effects library onto the line between your green screen clip and the foreground input on the merge node. From the inspector, drag the eye dropper into the viewer to sample the color you want to remove. The pre-matte, matte, fringe and tuning tabs give you a complete set of controls to refine the key until it’s perfect! You can also add a clean plate node which makes it easier to remove the background from shots and is especially useful for clips with reflections, hair and smoke!
Add 3D Particle Effects
Particles can be used to create realistic atmospheric effects like fire, rain or smoke, or fantastic swirling glowing bits for use in motion graphics and broadcast design. You can create particle systems from any type of image. To create particles, you need to add both a particle emitter and a particle renderer to your node tree. Click the particle emitter and open the inspector to customize and start animating your particles. There are more than a dozen particle specific nodes that can be inserted between the emitter and renderer to simulate gravity, friction, turbulence, bounce and more. Best of all, particles work in 3D so you can make them flow around and bounce off other elements in the scene!
Track and Follow Any Object
Tracking plays a key role in creating sophisticated visual effects and motion graphics. Fusion makes tracking easy with advanced 3D camera tracking, powerful planar tracking and rock solid 2D tracking. The 2D tracker is great for following most objects that move throughout a scene. Planar tracking lets you track image planes, or flat objects, in a scene. It’s ideal for replacing signs or screens. The 3D camera tracker is extremely powerful because it analyzes the motion of the camera that shot the original scene and recreates it in 3D space. This lets you add objects such as text, 3D model set pieces, or even atmospheric particles such as fog or smoke that seamlessly blend into the scene.
Speed Up Your Workflow
Fusion is packed with time saving tricks to help you click less and move faster. Keyboard shortcuts like Shift+Spacebar enables a tool search window, type in the tool name and press enter to add the tool. Node versioning is perfect for trying out new animations without duplicating a node. Quickly switch between versions by clicking on the numbers located at the top of the inspector. The clip timeline gives you quick access to every clip in the timeline on the edit page, so you can work on new shots without having to leave the Fusion page. Lastly, quickly view any selected node in the right and left viewers by pressing the number 1 or 2 key, and clear all viewers by pressing the tilde key.
Advanced Visual Effects and Motion Graphics Tools
The Fusion page features hundreds of advanced feature rich tools for creating photorealistic visual effects, powerful broadcast graphics and sophisticated title animations. Unleash your imagination with an infinite 3D workspace, transport characters to new worlds with 3D set extensions, or build custom templates that can be used right from the edit and cut pages for efficient broadcast workflows. Best of all, Fusion’s powerful spline based keyframe editor and expressions let you create incredibly smooth and sophisticated animations. There’s even built in scripting and automation. There really is no limit to what you can achieve with Fusion, and it’s right inside of DaVinci Resolve!
True 3D Workspace
Fusion features a true 3D workspace for compositing and creating cinematic visual effects and advanced broadcast motion graphics. It’s ideal for adding 3D models, objects, text or particles to your footage. To start, use the basic 3D nodes such as shape or text nodes, along with the 3D merge and camera nodes. There are a vast number of 3D tools to help you generate and manipulate surfaces, bend meshes and more. The 3D merge tool lets you add an unlimited number of objects, lights and cameras into your scene. 2D images can be used in 3D by placing them on 3D shapes such as image planes, spheres, or other objects and combining them with 3D text, lights and cameras to create dramatic designs.
Import and Render 3D Models
You can import 3D models or even entire 3D scenes from apps such as Maya and 3D Studio Max directly into your shots on the Fusion page. Using the FBX import menu, Fusion gives you the option to import FBX (Filmbox) scenes or Alembic animated geometry files, dramatically increasing your creative options for visual effects and motion graphics. For example, you can import a 3D model of a mobile phone and replace its screen, add a new car into a commercial spot, create a swarm of attacking spaceships, or add a dragon fighting live action knights in front of a castle! Then add textures, shading and lights, composite your actors into the shot and create photorealistic Hollywood style effects!
Realistic Lighting and Shading
Fusion’s sophisticated lighting tools let you add truly realistic lighting effects to your 3D scenes. You can add an unlimited number of customizable light sources such as ambient lights, directional spot lights and point lights. Directional spot lights can cast shadows. Color, angle, intensity, falloff and other lighting parameters can be adjusted and animated over time. You can even control how elements within a 3D scene react to lighting as well as define which objects cast shadows and reflections. To see the effects of your lights in the 3D viewers, click on the lighting button at the top of your viewer and don’t forget to enable lighting when you’re ready to render the final shot!
Spline Based Animation
The Spline Editor, which can be opened by clicking on its icon at the top right, gives you incredible control over curves that control the speed, or rate of change, in an animation. You can change the speed between keyframes using linear or fully customizable bezier and b-spline curves. The spline editor features a strip at the bottom with tools to reverse, loop or ping pong animations, making it faster and easier to create keyframe animations. You can even squish and stretch keyframes to shorten or lengthen animations without changing the relative motion! Curve shapes can be copied and pasted between parameters, independent of values, so you can create consistent, perfectly timed animations.
Modifiers and Expressions for Dynamic Animations
Quickly create dynamic animations by linking parameters together with modifiers and expressions. When one parameter changes, the others will automatically follow based on how you’ve customized their relationship to each other. For example, when working with text, you can add a special “follower” modifier that lets you create sequential text animations line by line, word by word, or even character by character. You can then add an expression that adjusts the blur parameter as character positions change over time. This allows you to quickly create sophisticated and dynamic animations in which multiple parameters change at the same time, all without having to manually animate each setting!
Advanced Mask and Rotoscope Tools
Rotoscoping is a technique used in visual effects compositing to cut characters or elements out of a scene so you can seamlessly place them in another. Fusion’s masking tools let you perform advanced rotoscoping with bezier and B‑spline shapes. You can track masks with the planar or 2D trackers, set custom feathering per point for precise blending, and use keyboard shortcuts to quickly manipulate shapes in the viewer to help you work faster. Masks and roto shapes can all be animated to morph as characters and objects change in a scene. This level of control lets you create feature film quality VFX composites. You can even send masks back to the color page to perform isolated corrections.
Create Your Own Templates
Lower third titles, animated background generators and custom transition templates can all be created in Fusion and added to the effects library on the edit page so they can be used in any project. When you build a template, you decide which controls will appear on the edit page. Templates are created by selecting nodes in a composition, right clicking and choosing “create macro” from the pop up menu. Simply check the parameters you want to expose, enter a custom name and save it. Templates are great for brand consistency. With pre‑built custom templates, editors don’t have to wait for designers to render titles, and motion graphic artists don’t have to worry about editors changing their designs!
Volumetric Effects
Adding environmental atmospheric effects such as fog, mist, rain and smoke can dramatically increase realism in a scene. Fusion uses GPU acceleration so you can instantly see how these types of effects interact with the rest of the scene, all without having to wait for renders! Volumetric effects work in 3D space so they can flow and swirl around other objects. They can also use 3D world position data found in deep pixel render files, allowing the effects to realistically move both in front of and behind 2D deep pixel elements! There are tools to define attraction, repulsion, collision detection and more, along with special masking tools that make working with volumetric effects faster and easier.
Deep Pixel Compositing
Deep pixel compositing uses 3D metadata stored in a 2D file to speed up the process of compositing elements such as actors, other 3D objects, volumetric effects or anything else in a scene. Instead of being a simple flat image, every single pixel has a 3D x, y and z coordinate. When you render a 2D EXR image out of a 3D application you get RGBA (red, green, blue and transparency) data for every single pixel, along with XYZ position information. That means you don’t have to load massive 3D scene models that take a long time to render. It allows you to add fog, custom lights or actors and render it in seconds, not hours, as it would in 3D software that uses full models with complex geometry!
Virtual Set Extensions
Regardless of your budget, it has become increasingly impractical to build massive sets. That’s why live action scenes are often shot on smaller sets and then composited into computer generated set extensions that make them look massive! Fusion can import and render 3D models and scenes from popular software like Maya and 3D Studio Max, so you can composite, light and render in one step. In addition, projection tools can be used to quickly render scenes, without having to use complex 3D geometry! With proper lighting and compositing techniques, virtual set extensions can blend seamlessly with live action shots to give you an epic cinematic look, all on an indie filmmaker’s budget!
Scripting and Automation
Once you’ve designed titles and graphics, creating and updating them with current data can be tedious. With support for Python and Lua built in, you can write scripts to automate repetitive tasks and to feed live data sources into your animations in realtime. For example, you can use a Python or Lua script, along with a simple text document, to automatically create and render updated broadcast graphics, titles and animations with things such as up to the minute weather forecasts, sport scores and player statistics, news headlines and more. It’s not just for motion graphics, either. It goes beyond motion graphics as scripting can speed up your workflow by automating virtually any repetitive task!
Fairlight
Professional tools designed for audio post-production.
Fairlight is the world’s first and only audio post production software that’s completely integrated with picture editing. That means you can move between sound editing and picture editing with a single click! The Fairlight page is designed to be intuitive and easy to learn for new users, as well as powerful and extremely fast for professionals working on massive projects with over a thousand tracks. You get dozens of professional tools for recording, editing, mixing, dialog replacement, sound clean up and repair, equalization, dynamics processing, and mastering soundtracks in all standard formats from stereo and surround sound up to the latest immersive 3D audio formats!
Engineer Your Own Soundtracks
Whether you’re a video editor using Fairlight for the first time, a ProTools user moving to DaVinci Resolve, or a sound engineer working on a massive console, the Fairlight page has everything you need! Video editors will find familiar arrow and selection tools just like on the edit page, making it easy to start learning Fairlight. If you’re coming from ProTools or another digital audio workstation, smart mouse based editing tools and customizable keyboard shortcuts let you edit sound faster than ever before. For even more speed, add the Fairlight Desktop Console or customizable 2, 3, 4 and 5 bay consoles for larger film, television and commercial projects!
Smart Edit Tools
The multi function edit selection tool is designed for fast sound editing with a mouse and keyboard. It even works during live playback and recording so you can fix problems as you hear them! The edit selection tool automatically changes based on where you click so you can work faster. It combines arrow and marquee tools and gives you a new way of selecting edits. You can click the lower half of a clip to select or move it, the upper half to set an edit point, or drag a range to select it. There are dozens of new sound editing commands that you can customize with your own keyboard shortcuts. The playhead snaps to the selection, so you can start playback without manually moving the playhead!
Clip Adjustments
Each clip in the timeline has its own volume, pan, pitch and 4‑band parametric EQ controls. Fade handles located on the sides of clips let you quickly add fade ins and fade outs. You can also adjust clip volume by raising and lowering the level bar in the middle of the clip. To change volume over time, hold down option on your keyboard and click to add keyframes, then drag to adjust the level. The waveform will update in real time. The clip inspector also features a level slider, panner, pitch adjustment and EQ settings. Levels can also be set using the normalization command, which can be found by right clicking on a clip. This is a fast way to quickly set target levels for timeline clips.
Waveform Editing
The Fairlight audio timeline combines clip and waveform editing in a single view, so you don’t have to switch to a different window for sound editing. Like the edit page, you can use the selection arrow to rearrange clips, extend or shorten them, quickly add fades and adjust levels. For waveform editing, just zoom all the the way in to see the individual audio samples! The closer in you zoom, the easier it is for you to spot clicks, pops or other problems. Once you have zoomed all the way in, the pointer becomes a pencil tool allowing you to redraw the waveform or draw a new one, and remove unwanted sounds! Changes to the waveform automatically update in real time when you zoom out.
Professional Mixer
The Fairlight audio page features a professional mixer with channel strips for timeline tracks and buses. All channel strips include a fader to adjust levels, stereo and 3D panners, 6 effects slots for adding plug‑ins, along with dynamics and a 6 band parametric equalizer on every channel. Make volume changes on the fly while you mix, or record the changes over time with automation. Click the automation button in the toolbar, set the touch control to latch, and then choose the parameter you want to record from the “enable” button in the toolbar. Active faders turn red during playback while automation data is recorded and green when you have finished.
EQ and Dynamics Processing
Every track includes real time equalization and dynamics processing to sweeten and fine tune your mix. This is in addition to your six real time track effects, making Fairlight far more powerful than other digital audio workstation software! Simply double click in the EQ area above any channel strip in the mixer to open the 6 band parametric equalizer. There are graphic controls and knobs for equalizing and filtering different tonal ranges. Double clicking the dynamics area will open the dynamics window which features expander, gate, compressor and limiter dynamics processing. Use the interactive controls to sweeten your tracks, save presets and even copy settings from one track to another.
Clean Up and Repair Sound
The Fairlight page includes Fairlight FX plug‑ins for cleaning up and repairing sound. Fairlight FX are located in the effects library, which opens by clicking on the icon at the top left of the screen. It contains Fairlight FX such as the de-esser to minimize annoying “s” sounds, de‑hummer to remove power line hum, noise reduction plug-ins and more. Simply drag one to a clip and its window will open for making adjustments. The noise reduction plug-in automatically detects noise in a selection. You can also teach it by selecting noise and clicking on “learn.” Anything that matches the noise will be removed from the clip! You can add as many plug‑ins as you need to clips or up to six per track.
Sound Effect Libraries
DaVinci Resolve makes it easy to access your external sound libraries right from the Fairlight audio page so you don’t have to leave the application! Click the sound library icon at the top left of the screen to open the search window, find a sound, mark the part that you want to use, and then click the audition button to try it out on your timeline. You can keep auditioning clips until you find the perfect sound. Once you have auditioned a clip in the timeline click the confirm button to keep it, or the cancel button to remove the clip and try another. There is even a sync button that lets you sync any part of the sound effect waveform to the playhead in your timeline.
VO and Multi Track Recording
You can use the Fairlight page to record everything from a simple voice over to a complete symphony orchestra! To start, click on a track’s input button at the top of the mixer and select input from the drop down menu. Next, choose the microphone or input device you want to use and click “patch.” Arm the track for recording by clicking the “R” button on the track header or in the mixer, then click the record button on the toolbar. Press the spacebar to stop recording when you’re finished. The new recording is added to the timeline on the selected track. If you record additional takes, they’ll be put in different layers on the same track. You can show audio track layers from the view menu.
Professional ADR
Film and television dialog is often re-recorded in the studio after the shoot. Sometimes on set recordings are noisy or unclear, or the Director may want a better performance from the actor. Fairlight includes professional automatic dialog replacement tools, known as ADR, so you don’t have to use another application. Click on ADR at the top of the screen, then use the set up panel to configure recording and visual cue options such as beeps, countdown, text prompts and streamers. Create cues on the “list” tab with character names, dialog and more. Finally, switch to the “record” tab, select a cue and start recording. You can record multiple takes, as well as mark and rate your favorites.
Elastic Wave Retiming
Elastic wave retiming makes it possible to stretch a clip’s length in the timeline without changing pitch so you can easily retime voiceover or sound effects to match the picture. Elastic wave retiming can also be used to synchronize ADR takes with video takes for perfect lip sync of dialog with picture. Right click a clip and choose elastic wave to show the retiming controls. Drag the right edge of a clip to stretch the entire waveform or command click to add keyframes and adjust individual sections. Command dragging a keyframe keeps its position in place while stretching the waveform next to it. However most importantly, the pitch of your audio won’t be changed!
Track Layers
Audio layers make it easy to mix phrases from different takes into a single seamless sentence. Select “show audio track layers” from the view menu to turn them on. You can quickly split takes and arrange the best sections on the top layer, add crossfades and build a composite. Use track layers to replace words or phrases from one take with another. When you drag a layer, you’ll see a translucent “ghost” of the waveform, so it’s easy to perfectly align the layer. Layers can be used to create alternate versions on a track. This can be anything from different sound effect options, music cuts, or dialog takes. Audio layers give you a non-destructive way to try different combinations of sounds!
Automatic Ducking
Ducking is when the volume of a music track is lowered during dialogue and raised when it ends. Fairlight automates ducking with sidechain compression, which uses the signal from one track to automatically control the amount of volume reduction on another. That means one track listens to the volume of the other and adjusts according to the rules you set up. Just open the dynamics window for the dialogue track, enable compression controls and choose “send.” Select the music track, enable compression and choose “listen.” Adjusting the threshold and ratio changes the amount reduced based on the dialogue’s volume. Now whenever there’s dialogue the music is automatically turned down!
Foley Plus Sound Effects
Foley sounds, such as footsteps, the rustle of clothing or the handling of objects in a scene, breathe life into soundtracks as characters interact with their on screen world. The Fairlight page offers several ways to add foley to your timeline. You can install the Fairlight Sound Library and edit foley sound effects directly to the timeline. Another option is to even record original content directly to a track using the automatic dialog replacement or ADR tool to set up various cues. Finally, for DaVinci Resolve Studio users, you can use the foley sampler plug‑in. The foley sampler lets you assign sounds to keyboards or drum pads and “perform” them in realtime while watching the video.
Delivering A Soundtrack
When you’re ready to deliver a soundtrack, there are numerous options to meet your needs. To export the finished video with a simple stereo mix, switch to the edit page and use the quick export option in the file menu. For more delivery options, go to the deliver page where you’ll find a variety of render presets ranging from a custom video clip, to rendering audio only files. Use the Audio Settings to select the audio format, buses and tracks you want to render. DaVinci Resolve with Fairlight gives you incredibly rich mastering and sound finishing options. You can output everything from mono and stereo to immersive 5.1, 7.1, 22.2 and even the latest 3D audio formats, all from within the same project!
Hundreds of Pro Tools for Audio Post!
The Fairlight audio page features hundreds of professional tools for audio post production in a familiar, intuitive interface that’s designed for speed and completely integrated with picture editing. Once you’re ready to go beyond the basics, you’ll find advanced sync tools, immersive 3D mixing and mastering, third party plug‑in support, bouncing, loudness monitoring, full automation, customization options and much more. Fairlight is the only digital audio workstation software with a modern, super low latency audio engine capable of handling massive numbers of tracks, advanced bussing to simplify mixing, easy channel mapping options and multi format mastering in the same project.
Introducing Fairlight Audio Core
Fairlight Audio Core is a high performance, next generation audio engine which lets you work with more tracks and realtime effects than any other system. It’s a completely scalable, hybrid engine that supports the latest multi core and multi threaded processors, as well as the Fairlight Audio Accelerator card for even more performance! Fairlight Audio Core works by distributing the workload across your system’s cores, threads and audio cards. For example, it might use the accelerator card for mixing and the CPU for plug‑in processing. Fairlight Audio Core is an extremely low latency, next generation audio engine that intelligently manages workloads, applying processing power where needed.
2,000 Tracks with Realtime Effects
The combination of DaVinci Resolve with Fairlight Audio Core and the Fairlight PCIe Audio Accelerator card lets you have up to 2,000 tracks, complete with realtime effects, all on a single system! That means sound elements can be split into as many tracks as needed without introducing unwanted latency. You get Fairlight’s built in 6‑band parametric EQ and dynamics processing plus six realtime plug-ins on every track. This is a revolutionary change for larger projects as previous systems required multiple “slave” computers to process different parts of a project and be synchronized for playback. Now, with DaVinci Resolve, it can all be done on a single system!
Revolutionary New FlexBus
FlexBus is a new and incredibly flexible audio busing and routing system. Instead of fixed aux, sub and main buses, FlexBus gives you multi purpose, 26 channel wide buses that allow every track to send post fader information to as many as 20 other buses, 10 of which have independent level control. In addition to tracks, buses themselves can be sent to 20 additional buses, 10 of which can have level control. You can manage high track counts and extensive plug‑in processing on all of your channels and buses. FlexBus allows you to create massive projects with support for cascade style busing, extensive plug‑in processing, perfect synchronization and multiple deliveries from a single project.
Full Automation Control
Automation tools let you record changes to virtually any control setting or effect over time so they adjust automatically during playback. Click the automation icon in the tool bar to display the controls, choose your settings, and enable the parameters you’d like to automate. Track headers feature a drop down menu for showing different parameter curves in the timeline so you can edit automation graphically. The Fairlight menu has additional options for editing automation. Use the preview button in the toolbar to try out new automation without writing the data, then turn it off to commit the changes. You can also view main and bus tracks in the timeline and graphically edit their automation data too!
Loudness Monitoring
There are three ways to monitor loudness while you’re mixing. Loudness meters located at the right side of the monitoring panel let you quickly assess program loudness. Just click the options menu to choose your preferred metering standard. The meters are color coded, blue if levels meet the selected standard, yellow for tolerance and red when levels exceed tolerance. There’s also a loudness graph for the main bus in the timeline when automaton controls are active. The loudness graph updates live during playback, so you’ll know exactly where the issues are so you can correct them as needed! Additionally, right click any clip to use the new “analyze audio level” offline loudness analysis.
Interactive 3D Spatial Panning!
DaVinci Resolve Studio lets you mix and master immersive 3D audio soundtracks in the latest 3D audio formats. To get started, choose a 3D audio format in the Fairlight section of project preferences. Once you create new tracks and buses, option double click the pan area in the mixer to open the 3D panner. This allows you to create flying sound objects by placing sounds and applying automation in 3D space. Use the space view scope to visualize the placement of multiple sounds in your mix at the same time. Show levels on active tracks as labeled objects move dynamically as they are panned. There are even B‑Chain controls for setting up and connecting to 3D speaker systems for monitoring.
Sync Scrollers
The Fairlight page features unique video and audio scrollers that help you precisely sync sound with picture. Click on the timeline view options menu in the toolbar and then select the audio and video scrollers to turn them on. You’ll see a scrolling filmstrip and audio waveforms at the bottom of the screen. These let you compare individual video frames and waveforms at the same time so you can perfectly align them. Simply drag the scrollers or double click any frame in the filmstrip to move the playhead to that frame. Then move the audio clip in the timeline to the playhead location to sync the sound with video. Scrollers are powerful tools that you won’t find on any other system!
Fairlight FX and Plug-Ins
DaVinci Resolve includes over 20 Fairlight FX plug-ins for audio repair, creative sound design and mixing. You can also add third party Steinberg VST and Mac audio unit plug-ins. When you drag and drop one to a clip or track, its custom interface window will open so you can adjust its settings. Multiple plug-ins can be added to a clip, you can copy and paste effects between clips or tracks, and even save an entire effects chain in the presets library for use in other projects. Plug-ins are processed in order from top to bottom. You can delete, open and reorder them in the inspector. If processor heavy plug-ins are affecting playback, simply right click and select from the cache or bounce options.
External Processing
For even more creative options, you can use external audio processing applications, such as Izotope RX, without leaving the Fairlight timeline! To get started, open preferences, click on audio plug-ins, and add your audio application at the bottom of the window. Once you’ve done that, right-click on any clip in the timeline, select external audio process and choose the application you want to use. A new bounced version of the clip opens in the external application. Use the external app as you normally would and save the clip when you’re done. When you do, the edited clip is added to a new layer above the original on the timeline. This gives you an easy way to restore the original if needed.
Bounce Clips, Tracks and Mixes
The Fairlight audio page offers a variety of bounce options for quickly rendering audio as you work. This lets you improve playback performance by “bouncing” processor intensive clips and tracks, consolidating tracks, or generating finished audio files. Simply right click on a clip and select either bounce audio effects or bounce clips to files. “Bounce clips to files” opens a dialog where you can enter a clip name, tags, change the clip format, and choose a destination for the rendered file. You can also bounce selected tracks to a new layer or bounce a mix to a track. Bouncing a mix will always result in a channel configuration that matches the source bus.
Mix Clips, Tracks and Buses
Now you have a variety of intuitive mixing options for quickly controlling clip, track and bus levels. For quick gain changes across multiple clips, drag an edit selection range and use keyboard shortcuts to raise or lower levels. Monitor your mix parameters with independent controls to enable and show the automation toolbar. Manage plugins and processing in the mixer with right click menu options to delete, disable or replace plugins, copy and paste processing, or drag and drop effects to reorder, copy or move to other channels. You can even convert fixed bus projects to FlexBus in one click. Fairlight lets you refine the sound of your mix with precision accuracy from start to finish!
Channel Mapping
Fairlight gives you the flexibility to change clip and track channel mapping at anytime. This is incredibly important when dealing with multiple microphone sources, to eliminate an unwanted channel, or to isolate dialogue from a 5.1 or 7.1 multichannel clip. In addition, you can also use “adaptive” tracks for non standard formats with support for up to 24 channels per clip or track. No matter how many sources you sync to your clips, they will playback seamlessly and can be edited to a single multi channel track or separate mono tracks. Track format can be changed by right clicking on the track header. Clip format can be changed by right clicking on the clip and changing clip attributes.
Multi-Purpose Timeline Index
Fairlight’s multi purpose index panel offers detailed interactive lists of the clips in your timeline, along with tracks and markers, letting you instantly navigate to specific elements. You can use the index to locate clips, quickly change track states, and even create spotting lists with markers. In list view, the markers index shows each timeline marker as an icon, along with notes and description columns for creating a detailed spotting list. The track index lets you quickly select or toggle track states such as lock, arm, solo and mute with a swipe of the mouse. You can also rename tracks, show or hide visibility in the timeline and mixer, and even drag to reorder tracks!
Customizable Keyboard Shortcuts
DaVinci Resolve’s comprehensive keyboard customization offers fingertip access to dozens of audio tools and options so editors can work without having to stop and click through menus. You can create your own audio workflow shortcuts by going to the DaVinci Resolve menu and selecting “keyboard customization.” You’ll find panel specific keyboard mappings for the Fairlight page and you can assign shortcuts for patch input/output, the presets library, automation setup, edit selection tools and more! Keyboard shortcuts can be saved as a preset or you can import settings from other popular applications. Once added, your new shortcuts will appear in the subsequent menus throughout the Fairlight page.

Media
Great Support and Compatibility!
All projects start with importing and organizing footage, and they all end with mastering and final output. DaVinci Resolve features powerful tools that are designed to let you get to work quickly and output files fast, so you’ll never miss a tight deadline. Its incredibly wide format support makes it compatible with virtually every modern file format and media type in the world, including Blackmagic RAW, making it the ideal hub for your post production workflow!
Importing Footage
Quickly get footage in and prepare it for editing!
DaVinci Resolve lets you preview, import and manage media on the Media Page. Files are never moved, they don’t need to be “ingested”, and they’re not stored in proprietary locations. Everything is left in place on your drives exactly where you put them. Simply drag and drop to the bins in your project’s media pool or directly onto a timeline.
Organize Clips
Organize media your way or automatically based on metadata!
Easily create free form bins to organize footage any way you’d like. You can also use Smart Bins to automatically sort and display footage based on metadata criteria. Bins can be viewed in a customizable list view that now includes markers, or as icons that show in/out indicators. You can now also open multiple bins into separate windows!
Marking Clips
Easily prepare clips for editing by marking, flagging and adding notes!
Quickly load and mark clips in the source viewer or directly in your project’s bins. Simply scrub over a clip icon and add your in/out points. A graphical overlay on the icon shows the marked portion of the clip! Markers and notes can now be viewed in list view and as overlays in the source monitor. You can even drag a duration marker segment from the bin to the timeline to edit in specific portions of a clip without having to create sub‑clips!
Syncing Audio
Instantly sync audio with video from multiple files!
Syncing audio and video is easy! Just select the audio and video clips and use the sync command. You can sync based on timecode or by audio waveforms. Best of all, you don’t have to render new media! Resolve manages it all for you, merging the audio, video and metadata from the files so you can start editing immediately!
Metadata
Powerful metadata tools that make editing easier!
File metadata is automatically imported, plus you can enter your own custom keywords and tags. Footage can be sorted into smart bins based on keywords, type of camera, or any other metadata. You can even change display names for clips using scene, shot and take metadata. That means you’ll never have to rename media files again!
Clone Tool
Quickly clone camera cards and mags with checksum verification!
It’s critically important to make backups of camera original media before recording over it! DaVinci Resolve features a powerful clone tool that makes bit for bit copies with checksum verification of media cards, SSDs and mags from cameras. For maximum protection, you can save multiple copies to different destinations at the same time!
Output Options
Deliver anywhere from the web to digital cinema!
DaVinci Resolve lets you output timelines, parts of timelines and individual clips for mastering or sharing with other applications. Delivery presets make it fast to prep files for the web or other applications, and you can build your own from scratch. You can even create Digital Cinema Packages (DCPs) for theatrical distribution or output to tape!
Render Queue
Batch process jobs or even offload rendering to another system!
You can quickly add multiple timelines or clips to the render queue for batch processing. Simply create each job, click the “Add to Render Queue” button and then start the batch. If you’re working on a network with DaVinci Resolve Studio, you can offload the render to another workstation so you can continue working on your system.

Resolve FX
DaVinci Resolve Studio 18 features over 100 GPU and CPU accelerated Resolve FX such as blurs, light effects, noise, image restoration, beauty enhancement, stylize and more! Version 18 adds even more plugins for depth map generation, surface tracking, fast noise, and despilling. There’s even improvements to the beauty effect, edge detection and lens reflections. Automatically generate a 3D matte of a scene with the depth map FX to grade or add effects to a background or foreground. Track the movement of textured surfaces with the surface tracker effect to apply images to t-shirts, flags and faces! All Resolve FX effects can be applied and animated in the cut, edit, Fusion and color pages!

DaVinci Neural Engine
The DaVinci Neural Engine uses state of the art deep neural networks and machine learning, along with artificial intelligence to power features such as facial recognition, object detection, smart reframing, speed warp retiming, super scale up‑scaling, auto color and color matching and more! The DaVinci Neural Engine is entirely cross platform, using the latest GPU innovations for AI and deep learning to provide unparalleled performance and quality. The DaVinci Neural Engine provides simple tools to solve complex, repetitive and time consuming problems. For example, it enables facial recognition to sort and organize clips into bins based on people in the shot, to reframe shots and more.

Works with 3rd Party Plug‑Ins and Storage
With all the different workflows and systems available, you need a post production solution that’s compatible and open enough to handle anything! DaVinci Resolve can be used with any type of storage ranging from direct attached hard drives to NAS and SAN systems. You can extend DaVinci Resolve with third party Open FX and audio plugins, or add third party title and motion graphics templates. New workflow integration and encoding APIs let developers integrate workflow and asset management systems with DaVinci Resolve. Plus, it works with all major file formats and post production software, making it easy to move files between DaVinci Resolve, Final Cut Pro, Media Composer, and Premiere Pro.

System Requirements
Pre-Installation Notes
For DaVinci Resolve 19.0, we have made an effort to keep the project libraries compatible with DaVinci Resolve 18.6.6. While this allows you to access the project library with 18.6.6, individual projects created or opened in 19.0 will no longer be accessible in 18.6.6.
We recommend a full project library backup as well as individual project backups before opening projects in 19.0.
Minimum system requirements for Mac OS
- Mac OS 13 Ventura.
- 8 GB of system memory. 16 GB when using Fusion.
- Blackmagic Design Desktop Video 12.9 or later.
- GPU which supports Metal.
Minimum system requirements for Windows
- Windows 10 Creators Update.
- 16 GB of system memory. 32 GB when using Fusion.
- Blackmagic Design Desktop Video 12.9 or later.
- Integrated GPU or discrete GPU with at least 2 GB of VRAM.
- GPU which supports OpenCL 1.2 or CUDA 12.
- NVIDIA/AMD/Intel Driver version – as required by your GPU.
Minimum system requirements for Linux
- Rocky Linux 8.6 or CentOS 7.3.
- 32 GB of system memory.
- Blackmagic Design Desktop Video 12.9 or later.
- Discrete GPU with at least 2 GB of VRAM.
- GPU which supports OpenCL 1.2 or CUDA 12.
- NVIDIA/AMD Driver version – as required by your GPU.
Installing DaVinci Resolve Software on Mac
Double-click the DaVinci Resolve Installer icon and follow the onscreen instructions. To remove DaVinci Resolve from your system, double-click the Uninstall Resolve icon.
Installing DaVinci Resolve Software on Windows
Double-click the DaVinci Resolve Installer icon and follow the onscreen instructions. To remove DaVinci Resolve from your system, go to the Programs and Features control panel, select DaVinci Resolve, click on Uninstall and follow the onscreen prompts.
Installing DaVinci Resolve Software on Linux
Double-click the DaVinci Resolve Installer and follow the onscreen instructions. To remove DaVinci Resolve from your system, select the uninstall option after running the installer.
Additional Information
You will also need to download and install the latest Blackmagic Design Desktop Video software for monitoring with your Blackmagic Design video hardware. Desktop Video is available from www.blackmagicdesign.com/support.
Change Log
About DaVinci Resolve Studio 19 BETA
What’s new in DaVinci Resolve 19.0
Items marked with * are in progress.
Cut
- New multi source option to view time-synced footage.
- Support for displaying clip markers and keyframes.
- Support for a large enhanced viewer in the cut page.
- Live overwrite now starts with a single frame duration by default.
- Interactive Resolve FX and Fusion effect overlays in the viewer.
- Improved grouping of Fusion effects.
Replay Workflows
- Support for the cut page as a media player and playout system.
- Support for the DaVinci Resolve Replay Editor.
- View ATEM multiview feeds live inside DaVinci Resolve.
- Add points of interest and create replays from multiview and timeline.
- Cue and run replays with live slow motion.
- Pick from slow motion, ramp down and other retime presets.
- Apply auto stingers to start and end of playback.
- Automatically add replays to build highlights timelines.
DaVinci Neural Engine
- IntelliTrack AI point tracker for tracking and stabilization.
- AI powered UltraNR noise reduction for spatial denoising.
- New voice isolation mode with faster response and buffering.
- IntelliTrack powered audio panning to video in Fairlight.
- New faster option for Speed Warp.
- Music Remixer FX to remix voice, drums, bass, guitar and other sources.
- Dialogue Separator FX to separate dialogue, background or ambience.
- Option to detect speakers for text based editing workflows.
Edit
- Ability to edit timeline content based on source clip transcription.
- Option to display timecode column in the transcription window.
- Option to search and replace partial words in the transcription window.
- Select a sentence using mark clip in the transcription window.
- Place on top button in the transcription window.
- Ability to import and export transcriptions using SRT files.
- Ability to detect speakers during transcription.
- Preview, skim and scrub source audio channels in the inspector file tab.
- Set common source audio configurations in the inspector.
- Support for the precision trim editor in the timeline viewer.
- Ability to select audio channels when aligning clips using waveform.
- Support for fixed playhead mode in the timeline.
- Support for bezier controls for Open FX keyframes.
- Missing Text+ fonts are indicated as a viewer overlay.
- Ability to edit Text+ titles in the viewer.
- Ability to use the keyboard numeric keypad for direct timecode entry.
- Effect library favorites are now categorized.
- Option to search across all effect library folders.
- Collapse effect library categories with alt or option double click.
- Improved snapping and cursor sensitivity on the timeline.
- Up to 50% faster iris, shape, wipe and simple dissolves on Apple Silicon.
Media
- Support for updating clip usage for all timelines.
- Ability to select channels when syncing audio using waveform.
- Ability to reveal media pool bin from multi bin or search displays.
- Media management now retains alpha for supported formats.
- Marker clips are now editable in the media pool list view.
- Generated proxies now retain reel number metadata.
- Up to 3.5x faster Super Scale on supported AMD systems.
Color
- New ColorSlice six vector grading palette.
- Node Stack allows management of complex grading workflows.
- Support for ACES AMF 2.0.
- Option to normalize channels in the RGB mixer.
- SDI output now shows advanced 3D keyer strokes and marker annotations.
- Support for double clicking to open a compound node.
- Preview matte node layers by alt or option hovering over layer entry.
- Node context menu actions can now be assigned shortcut keys.
- Support for cleaning up node graph for multiple selected clips.
- Support for creating smart filters for HDR graded clips.
- Improved stereoscopic 3D control layouts on advanced and mini panels.
- Improved viewer zoom increments when using shortcut keys.
- Option to link Dolby Vision target display selection for trims and preview.
- Improved HDR Vivid support.
- Support for FujiFilm Log and Log2 for color managed workflows.
Fusion
- Fusion viewers are now color managed.
- Multi Poly tool for easier rotoscoping of complex objects.
- Support for Open Color IO 2.3.
- Support for referenced Fusion compositions in the media pool.
- USD enhancements for Material X and advanced volumetric shading.
- Stereoscopic 3D clip support in Fusion compositions.*
- Multiple shape toolset enhancements.
- Improved Text+ inspector and on-screen controls.
- Support for deleting and resetting layers in MultiMerge.
- Option for sBooleans to retain the upstream style.
- Option to specify duplication path in duplicate tools.
- Set control to default now clears animations, modifiers and expressions.
- Ability to match planar tracker sizes to dissimilar logo and image overlays.
- Faster rendering of streaming 3D textures in compositions.
- Up to 3x faster Magic Mask performance in Fusion.
- New left flow and mid flow UI presets with vertical viewer layouts.
Resolve FX
- New Film Look Creator.
- Better Face Refinement box and profile handling and smooth skin options.
- New Defocus Background isolates foreground with blur.
- Improved blur quality for Radial Blur and Zoom blur.
- Smoother sub pixel animation and finer control for Box and Directional blur.
- Up to 3x faster Beauty, Edge Detect and Watercolor on Mac.
- Up to 2x faster Beauty, Edge Detect and Watercolor on Nvidia systems.
Fairlight
- Fully integrated native Ambisonics workflow.
- IntelliTrack powered audio panning to video.
- Ability to sidechain VST3 and AU audio effects.
- Music Remixer FX to remix voice, drums, bass, guitar and other sources.
- Dialogue Separator FX to separate dialogue, background and ambience.
- Ducker track FX for auto level management of beds against dialogue.
- Voice Isolation supports true stereo and improved buffering.
- Dialogue Leveler has improved with faster cue up time.
- Improved frequency analyzer displays for spectrum and waterfall options.
- Multiple improvements for native FX processing.
- Multiple automation improvements.
- Support for panning in groups.
- Support for clip head and tail snapping in focus mode.
- Support for zoom to fit for timeline view.
- Support for LTC and MTC chase.*
- Support for an exclusive solo mode.
- Support for fades with Dolby Atmos compositions.
- Arming a track now patches default audio inputs.
- Ability to loop playback over range from Fairlight panels.
- Support for dynamic delay compensation with AU plugins.
- Support for Sony 360RA Walkmix audio formats and plugin.
- Improved ADM and Vivid audio with MPEG-H SDK 2.75.
- Support for third party auto conform workflows.
Codecs
- Up to 3x faster H.264 and H.265 decodes on non Studio in Windows.
- Up to 2x faster H.264 and H.265 native encodes in Windows.
- Support for encoding IMF packages with JPEG HT content.
- Up to 2x faster decodes for ZIP1 compressed OpenEXR sequences.
- Support for alpha-based HEIC formats.
- Support for encoding FLAC audio.
- Support for 44.1 KHz and other audio sample rates in Linux.
- Render support for odd numbered resolutions in mov and avi formats.
- Initial support for iPhone Cinematic video on Mac OS Sonoma.
- DaVinci IO Encode Plugin SDK support for audio only formats.
- Support for Sony XAVC H raw controls.
- Support for embedded LUTs in Sony MXF and MP4 clips.
- GPU accelerated decodes for ARRI Codex HDE on CUDA.
Scripting API
- Support for managing clip color groups.
- Ability to query timeline, clip and group node graphs.
- Support for enumerating tools used in a given node.
- Support for setting and getting color keyframe mode.
- Ability to export clip LUTs.
- Ability to export timeline ALE and CDL.
- Ability to import OpenTimelineIO timelines with custom import options.
General
- Organization profile support for Blackmagic Cloud.
- Support for Blackmagic Cloud monthly Studio licenses.
- Improved Blackmagic Cloud media sync dialog.
- Open FX Resolve Renderer plugin for external VFX applications.
- Support for German and Italian user interface localizations.
- Support for duplicating local project libraries.
- Support for restoring timeline backups from deleted timelines.
- Loading large timelines now shows a progress bar.
- Support for disabling specific video tracks for a render job.
- Option to optimize audio loudness and peaks in render settings.
- Support for HDR displays on Windows.*
- Support for HDR scans using the new Cintel scanner 8mm gate.
- Support for black and white scans from the Cintel scanner.
- Clip flags and colors support in data burn-ins.
- New workflow integration example for common MAM APIs.
- DaVinci Remote Monitoring using IP address connections.
- Option to specify a custom TURN server for remote monitoring.
- General performance and stability improvements.
DaVinci Resolve Studio 18.6.6 Update
This software update adds support for AVC MXF Op Atom formats, improved alpha channel interpretation for QuickTime files and better media management of 8K X-OCN clips when trimming. This version requires a DaVinci Resolve Studio license dongle or software activation code.
What’s new in DaVinci Resolve 18.6.6
- Ability to encode Panasonic AVC 100 and 50 in MXF Op Atom formats.
- Option to encode big endian LPCM audio in QuickTime.
- Addressed default alpha mode interpretation for some QuickTime media.
- Addressed incorrect path separators in some project settings on Windows.
- Addressed some Sony XAVC H clips being shown as offline.
- Addressed a media management issue trimming Sony 8K X-OCN clips.
- General performance and stability improvements.
What’s new in DaVinci Resolve 18.5
Key Features
- Multiple cut page improvements.
- Support for Blackmagic Cloud Presentations.
- DaVinci Neural Engine based subtitles from audio in Studio.
- DaVinci Neural Engine powered text based editing in Studio.
- Support for Universal Scene Description based workflows in Fusion.
- New Fusion multi merge tool for compositing multiple layers.
- Multiple remote monitoring improvements.
- Support for fast per-timeline backups.
- Per-timeline Resolve Color Management.
- Support for edit and mix groups in Fairlight.
- Support for AI-based audio classification in Studio.
Cut
- Multiple timeline display improvements.
- Support for subtitles in the cut timeline.
- Enlarge a track by clicking on icon in the track header.
- Options to display clip names and indicators.
- Improved smart indicator and edit point display.
- Out of sync indicators for edited sync clips.
- Multiple timeline action improvements.
- Automatically detect and create captions from timeline audio.
- Perform DaVinci Neural Engine scene cuts in the cut timeline.
- Add audio, video and subtitle tracks.
- Split and join adjacent clips.
- Ripple option to toggle ripple edits on main track.
- Add markers and set default marker color.
- New edit actions.
- Ability to create split edits by rolling or trimming audio.
- Alt or Option trim to bypass ripple and add a gap on the main track.
- Trim and extend edit clip start or end to playhead.
- Resync misaligned synced clips.
- Reorganized toolbar for quick access to view options and edit actions.
- Right click on smooth cut to access favorite transitions on the toolbar.
- Cut page track numbering unified with other pages.
- Export current frame as still from media, cut and edit viewers.
- New motion graphic effects templates and transitions in cut and edit.
Media
- Support for AI-based audio classification in Studio.
- Support for fast per-timeline backups.
- Support for additional automatic smart bins.
- Import and export timelines using the OpenTimelineIO format.
- New 2x Enhanced Super Scale algorithm.
- Ability to set Super Scale settings for media from the inspector.
- Metadata panel support for marker subclips.
- Ability to clear in-out ranges for multiple clips.
- Ability to change the starting timecode for multiple timeline selections.
- Ability to reorder favorites in media storage.
- Ability to clear recent media history in the source viewer.
- Support for custom pixel aspect ratios in clip attributes.
- Improved proxy linking for clips without timecode.
Edit
- DaVinci Neural Engine based subtitles from audio in Studio.
- DaVinci Neural Engine powered text based editing in Studio.
- Ability to add and delete keyframes using keyboard shortcuts.
- Ability to modify keyframes during playback on the edit timeline.
- Export current frame as still from media, cut and edit viewers.
- Ability to drag video tracks to reorder in the track index.
- Ability to stabilize multiple selected clips from the timeline.
- Retime curve now invokes the speed curve by default.
- Option to copy grades from flattened multicams to multicam angles.
- Ability to manage render caches across projects.
- Ability to manually relink missing VFX Connect clips.
- Ability to select all clips under playhead in cut, edit and Fairlight.
- Ability to set key shortcuts for timeline view options and volume controls.
- Smoother video updates when the system cannot play in realtime.
- Improved text wrapping for caption previews in the subtitle inspector.
- The timecode display window now shows timecode entry previews.
- The Export Edit Index action is now part of edit index options.
Fusion
- Support for importing Universal Scene Description (USD) files.
- Introduction of the USD toolset for managing USD assets.
- Support for USD Hydra based renderers including Storm.
- New multi merge tool for compositing multiple layers.
- Support for a native AI-based depth map tool in Studio.
- GPU accelerated Clean Plate.
- GPU accelerated Anaglyph.
- Up to 3x faster renders when using Fusion splitter tool.
- Find in media pool for clips and MediaIns in Fusion page.
- Support for OpenEXR DWA compression in Fusion savers.
- Support for BMD Film Gen 5 in Fusion’s CineonLog tool.
- Support for previewing individual shape tools.
- Project setting option to disable tone mapping for Fusion conversions.
- Media pool relink, replace and reveal for USD, FBX and Alembic assets.
- Project archives now include USD, FBX and Alembic assets.
- Media pool indicator for offline USD, FBX and Alembic assets.
Color
- Per-timeline Resolve Color Management.
- Support for matte finesse post-filter controls in Magic Mask.
- Ability to undo Camera RAW changes for each clip.
- Ability to set composite mode in the corrector node.
- Support for marker overlays and annotations in the viewer.
- Support for showing missing LUTs as a viewer overlay.
- Ability to manage missing LUTs from the LUT manager.
- Ability to sort stills, LUTs and PowerGrade albums in the gallery.
- Generated LUTs now include spatial Resolve FX DCTL effects.
- Automatic background refresh of gallery stills for multi user projects.
- Improved highlight mode behavior during HDR grading.
- Ability to copy and paste Vivid HDR trim metadata between clips.
- Improved performance when grading HDR footage.
- Up to 2x faster spatial noise reduction in Apple silicon.
- Improved tracking and cache management for Magic Mask.
- Support for Dolby Vision controls in DaVinci Resolve Mini panels.
- Support for color warper controls in DaVinci Resolve Mini panels.
- Ability to reset all qualifiers with the advanced panel.
- Advanced panels in tracker mode now show active power window controls.
- External matte node labels now default to the matte file name.
- Node label is now retained when converting to a shared node.
- Support for Leica L Log color management.
- Color space and gamma options are now organized by vendor.
Resolve FX
- AI-based Resolve FX Relight to add virtual lighting in Studio.
- Invert Effect option in Resolve FX Glow for a dark glow effect.
- Option to export Resolve FX Flicker Addition analysis as an alpha channel.
- Ability to swap in and out colorspaces in Resolve FX Color Transform.
- Improved handling of blanking in Resolve FX Depth map analysis.
- Improved patch replacer results at patch edges.
- Bright region recovery control for Resolve FX Glow and Light Rays.
- Automatic input and output management for Resolve FX grading nodes.
- Dragging a Resolve FX now applies it as a color grading node.
- Alt or option drag a Resolve FX to create an FX node.
- Support for smart initialization of OFX alpha mixing state.
- Alt or option resize selection to preserve ratio in warper and surface tracker.
- Up to 2x faster Beauty, Water Color and Stylize on Nvidia systems.
- Up to 1.5x faster Lens Blur and Aperture Diffraction on Nvidia systems.
Fairlight
- Support for track groups in Fairlight.
- Elastic wave time stretching now features a voice-specific option.
- Support for nesting VCAs.
- Enhanced Dolby Atmos support in Studio.
- Support for voice isolation in Studio for Linux.
- Support for dialog leveler for Linux.
- Improved metering previews for muted or soloed tracks and monitors.
- Ability to set key shortcuts to scroll to selected track in the mixer.
- Track solos are now retained across project sessions.
- Ability to pan busses.
- Ability to select all clips under playhead in cut, edit and Fairlight.
- Ability to designate track and bus monitor sources from the tracks index.
- Multiple voice isolation improvements in Studio.
- Fairlight FX Monitor Control allowing third party Rewire integration.
- Ability to stream and spot from applications like Soundminer.
- Shift modifier action for 0.1 dB resolution automation level trimming.
General
- Support for Blackmagic Cloud Presentations.
- Sign in and upload videos directly to TikTok from DaVinci Resolve.
- Remote Monitoring Improvements in Studio
- Support for remote monitoring from Mac OS.
- Improved Mac OS client with support for more formats.
- New iOS client to monitor on iPad and iPhone.
- Support for connecting clients using Blackmagic ID.
- Support for streaming to multiple clients.
- Support for viewing streams on computer displays.
- Support for monitoring HDR streams.
- Ability to upload new versions to Dropbox Replay in Studio.
- Rocky Linux 8.6 based installation environment for DaVinci Resolve.
- Press play multiple times for faster playback from the Advanced panel.
- DRT exports now include groups and shared nodes.
- DRA project archives now include VFX Connect media.
- Optimized Blackmagic Cloud project library connections.
- New vertical resolution timelines and projects default to full frame with crop.
- Speed warp option for default motion estimation mode in project settings.
- Stabilization, scene cut and other progress dialogs show analysis speed.
- Quick export icon on edit and color pages.
- General performance and stability improvements.
Scripting & APIs
- Scripting API support to import and export DRT and DRB files.
- Scripting API support to load data burn presets.
- Scripting API support to get node label.
- Scripting API support to apply ARRI CDL and LUT to a clip.
- Scripting API support for querying and setting clip enabled state.
- Scripting API support to add, delete, enable and lock timeline tracks.
- Scripting API support to delete and link timeline clips.
- Scripting API support to trigger object mask tracking.
- Scripting API support to trigger stabilization.
- Scripting API support to invoke scene cut detection in timelines.
- Scripting API support to enable smart reframe for clips.
- Scripting API support to create subtitles from timeline audio.
- Scripting API support for adding subclips to the media pool.
- Additional track and record frame inputs when adding clips to timeline.
- Additional record frame input when creating a timeline from media.
- Supported containers for selected codecs are now listed in the encode API.
- Ability to specify data and video range in the encode API.
Codec Support
- Support for Blackmagic RAW SDK 3.3.
- Support for rendering JPEG and PNG image sequences.
- Support for rendering animated GIF clips.
- Support for decoding AC3 audio in Linux.
- Ability to decode LogC3 ARRI clips as LogC4.
- Support for raw controls for Sony XAVC clips.
- Ability to import MKV chapters as media markers.
- Ability to export timeline markers as MKV chapters.
- Hardware accelerated VP9 decodes in Resolve for supported Nvidia cards.
- Up to 50% faster encode speeds for Sony XAVC 420 8-bit clips.
- Support for decoding AV1 from MKV and WEBM clips.
- Support for encoding and decoding FFV1 formats.
- Encode support for ProRes, AV1, H.264, H.265, MP3, AAC in MKV clips.
- Custom compression levels when rendering ZIP formatted EXRs.
- Improved bitrate and quality when encoding AAC audio in Windows 11.
- Hardware accelerated encode support for AV1 in AMD systems.
- Ability to use multiple hardware encoders in supported AMD systems.
- Up to 30% faster Apple ProRes hardware accelerated encode.
- Better disk usage estimates when rendering ProRes clips on Apple silicon.
- Quick export renders now include active subtitle and data burn in.
DaVinci Resolve Studio 18.1.4 Update
This software update adds faster loading of timelines with multiple markers and better handling of creation date metadata. It also adds improvements to the grab all stills function and audio scrubbing in the sync bin as well as support for monochrome decoding of ARRI RAW clips. This version requires a DaVinci Resolve Studio license dongle or software activation code.
What’s new in DaVinci Resolve 18.1.4
- Improved load performance for timelines with a large number of markers.
- Ability to cancel the grab all stills process.
- Support for monochrome decode mode for ARRI raw clips.
- Sync bin views now use creation date instead of modified date.
- Creation date is now preserved by Proxy Generator.
- Addressed an issue with Resolve FX Dehaze in DaVinci Wide Gamut.
- Addressed missing audio when scrubbing in the sync bin.
- Duration markers created from in-out ranges now use the last set color.
- Addressed internet upload issues for file names with non-ascii characters.
- Addressed an intermittent issue trimming gaps with a speed editor.
- Addressed an issue with Resolve FX keyers on the Fusion page.
- Addressed an issue with delete empty tracks deleting locked tracks.
- General performance and stability improvements.
What’s new in DaVinci Resolve 18.1.3
- Support for MXF OP1A DNxUncompressed.
- Support for new Sony Venice 2 formats.
- Ability to pick color in Fusion glow, soft glow, and highlight tools.
- Improved performance for Text+ when set to zero opacity.
- Improved mixed resolution UI handling for audio effect dialogs.
- Proxies from vertical clips now preserve aspect ratio.
- Copying grades to compound nodes now honors keyframe alignment.
- Addressed cache invalidation for changes to Fusion background media in.
- Addressed ARRIRAW decode issues on Mac systems with multiple GPUs.
- Addressed excessive memory usage with interlaced rendering.
- Addressed a possible crash when working with crossfades in Fairlight.
- General performance and stability improvements.
What’s new in DaVinci Resolve 18.1
Key New Features
- Vertical resolution options in project settings for social media.
- Select custom thumbnails for YouTube uploads.
- Support for individual timeline locks enhancing multi-user collaboration.
- New Voice Isolation powered by the DaVinci Neural Engine in Studio.
- New Dialogue Leveler for natural smooth audio.
- Vector keyframing for Fairlight automation curve editing.
- Fairlight grid support for editing to timecode or musical tempo.
- Reorganized and streamlined view menu.
- Support for Resolve FX Dust Buster in the edit timeline.
- Improved speed editor functionality in the edit page.
- Subtitle caption properties can now be overridden individually.
- Support for subtitle track presets and per-track formatting rules.
- Support for Magic Mask in the Fusion page.
- Support for Dolby Vision cinema trims.
- Support for fractional display scaling for Windows and Linux.
Media
- Support for smart bins to show individual marker clip listing.
- Navigating to markers in the viewer now selects the marker.
- Support for loading previous or next clip via source viewer actions.
- Drag media entries to auto smart bins to apply keyword, shot or scene.
Edit
- Improved speed editor functionality in the edit page, including:
- Full screen view, resize timeline and review playback keys.
- Trim, roll, slip edits and insert close ups in the edit timeline.
- CUT, DIS and SMTH CUT keys.
- Changing audio levels for clips in the edit timeline.
- Setting default transition durations with the SET key.
- Using sync bin and cam 1-9 keys to change multicam clip angles.
- Improved subtitle functionality:
- Subtitle caption properties can now be overridden individually.
- Improved subtitle handling for HTML bold and italics formatted text.
- Support for subtitle track presets and per-track formatting rules.
- Improved alpha handling with compound clips and transitions.
- Ability to multi-select, delete and realign transitions.
- Support for edit and trim actions on gaps.
- Support for timeline page scrolling.
- Shortcut to enable or disable all audio track destinations.
- New tracks are now added in context in the edit timeline.
- Support for Resolve FX Dust Buster in the edit timeline.
- Support for marker and track listing alongside the edit index.
- The change speed dialog now shows source clip duration.
- Reconform from bins persists the selected bin for the session.
- Drag and drop media as inputs to inspector on supported Fusion effects.
Fusion
- Integrated keyboard configuration for Fusion actions.
- Support for Magic Mask in the Fusion page.
- Support for Resolve FX Keyers, Dust Buster, Lens Flare and Stop Motion.
- New media-in background mode to access edit track composites.
- Up to 10x faster Text+ playback and render performance.
- Search for Fusion nodes using common keywords and categories.
- Faster VariBlur with GPU acceleration.
- Faster FilmGrain with GPU acceleration.
- Support for ARRI LogC4 and ARRI Wide Gamut 4 in the Fusion page.
Color
- New Resolve FX Sky Replacement including generated sky textures.
- Support for motion blur for textures with Resolve FX Surface Tracker.
- Support for using Resolve FX alpha for grade isolation.
- Support for separate RGB controls in Resolve FX Film Grain.
- Support for Dolby Vision cinema trims.
- Color grading nodes with Resolve FX automatically get additional inputs.
- Ability to process alpha channel for supported Resolve FX in Color.
- Tracking now works over transition extents.
- Improved resize quality for multicam and compound clips.
- Improved quality when tracking faces in profile or partial occlusion.
- Improved eye sharpening behavior in Resolve FX Face Refinement.
- Improved DaVinci Resolve advanced panel features:
- Improved clip and timeline toggle for grouped clips.
- The pots mode now includes additional primary controls.
- Improved qualifier menus.
- Improved power windows menus.
- Pressing shift down + loop toggles playhead mode.
- Ability to dock reference wipe mode on the side panel.
- Improved handling of Text+ in RCM projects with DaVinci Wide Gamut.
- Improved HDR, division and percentage labeling on video level scopes.
- Ability to filter clips with object mask.
- Ability to filter clips by clip color.
- The effects inspector now shows an explicit delete icon.
Fairlight
- New Voice Isolation powered by the DaVinci Neural Engine in Studio.
- New Dialogue Leveler for natural smooth audio.
- Support for grid editing to timecode or musical tempo.
- Greatly improved automation editing and control including:
- Automation curve editing with vector keyframing.
- New snap automation glide time preference.
- Automation now follows clip edits by default.
- Automation now stays updated to match current playhead position.
- Support for writing automation to start, end or all of a timeline.
- New controls for auto punch, auto safe, zones and new mix.
- Ability to create audio crossfades between clips over a gap.
- Support for paste insert and ripple cut actions in the Fairlight timeline.
- Support for pasting multiple track names for adjacent tracks.
- Support for locating view to start and end of range selection.
- Rendering one track per channel now suffixes audio channel name.
- Mixers and meters show tooltip names for easier patch visibility.
- Confirmation dialog when deleting buses with assignments or automation.
- Support for deleting multiple buses from the bus format dialog.
- Multiple ADR usability improvements.
Codecs & I/O
- Select custom thumbnails for YouTube uploads.
- Select bit rates for supported codecs in YouTube presets.
- An option to review rendered clip before social media upload.
- Support for timeline markers in AAF import and exports.
- Custom preset support for Dropbox and Dropbox Replay uploads.
- Most suitable H.264/H.265 encoder is automatically selected.
- Support for decoding Dolby Vision H.265 Profile 5 clips.
- Hardware accelerated AV1 encodes in supported Nvidia systems.
- Support for UHD and DCI presets in output resolution scaling.
- Support for importing and exporting timeline markers in IMF workflows.
- Improved multichannel audio metadata in IMF delivery workflows.
Performance
- Up to 2x faster optical flow performance in enhanced mode.
- Up to 10x faster Text+ playback and render performance.
- Improved performance with RCM on Apple silicon.
- Up to 5x faster face refinement tracking and analysis.
- Up to 5x faster Resolve FX object removal performance.
- Up to 2x faster sharper resize performance on Apple silicon.
- Up to 4x faster spatial noise reduction performance.
- Up to 30% faster temporal noise reduction performance.
- Up to 5x faster video stabilization performance.
- Faster playback performance with large node graphs.
- Up to 2x faster decode performance for PIZ EXRs in Apple silicon.
- Improved RAW decode performance on Apple silicon.
- Up to 30% faster Nvidia accelerated playback for 8K H.265 clips.
- Up to 50% faster AV1 and H.265 encodes with dual Nvidia encoder.
- Improved startup time on Mac for users with many project libraries.
- OpenVINO accelerated AI-based Studio features in Windows Intel systems.
General
- Vertical resolution options in project settings for social media.
- Support for individual timeline locks enhancing multi-user collaboration.
- Improved audio management when importing ATEM projects.
- Simplified project setting presets accessible from the three dot menu.
- Reorganized and streamlined view menu.
- Support for exporting multiple selected projects.
- Support for copying and pasting project manager folders.
- Exported DRT timelines now include media sync information.
- Ability to copy and paste values when selecting virtual slider controls.
- Middle mouse drag to scroll clip thumbnails in color and Fusion.
- Support for fractional display scaling for Windows and Linux.
- Customize shortcuts for move clips, audio record and more actions.
- Ability to search for sub menus in keyboard customization.
- Keyboard customization action hover text shows the location of the action.
- Clickable warnings to easily resolve key shortcut conflicts.
- Scripting API support to spot audio to current track at playhead.
- Ability to select specific timelines to import from FCPXML files.
- General performance and stability improvements.
Improvements to speed editor functionality on the edit page
In the edit page, the speed editor features a number of workflow improvements. The Sync Bin button opens the source viewer in multicam mode. The CAM buttons switch angles in multicam clips and timelines. Audio level, trim in, trim out and other functions prioritize selection followed by track order. The slip source button always works on the clip under the playhead and slip dest works on the following clip. Other speed editor functions now match the behavior on the Cut page.
Multiple subtitle improvements
You can now override individual properties for each subtitle caption, e.g adjust font family and style while keeping font size and background to follow track. Imported HTML styled rich text in SRT is handled better with subsequent font changes.
You can also specify per-track deliverable rules, setting multiple tracks targeted at specific markets, each with their own custom CPS, timing and line rules.
Both track style and rules can be saved and recalled as presets from the inspector 3 dot option menu.
New tracks are now added in context in the edit timeline
Context clicking and adding a track inserts the new track adjacent to the context clicked track. When adding multiple tracks, the dialog suggests the appropriate position for the new tracks.
Media inputs for Fusion effects in the edit inspector
You can now drag and drop media pool clips to the inspector as Fusion inputs. When creating Fusion effects, plugins and transitions, you can create media drop targets by selecting a Media In tool and exporting clip name as an inspector control.
Combined sizing and alpha support for nested compound clips
Multicams and simple compound clips can now combine sizing and alpha changes from their child clips with sizing and alpha changes applied in the parent timeline, effectively preserving the underlying media resolution.
New Resolve FX Sky Replacement including generated sky textures
Resolve FX Sky Replacement allows for keying and replacing the sky in shots with B-roll or artificially generated sky textures. You can use it to keep the sky consistent between takes or provide more appropriate backgrounds to creatively affect color and mood.
An option to review rendered clip before social media upload
From the render queue 3 dot option menu, you can enable Review Before Upload. When rendered, jobs with internet presets render to disk and show that they’re waiting for upload. From the job’s context menu, you can reveal the rendered file, review the quality and content and upload the result.
Individual timeline locks in multi-user collaboration projects
With DaVinci Resolve 18.1, you can lock and edit individual timelines without locking the parent bin’s contents. This allows for greater flexibility in multi-user projects in setting up your media pool bins without locking other media or timelines in the same folder.
You can still manually choose to lock individual media pool bins to secure their contents independently.
Reorganized and streamlined view menu
The View menu has been streamlined and improved to make it easier to focus on View-related choices that apply to the entire application, while moving some view-oriented choices that are specific to a single page (e.g., Color) to local menus.
The View menu has been reduced from 40+ items to 25. Some items have been moved into a hierarchical choice, and some moved elsewhere to panel-specific context menus.
- The Color Page viewer’s 3 dot option menu now includes options like Window Outline, Highlight, Wipe and Split Screen, aggregating some items that were formerly hidden in context menus. These can now be controlled via the keyboard if desired.
- Stills options and Step Timeline Wipe are now available from the Color menu.
- Display of Smart Bins and Power Bins are now available in the Media Pool panel options menu as they are local to the Media Pool.
- Playhead shadows, Gray viewer backgrounds and 2D timeline scrolling can now be found in Preferences>User Preferences.
Dolby Vision cinema trims
DaVinci Resolve now supports the Dolby Vision XML 5.1.0 format which includes trim support for Dolby Vision cinema targets as well as L11 metadata. Users can create trims for Home and Cinema targets by selecting the appropriate target displays.
When exporting a 5.1.0 XML from a Dolby Vision version 4.0 project, there is a dialog where the mastering colorspace, application type and L11 values for content type and intended white point can be chosen.
Fairlight automation curves updates
Substantial update to audio automation curves, including vector-based keyframing, ability to graphically enter, edit, trim, nudge keyframes with standard tools.
- A new automation editing view, selectable from the track header automation drop-down menu, allowing management of curves and keyframes. You can add (Option/Alt-click), remove (Ctrl-Alt/Cmd-Option-click), select and move individual keyframes, or select, edit or cut/copy/ paste keyframe ranges. A keyboard shortcut can be configured to allow you to easily switch to fader views.
- Automation curve data written by control surfaces now appear as keyframes on the curve line.
- Moving keyframes now creates smooth ramps between any 2 adjacent points. When moving multiple keyframes in a range, bounding keyframes are automatically added to the range to preserve values outside the range.
- Select an area and drag up or down to create “carve out trims,” allowing instant level changes over a selected area. Use the Shift key for fine tuning.
- In the multi tool focus mode, hold shift-alt/shift-option to temporarily switch to the pencil tool to redraw curves.
- An overlay will appear when trimming and adjusting keyframes. e.g. “-8.5 dB (∆1.3 dB)” indicating absolute level value (-8.5 dBfs) and the change in the current trim operation (+1.3 dB).
- The Select Range Mode Tool is now removed as it is no longer needed. The other tools (especially Multi Tool in Focus mode) can now be used in the Automation curve view to select and manipulate keyframing.
Fairlight automation modes updates
New behaviors have been added to automation modes:
- Automation values now update when moving the playhead to a new location, avoiding discontinuities when recording automation; faders are always up to date when the Playhead is parked.
- The Fairlight>Automation menu has several new choices:
- You can choose Write to Start/End/All actions to write current automation levels to the start, the end or all of your timeline.
- Choose Join to manually resume writing automation in Latch mode from the current level.
- You can set an automation active zone (indicated in red on the ruler) by choosing Fairlight>Automation>Active Range and choosing In, Out or Enable to restrict where automation can be written. Automation preview switches automatically at the borders, allowing playback before and after the active range and recording within the range.
- Trimming can be initiated by touching and holding the fader prior to pressing play, or prior to or during playback, pressing the automation punch button on the channel. The button will turn red and the fader cap will turn yellow. Use of the punch button allows trimming to be initiated on some channels and not on others.
- You can disable per-track automation recording and automation playback by right clicking the automation arm icon in the mixer and selecting Off or Safe.
- The user preference “Include mixer events in the undo stack”, in the Fairlight tab, allows mixer actions to be undone from Edit>Undo (Control/Cmd-Z).
Fairlight grid mode
The Fairlight grid mode allows you to position clips on a grid based on timecode or musical tempo.
- From the Grid options, located next to the Timeline View options above the ruler, you can customize grid line visibility, duration, snapping to grid lines and other options.
- For the timecode grid, you can select resolutions of 1 second, 1 frame, 1/2 frame and 1/4 frame.
- For the tempo grid, you can configure beats per minute, note duration (1 bar, 1/2 note, 1/4 note, 1/8 note, 1/16 note) and time signature (4/4, 3/4 and 6/8).
- The ruler context menu also allows you to set grid start at a timecode location, or create grids from a range. Areas before the grid start are shown with negative bar|beat values. You can set a grid from a selected time range and set the start point and number of measures so that tempo is automatically calculated.
- Musical tempo grid lines are labeled with bars, beats and note durations. A counter location of “003|03|09” indicates a grid location of “bar 3, beat 3, and nine 16th notes.”
Voice isolation processing
The Fairlight page now has a new DaVinci Neural Engine AI-based core effects process that appears in the Inspector or as a floating plug-in window. This processing can remove loud, undesirable sounds from existing voice recordings. You could literally remove a jackhammer from a recording, leaving only the voice. Voice isolation can be very effectively for general purpose noise or room sound reduction/removal – including air conditioning, traffic, generator or motor noise, echoes and reverbs, undesired room sound, and other background sounds.
The voice isolation effect is one of two Fairlight track effects (the other being the dialogue leveler), accessible from the inspector. Under the audio tab, you can enable voice isolation for selected mono and stereo clips and tracks in the Fairlight, edit and cut pages. For tracks, it can also be enabled from the track FX section in the Fairlight mixer.
- There are two controls: effect on/off and an “Amount” control (0-100%). Using just a bit less than 100% can create a more natural result.
- Supported as an effect in mono and stereo tracks and clips.
- Live audio input cannot be used; the sound source must be on disk.
- Note: Voice isolation is not suitable for anything other than the human voice, and primarily useful for dialogue processing.
Fairlight FX Dialogue leveler
The dialogue leveler allows for very useful improvements to dialogue recordings without the need for tedious level adjustment (clip gain or automation curves) or the artifacts of compression or expansion.
Use the dialogue leveler for dialogue recordings that are partially off mic, or have multiple people in a scene at different volumes, differing levels are too extreme, etc, to get extremely even and natural results, while maintaining the perspective of the original balance. The overall effect allows dialogue levels that originally jump out or are near inaudible to sit well in the final mix.
The dialogue leveler (like the voice isolation effect) can be enabled from the inspector and the track FX section in the Fairlight mixer.
The dialogue leveler’s controls include:
- An on/off switch.
- 4 presets optimized for different dialogue types. The default (“Optimize most sources”) works for most material.
- 3 module switches that allow to further tailor the response to your source material.
- An output level control with up to 6 dB of gain.
What’s new in DaVinci Resolve 18.0.4
- Support for Blackmagic RAW SDK 2.7.
- General performance and stability improvements.
What’s new in DaVinci Resolve 18
Key Features
- Blackmagic Cloud to host and manage cloud-based project libraries.
- Collaborate securely over the internet using Blackmagic ID.
- Support for intelligent path mapping to relink files automatically.
- Vastly improved project library performance for network workflows.
- Improved project performance, especially when working with large projects.
- New Proxy Generator app for auto-creating proxies within watch folders.
- Ability to choose between prioritizing proxies or camera originals.
- Proxy files in subfolders are automatically assigned in the media pool.
Media & Edit
- Stabilize Blackmagic Pocket Camera clips with camera gyro metadata.
- New subtitle improvements including:
- Support for timed text TTML, XML and embedded MXF/IMF subtitles.
- Ability to view and import subtitles from media storage.
- Support for relinking subtitle clips from the media pool.
- Subtitle region support with multiple simultaneous captions per track.
- Set individual presets, text positions and intuitively edit between regions.
- Add, rename and manage regions from the timeline context menu.
- Ability to export TTML subtitles from the track header context menu.
- Ability to import, export and embed multiple subtitle tracks as TTML.
- Support for reversing shape, iris and wipe transitions in the edit page.
- Support for showing up to 25 simultaneous multicam angles on the viewer.
- Edit Index now shows clip duration.
- Ability to navigate keyframes outside trimmed clip extents.
- Ability to navigate retime keyframes using hotkeys.
- Smart bin filter for disabled timelines.
- Render in place and open in Fusion actions can be assigned shortcuts.
- Reset Fusion composition now works on multiple clip selections.
Color
- New object mask capability in Magic Mask.
- Adjustment clips and Fusion generators can bypass color management.
- Support for syncing clip groups in remote grading sessions.
- Ability to trigger bidirectional tracking from advanced and mini panels.
- Support for matte finesse and 3D qualifier in advanced and mini panels.
- Dolby Vision highlight clipping support in advanced panels.
- Support for bypassing color outputs from advanced panels.
- Add key mixers with auto-connected key outs from advanced panels.
- Support for bidirectional tracking in advanced panels.
- Support for fast review playback mode in advanced panels.
- ACES support for Blackmagic Gen 5 camera formats.
- Support for the HDR Vivid standard.
- Reference gamut compression enabled by default in ACES 1.3.
Resolve FX
- New Resolve FX Depth Map to generate 3D depth based keys in Studio.
- New Resolve FX Fast Noise.
- New Resolve FX Despill.
- New Resolve FX Surface Tracker for tracking warped surfaces in Studio.
- Improved Resolve FX Beauty with new ultra mode.
- Improved edge strength and filter controls in Resolve FX Edge Detection.
- Option to composite from a second input in Resolve FX Transform.
- New bokeh preset for Resolve FX Lens Reflections.
- Green-purple control for Resolve FX Chromatic Aberration.
- Sizing awareness option in Resolve FX lens flare and radial & zoom blurs.
Fairlight
- Ability to convert fixed bus projects to FlexBus in project settings.
- Ability to freely order tracks and buses in the mixer via the track index.
- Ability to nudge custom millisecond or sub-frame intervals in the timeline.
- Improved quality for time stretched audio.
- Improved Dolby Atmos immersive mixing, including binaural monitoring.
- Native support for Dolby Atmos production for Linux and Apple silicon.
- Independent controls to enable automation and expose parameters.
- Improved behavior of automated tracks under VCA control.
- Improved meters with configurable decay, peak hold and display modes.
- Ability to ctrl-alt click to remove gain and elastic wave keyframes.
- Ability to double click a clip in the timeline to rename.
- Ability to set record clip name prefix at a per-track level.
- Support for renaming underlying tracks when renaming a linked group.
- Equalizers with improved Q controls and mouse wheel inputs.
- Dynamics with enhanced metering, gain display and enable controls.
- Dynamics with improved dry mix, soft knee and metering in FlexBus.
- Improved plugin management with replace and copy settings in the mixer.
- New built in presets for equalizers and dynamics.
- Hold shift and double click clips to extend the edit selection range.
- Support for applying audio gain on range selection.
- Improved waveform display accuracy under crossfades.
- Origination time metadata is now persisted when bouncing mix to track.
- Option to trim from unity on the Fairlight Desktop Console.
- Support for VCA and bus spill on the Fairlight Desktop Console.
- Support for using the Fairlight Desktop Console on Linux systems.
- Studio monitoring support for FlexBus on consoles.
- Fairlight console option to mute speakers on timeline load.
- Support for chasing timecode via Fairlight audio interfaces.
- Support for user views in the Fairlight Desktop Console.
- Improved mapping for audio effects on the Audio Editor panel.
- Ability to use alt + solo to invoke solo safe in the Audio Editor panel.
- Support for a new clear mutes action in the timeline menu.
- Enabling track mixer controls brings window to focus if already open.
- Grid and list modes are persisted for patch, bus and VCA assign.
Fusion
- Multi-button mode selection in inspector for multiple tools.
- Support for all modern and future python 3 versions for scripting.
- Support for live previews when using the Text+ color picker.
- Multiple new composition blend modes.
- New expression animated Custom Poly modifier for masks and strokes.
- Faster GPU accelerated paint tool with smoother strokes.
- Faster duplicate tool with additional blur, glow and size controls.
- Improved fade-on and text ripple title performance.
- Improved performance for night vision, glitch, TV and other effects.
Codecs
- Support for Blackmagic RAW SDK 2.6.
- Support for video uploads to internet accounts using custom presets.
- Support for encoding mono and stereo MP3 audio.
- New HyperDeck export preset in the Quick Export and deliver page.
- Ability to render individual clips with timeline effects.
- Ability to embed Blackmagic RAW metadata in QuickTime renders.
- Custom quality and profile media management options where available.
- Support for rendering Dolby Vision compatible H.265 clips.
- Support for decoding CMYK format TIFF files.
- Support for retaining reel name metadata in rendered EXRs.
- Support for record date and time metadata for JPEG stills.
- Alpha channel support in the IO Encode Plugin SDK.
- Support for RED SDK 8.3.
- Support for the ARRI Alexa 35 camera.
- New 1440p YouTube preset.
- Render option to override ACES gamut compression for round trips.
- Main10 is now the default H.265 encoding profile on Mac.
General
- Support for 10-bit viewers on Windows and Linux in Studio.
- Stream video output to remote monitoring in Windows and Linux in Studio.
- Apple Neural Engine support for DaVinci Neural Engine on M1 and M1 Pro.
- Support for Korean localizations in DaVinci Resolve.
- PostgreSQL 13 is now bundled with Project Server.
- Support for desktop notifications for collaboration chat.
- User preference to import Finder tags as clip keywords on Mac.
- Support for importing and exporting Final Cut Pro v1.10 XMLs.
- Ability to unlink Dropbox comment and marker sync for timelines.
- Playback and render now prevents Mac systems from sleeping.
- Render jobs now show progress bars for uploads.
- Support for per-system project working paths in collaboration and cloud.
- Support for per-system render cache mode in collaboration and cloud.
- Support for setting current project settings as default.
- Drag and drop project archives to project manager to restore.
- Scripting API support for creating Fusion compositions.
- Scripting API support for exporting project archives.
- Scripting API support to get and set timeline start timecode.
- Scripting API support to detect stale media bins and refresh them.
- Scripting API support for updating camera raw sidecar files.
- General performance and stability improvements.
Pre-Installation Notes
- PostgreSQL 9.0 is the minimum supported version.
- PostgreSQL 13 is the recommended version.
- 10-bit viewers on Windows & Linux needs a capable graphics card and display.
What’s new in DaVinci Resolve 18 (Public Beta 2)
DaVinci Resolve 18 is a major release featuring cloud based workflows for a new way to collaborate remotely! You can host project libraries using Blackmagic Cloud and collaborate on the same timeline, in real time, with multiple users globally. The new Blackmagic Proxy generator automatically creates proxies linked to camera originals, for a faster editing workflow. Plus, support for Apple M1 Ultra gives you a powerful image processing engine, eliminating expensive cloud computing. There are new Resolve FX such as ultra beauty and 3D depth map, improved subtitling for editors, GPU accelerated Fusion paint and real time title template playback, Fairlight fixed to FlexBus conversion and more!
DaVinci Resolve Studio 17.4.6 Update – 29 March 2022
This software update adds support for Nikon RAW files, a Sony IMF render preset and improved stability with 3D renders in Fusion on Apple Mac models with M1 Max processors. In addition, DaVinci Resolve Studio 17.4.6 adds better audio proxy handling and Vimeo credential recognition, as well as improved stability when using HDR controls on Apple silicon models. This version requires a DaVinci Resolve Studio license dongle or software activation code.
What’s new in DaVinci Resolve 17.4.6
- Support for Nikon RAW video formats.
- Support for Sony IMF render preset.
- Support for CopySettings to work on Fusion modifiers.
- Scripting API support to get node count and LUT by node index.
- Improved stability with large 3D renders in Fusion on M1 Max.
- Addressed clip gain changes being wrongly applied to selected tracks.
- Addressed audio issues with proxies generated for non-48KHz clips.
- Addressed a context menu issue for clips with cached audio effects.
- Addressed a stability issue with some HDR controls in Apple silicon.
- Addressed an issue with malformed fonts.
- Addressed an issue extruding 3D text from specific fonts.
- Addressed SVG groups going offline if duplicate Fusion node names exist.
- Addressed issues with IO encode plugins.
- Addressed audio artifacts rendering Sony XAVC formats.
- Addressed sign-in issues for Vimeo.
- General performance and stability improvements.
DaVinci Resolve Studio 17.4.5 Update – 7 March 2022
This software update improves deconstruction of nested timelines for audio tracks, and adds support for 20% faster decoding and rendering of Blackmagic RAW 12K files on Apple M1 Max. DaVinci Resolve 17.4.5 also adds support for decoding 6K and 8K clips from Sony Venice and improves text processing with 3D text and Text+ fonts. In addition, this update improves importing of AAF files with retime or mixed frame rates. This version requires a DaVinci Resolve Studio license dongle or software activation code.
About DaVinci Resolve 17 Studio
What’s new in DaVinci Resolve 17.4.5
- Improved nested timeline decompose for audio, plugins and automation.
- Support for decoding 6K and 8K clips from the Sony Venice 2.
- Faster 12K Blackmagic RAW decode and playback on Apple silicon.
- Ability to set output colorspace in DaVinci YRGB projects.
- Addressed Dolby Vision tone mapping for DaVinci YRGB projects.
- Addressed layout and refresh issues after using the cinema viewer.
- Addressed an issue with missing Text+ fonts in Mac OS Monterey.
- Addressed issues when extruding 3D text from specific TrueType fonts.
- Addressed retime and mixed frame rate issues when importing AAFs.
- Addressed an issue rendering additional outputs with data burn-in.
- Addressed trims not applied from imported Dolby Vision 2.9 XML metadata.
- Addressed ProRes 422 artifacts for some rendered clips on Apple silicon.
- Addressed playback glitches for some long GOP formats in Apple silicon.
- General performance and stability improvements.
Minimum system requirements for macOS
- macOS 10.15 Catalina
- 8 GB of system memory. 16 GB when using Fusion
- Blackmagic Design Desktop Video version 12.0 or later
- Integrated GPU or discrete GPU with at least 2GB of VRAM.
- GPU which supports Metal or OpenCL 1.2.
Minimum system requirements for Windows
- Windows 10 Creators Update.
- 16 GB of system memory. 32 GB when using Fusion
- Blackmagic Design Desktop Video 10.4.1 or later
- Integrated GPU or discrete GPU with at least 2GB of VRAM
- GPU which supports OpenCL 1.2 or CUDA 11
- NVIDIA/AMD/Intel GPU Driver version – As required by your GPU
Minimum system requirements for Linux
- CentOS 7.3
- 32 GB of system memory
- Blackmagic Design Desktop Video 10.4.1 or later
- Discrete GPU with at least 2GB of VRAM
- GPU which supports OpenCL 1.2 or CUDA 11
- NVIDIA/AMD Driver version – As required by your GPU
DaVinci Resolve 17.4.1
This software update fixes issues with automatic recognition of HDR displays on Apple Macs and adds a consistent approach to frame based clip imports. In addition, this update improves fade trimming behavior on the edit timeline, provides better retention of smart filter settings and fixes issues with playback performance and unicode character display for Text+. Technical support for the free version of DaVinci Resolve 17 is only available via the Blackmagic Design community forums.
What’s new in DaVinci Resolve 17.4.1
- Improved frame based imports from Finder.
- Addressed an issue with HDR on viewers on Mac.
- Addressed an issue with banding on video clean feed on Mac.
- Addressed incorrect fades when trimming in the edit timeline.
- Addressed an issue displaying certain unicode characters in Text+.
- Addressed an issue where Text+ expressions would not work.
- Addressed slow playback for Text+ with character styling.
- Addressed retention of smart filters between projects.
- Addressed nested macros not rendering or showing previews in Fusion.
- Addressed incorrect Fusion viewer behavior with tablet input devices.
- Addressed trim interpolation for imported XML Dolby Vision metadata.
- Addressed incorrect PAR values on some Blackmagic RAW clips.
- Addressed issue with lost customized subtitle backgrounds.
- Addressed an issue with unintended markers on Sony MXF clips.
- Addressed a decoding issue with Panasonic XAVC clips on Mac.
- General performance and stability improvements.
What’s new in DaVinci Resolve 17.4
This software update adds support for Apple MacBook Pro models with M1 Pro and M1 Max chips as well as improvements to subtitling including support for more languages and layouts with Text+. It also adds asymmetrical trimming, improved automatic color management, new Resolve FX, support for Steinberg VST3 audio plugins, the ability to export YouTube video chapters, and more.
In addition to the features in the free version (noted above), the Studio update adds Dropbox Replay integration, switching capability for multicam angles with DaVinci Resolve Speed Editor, and support for ACES 1.3 including gamut compression. It also includes a new film halation Resolve FX and faster decodes and encodes for Windows Intel systems.
Key Features
- Hardware accelerated Apple ProRes on Apple M1 Pro and M1 Max.
- Faster DaVinci Neural Engine performance on Mac OS Monterey.
- Native HDR viewers and 120 Hz playback on supported MacBook Pros.
- Native Dropbox and Dropbox Replay integration with render presets.
- Sync markers, comments, annotations with Dropbox and Dropbox Replay.
- Export timeline markers as YouTube video or QuickTime chapters.
- Steinberg VST3 support with access to even more audio effects.
- Simplified auto color management settings with SDR and HDR selection.
- Improved 3D keyer and matte finesse controls.
- New Resolve FX including film halation and custom mixers.
- Text+ support for combined glyphs, right to left text and vertical layouts.
- Subtitles can auto resize backgrounds and decompose to parent timeline.
Apple M1 Pro and M1 Max
- Hardware accelerated Apple ProRes on Apple M1 Pro and M1 Max.
- Faster DaVinci Neural Engine performance on Mac OS Monterey.
- Smoother 120 Hz UI and playback on M1 Pro and M1 Max MacBook Pros.
- Native HDR viewers on M1 Pro and M1 Max MacBook Pros.
- Native full screen mode on Mac OS.
Dropbox
- Dropbox login within DaVinci Resolve preferences.
- Render presets for Dropbox and Dropbox Replay with background uploads.
- Sync comments and annotations with Dropbox Replay in Studio.
- Sync markers and comments with Dropbox in Studio.
Edit
- Subtitle and caption backgrounds now auto-resize to fit text content.
- Subtitle tracks in nested timelines now decompose to the main timeline.
- Adding a new subtitle caption now auto-focuses on the text area.
- Simple titles and subtitles are faster on Apple Silicon systems.
- Improved ease in and out functionality for position curves in the timeline.
- Options to include effects and grades for render in place operations.
- Switch multicam angles in the edit page with the speed editor.
- Ability to mark selection for timeline gaps.
- Edit asymmetric audio transitions created in the Fairlight page.
- Trim video and audio transitions asymmetrically using cmd/ctrl.
- Fine audio clip gain adjustments using shift + mouse drag.
- Support for pasting retime attributes on audio clips.
- Option to limit audio sync to the first timecode match.
- Preview composite modes by hovering over each mode in the inspector.
- Ability to set per-clip deinterlace quality in the inspector.
- New square iris transition.
- Support for custom aspect ratio controls for shape transitions.
- Improved overlays for Fusion tools in the viewer.
- Improved undo support for Fusion effects and Text+ in the inspector.
- Support for folder based organization of effect templates.
- New customizable key actions to go to previous/next timeline tabs.
- Ability to close timeline tabs with middle click.
- Preview generators and titles from the effects panel in the cut viewer.
Color
- Support for an automatic mode for color managed projects.
- Support for ACES 1.3, gamut compression and new CSC transforms.
- New 3D Keyer with new modes, better selection/stroke logic, live feedback.
- Improved HSL and luma keyers with updated matte finesse controls.
- Track forward and back with a single action in trackers and magic masks.
- Node tooltips now indicate LUT and effect type present.
- Dragging new links to layer and key mixers auto-creates node inputs.
- Dragging color nodes over key links creates key-to-RGB connections.
- Added individual primary and secondary tool icons for faster switching.
- Clip filters for timeline clips with Dolby Vision analysis or trim.
- Disabled clips are now shown as gray in the timeline.
- Support for applying camera LUTs and CDLs to ARRI MXF ProRes clips.
- The printer light state is now persisted across application restart.
- Navigating to markers in the timeline now auto scrolls to center marker.
Resolve FX
- Film halation emulates film stock reflections and scatter with Studio.
- Custom mixer to combine effects and grades with finer control.
- Improved 3D, HSL and Luma keyers in edit and Fusion.
- Better noise handling and key refinement for existing keyers.
- Improved patch replacer with ability to align source and target.
- Film grain with interactive previews and grain freeze options.
Fairlight
- Support for Steinberg VST3 audio effects on Mac OS and Windows.
- Ability to reorder, move and duplicate effects in the mixer.
- Support for copying clip ranges with partial fades.
- Single sided audio transitions are now displayed as fades.
- Support for multi channel audio outputs on Linux.
- Waveform displays visible at smaller track heights and lower zoom levels.
- Ability to shift-click and cmd-click on keyframe selections in the timeline.
- Navigating to previous or next timeline marker now selects the marker.
- Improved default processing order in Fairlight mixers.
- Automation curves display current values when no automation is present.
- Flashing edit cursor in edit selection mode.
- Improved column order and search behavior in the clip index.
- Improved jog, scroll and shuttle with the editor keyboard and speed editor.
- Fairlight FX meters have resizable displays and improved channel labels.
- Improved audio performance when using Blackmagic monitoring devices.
Fusion
- Text+ support for combined glyphs and right to left language layouts.
- Improved vertical Text+ layout, vertical glyphs, rotation and line direction.
- Improved Text+ character grouping, spacing, underlining and borders.
- Text+ supports per-character stylistic sets for supported fonts.
- Support for OpenType features, including old-style numbers in Text+.
- Multiple Text+ improvements for character styling and animation.
- Hover to show tool descriptions in the effects panel and add tool window.
- Improved default tracker search and pattern size for grid warps.
- New search area scale slider in tracker options.
Codecs and File I/O
- Improved encode settings for YouTube render preset.
- Option to export a timeline marker color as YouTube video chapters.
- Option to export a timeline marker color as QuickTime chapter markers.
- Support for decoding opus audio in QuickTime and MP4 clips.
- Hardware accelerated Panasonic 8K AVC decodes on Apple Silicon.
- Improved decode speeds for ARRI ARX clips.
- Hardware accelerated H.265 encodes on free version on Windows.
- H.264 encode profile options on supported Nvidia systems with Studio.
- H.264/H.265 encode bit rate controls on supported Windows Intel systems.
- Faster hardware acceleration on Windows Intel systems with Studio.
- Support for rendering EXRs with ZIP1 compression.
- Ability to add custom languages in DCP/IMF composition naming options.
- Ability to use approved operator / rating / region lists for DCP naming.
- Marker support in the IO encode plugin SDK.
- Ability to bypass re-encodes for Sony XAVC Intra clips.
- Improved retention of comments metadata for third party XML workflows.
- Improved display of render job names with tooltips.
General
- Right click audio icon to adjust volume on media, color and deliver pages.
- Auto-identifying media storage sequential image formats as stills or clips.
- Prompt to overwrite existing projects when invoking save as.
- Locked project indicator for PostgreSQL databases with usage info tooltip.
- Ability to clone a PostgreSQL database from the project manager.
- Ability to export PostgreSQL access keys from the project manager.
- Option to import into current timeline when importing an AAF.
- Scripting API support to access inspector properties for video clips.
- Scripting API support to set playhead position on the timeline.
- Scripting API support to get color version for video clips.
- Scripting API support for reflecting upload status in render job APIs.
- Scripting API support for setting network optimization in render jobs.
- Scripting API support for H.264 multi-pass encode option in Mac OS.
- Improved scripting property set when querying MediaIn nodes.
- Addressed an issue with Vimeo login.
- General performance and stability improvements.
DaVinci Resolve Studio17.3.1 Update
2 September 2021
This software update adds the ability to combine multiple source audio files to export as interleaved audio. It also improves YouTube and Vimeo sign in for Windows systems and improves middle click behavior when using tablets. DaVinci Resolve 17.3.1 Update also adds improved stability when adding stills to memories as well as better Apple ProRes 4444 processing on Apple Silicon systems. This version requires a DaVinci Resolve Studio license dongle or software activation code
What’s new in DaVinci Resolve 17.3.1
- Ability to combine multi source audio files to export interleaved audio.
- Addressed incorrect sizing controls behavior for Advanced Panels.
- Addressed an issue with signing into YouTube and Vimeo in Windows.
- Addressed an issue with updating LTC for some clips.
- Addressed an issue where titles with disabled stroke could not be edited.
- Addressed incorrect middle click behavior in gallery using Wacom tablets.
- Addressed an issue where creating memories could cause a crash.
- Addressed an issue with some Dolby Atmos rendering configurations.
- Addressed render glitches for ProRes 4444 in Apple Silicon systems.
- Addressed an issue with audio output when switching audio devices.
- Addressed an issue with picking colors in the viewer with input scaling.
- Addressed a crash for certain renders in Apple Silicon systems.
- Addressed corruption when using generators on Apple Silicon.
- Addressed an issue with creation of Fusion Copy Metadata.
- General performance and stability improvements.
DaVinci Resolve Studio 17.3 Update
This software update adds a new processing engine for improved performance on Apple Mac models with the M1 chip. In addition, there are new controls for Resolve FX including aperture diffraction, mosaic blur, keyer, and glow, as well as improvements in audio latency and the Fairlight export dialog. Edits from subclips can now be match framed to original media, plus DaVinci Resolve 17.3 will now decode AVC Intra files using the media engine built into the Apple M1 chip. This version requires a DaVinci Resolve Studio license dongle or software activation code.
What’s new in DaVinci Resolve 17.3
Apple Silicon Performance
- 2-3x performance improvements for image processing on Apple Silicon.
Fairlight
- Improved thru-latency and adjustable processing/input buffers.
- Improved export clips dialog with naming, metadata and format control.
- Edit selections in the timeline can now be nudged.
- In-Out ranges can be cleared and navigated to in the timeline.
- Timeline clips can be selected from the Fairlight edit index.
- Improved context-based defaults when adding new audio tracks.
- Improved Fairlight timeline ruler resolution.
- Gain curves show tooltip values when selected.
- Changing clip gain under an edit selection now adds bounded keyframes.
- Timeline clip names and gain curves can now be hidden.
- New timeline scroll options during playback – fixed, page and none.
- Buses can be reordered by dragging in the track index.
- Bus delay compensation can now be bypassed in the track index.
- Multiple selected tracks can now be deleted from context menu.
- New audio I/O preference options with support for separate I/O selections.
- Support for a wider range of Windows native audio devices.
- Support for multichannel I/O on Windows using Steinberg ASIO.
- Native Linux audio recording support using ALSA inputs.
- Improved mixdown support for LRC, 5.0 and 7.0 track formats.
- Improved edit, nudge and fade behavior for linked clips.
- Modify track and mixer parameters on all or selected tracks with modifiers.
- Pan, EQ and dynamics control dialogs accessible from Fairlight consoles.
Color
- User configurable default grid size for Color Warper.
- User configurable default zone preset for HDR color controls.
- Active playheads can be switched by clicking on the split screen viewer.
- New anamorphic aperture controls for Resolve FX Aperture Diffraction.
- New shapes and finer mosaic control for Resolve FX Mosaic Blur.
- New rotation controls for Resolve FX Keyer garbage mattes.
- New sat and gamma controls and faster performance for Resolve FX Glow.
Cut
- List views in the media pool can be sorted from column selection.
- New badge to easily identify still clips on the timeline.
- Improved sync bin to ignore still images placed on top in the timeline.
Edit
- Edits from subclips can now be match-framed to original media.
- Shape and iris transitions can be rotated from the inspector.
- Play around selection now works with transition selections.
- Newly added subtitles retain playhead position to allow text preview.
- Compound clip instances in the timeline can be renamed.
- Fusion compositions can be renamed from the inspector panel.
- Options to name and use full clip extents when creating a subclip.
- Timelines and clips in smart bins can be duplicated from context menu.
- Improved context menus with quick actions for tabbed timelines.
- Timeline viewer overlays are now retained during playback.
- Media pool marker lists can be expanded using cursor keys.
- New badge to easily identify still clips on the timeline.
- Improved offset tooltips and thumbnails for mouse drags in the timeline.
Fusion
- DRFX bundles can be double-clicked to install on Windows and Linux.
- Support for viewing node type by holding Ctrl/Cmd-Shift-E.
Codecs & Deliver
- Support for audio encoding in the encoder plugin SDK.
- Optimized H.265 encodes for speed on Apple Silicon systems.
- Hardware accelerated AVC Intra decodes for on Apple Silicon.
- Support for decoding and encoding JPEG-HT .JPH image sequences.
- Support for decoding 12-bit DPX formats.
- Support for decoding AV1 clips on Mac OS and Linux.
- Hardware accelerated AV1 decodes on NVIDIA graphics in Linux.
- Hardware accelerated H.265 10-bit encode on AMD graphics on Windows.
- Hardware accelerated H.264 4:4:4 8-bit encodes in NVIDIA on Windows.
- Improved H.264 and H.265 decode performance in Windows Intel systems.
- Support for decoding MKV clips with VP9 video codecs.
- Support for DFXP sidecar export options for DCP renders.
- Improved decode performance for MKV clips with AAC and AC3 audio.
- Support for encoding ISDCF compliant audio channels for DCP packages.
- Support for embedding MPEG2 bitstream captions in XDCAM clips.
General
- Improved startup speeds for disk databases with many projects.
- Support for simplified database creation and connection process.
- AAF imports now support translation of simple nested clips.
- Resolve FX Motion Blur for dedicated motion effects across pages.
- Resolve FX Frame Replace to reuse or blend adjacent frames on artefacts.
- Multiple keyboards and speed editors can now be connected and used.
- JKL playback with stop and go to last position now works correctly.
- Timelines can be located in media pool from smart bin context menu.
- Media, inspector and other panels can be scrolled by holding middle click.
- Scripting API support for Gallery, Gallery Album and GalleryStill objects.
- Scripting API support for adding video or audio-only clips to the timeline.
- Addressed PostgreSQL installation issues on some Windows systems.
- General performance and stability improvements.
DaVinci Resolve Studio 17.2.2 Update
This software update adds support for Blackmagic RAW 2.1, improved Bluetooth connectivity for DaVinci Resolve Speed Editor, and better YouTube credential recognition. This update also adds improvements to color mapping and source viewer playback as well as general performance and stability improvements. This version requires a DaVinci Resolve Studio license dongle or software activation code.
What’s new in DaVinci Resolve 17.2.2
- Support for Blackmagic RAW SDK 2.1.
- Improved Speed Editor Bluetooth support.
- Addressed an issue with configuring YouTube accounts with Resolve.
- Addressed clipped tone mapping of input data in color-managed workflows.
- Addressed an issue with missing iXML data when exporting audio AAFs.
- Addressed clamping of extended range data in video range scopes.
- Addressed intermittent source viewer lag when switching from the timeline.
- Addressed an issue where disarming a Fairlight track would cause a hang.
- Addressed an issue with zoom blur showing repetitive patterns in playback.
- Addressed dropped frames rendering some clips to slow network disks.
- Addressed an issue with incorrect channel mapping for 5.1 AAC renders.
- Addressed an issue with 3:2 pull-down clips being tagged as progressive.
- Addressed an issue with decoding some 24-bit linear PCM audio files.
- Addressed incorrect field dominance for scene cut clips and sub-clips.
- General performance and stability improvements.
DaVinci Resolve Studio 17.2.1 Update
This software update adds support for improved playback performance when working with network storage devices and a more responsive HDR palette when using color panels. This update also adds more reliable audio playback when working in longer timelines, improved representation of the audio waveform for normalized 32-bit audio, and better audio playback with MKV clips when working on Windows systems. This version requires a DaVinci Resolve Studio license dongle or software activation code.
What’s new in DaVinci Resolve 17.2.1
- Improved playback performance on network storage devices.
- Improved startup performance when using video monitoring devices.
- Improved startup performance when scanning Fusion templates.
- Addressed a lag when changing HDR properties using a control panel.
- Addressed an issue with the clipped waveform for normalized 32-bit audio.
- Addressed an issue with incorrect loudness normalization behavior.
- Addressed an issue with recording audio in 192 KHz in FlexBus projects.
- Addressed audio stutters when playing MKV clips in Windows.
- Addressed incorrect linked audio names in AAFs for round trip workflows.
- Addressed momentary audio dropouts when playing back large timelines.
- Addressed an issue with relinking media when importing a DRT timeline.
- Addressed an issue with persisting MIDI I/O preferences between restarts.
- Addressed an issue with reversing direction for iris and shape transitions.
- Addressed a loss of remote grades for compound clips on project reload.
- Addressed incorrect Fusion loader behavior with some image sequences.
- Addressed incorrect preview results with Fusion viewer LUTs.
- Addressed an issue with loading LUT files in drfx bundles.
- Addressed an issue with updating new content for templates.
- Addressed an issue persisting UI layouts between application restarts.
- Addressed an issue with exporting subtitle sidecar files to a new folder.
- Addressed an issue with render jobs ignoring in-out ranges in collaboration.
- Addressed an issue trimming Arri Raw MXF clips in media management.
- General performance and stability improvements.
DaVinci Resolve 17.2 Update
This software update adds improved startup performance and changes the default save setting to live save, as well as adding support for applying and managing crossfades in the Fairlight timeline and for controlling track processing order in the Fairlight mixer. This update also adds support for Fusion template bundles along with the ability to decode AV1 clips on Windows machines and support to decode MKV clips across all platforms. DaVinci Resolve Studio 17.2 also includes support for renaming individual timeline clips and setting handles when performing audio only renders. This version requires a DaVinci Resolve Studio license dongle or software activation code.
What’s new in DaVinci Resolve Studio17.2
- Dramatically improved application startup performance.
- Live save is now on by default.
- Support for custom naming for individual timeline clips.
- Support for adding transitions by double clicking or dragging to viewer.
- Support for decoding AV1 clips on Windows.
- Accelerated AV1 decodes on supported Intel, NVIDIA and AMD platforms.
- Support for decoding MKV clips.
- Support for exporting IMSC-1 compatible TTML captions in IMF clips.
- Support for option to include project name subfolder in media management.
- Support for pasting HDR and color warper attributes in the Color page.
- Support for Fusion template bundles.
- Support for applying and managing crossfades in the Fairlight timeline.
- Support for a batch fade and crossfade editor in the Fairlight page.
- Support for persisting Fairlight edit mode between application restarts.
- Support for moving audio clips to match timeline timecode position.
- Support for setting handles when performing audio only renders.
- Support for controlling track processing order in the Fairlight mixer.
- Support for accessing Fairlight patch and link in the edit and deliver page.
- Ability to show or hide specific audio I/O ports for patching in Fairlight.
- Support for Fairlight console firmware 1.6 with full FlexBus mixing support.
- Improved waveform displays in the Fairlight timeline.
- Improved auto scroll behavior when dragging clips in the Fairlight timeline.
- Support for ACES color science 1.2.
- Support for selecting per-clip ACES DCTLs from context menu.
- Support for new IDTs for the Canon EOS-R5 cameras.
- Option to use white point adaptation in project settings for RCM workflows.
- Option to use white point adaptation in Resolve FX color space transform.
- Support for codec passthrough when rendering IMF JPEG2000 clips.
- Support for trimming Sony Raw and XAVC MXF in media management.
- Support for reading gyroscopic metadata on Sony Venice clips.
- Ability to update RMD metadata files for R3D clips.
- Improved spatial and temporal deinterlace quality.
- Improved curves range display for position and zoom on the edit timeline.
- Improved color management for Blackmagic RAW Gen 5 color science.
- Improved decode performance for 8K H.265 clips on Apple Silicon systems.
- Improved scripting API with the ability to import custom frame sequences.
- Improved scripting API with the ability to delete timelines.
- Improved scripting API with the ability to query current page.
- Improved scripting API with the ability to add generators and titles.
- Improved scripting API with the ability to specify render alpha options.
- Improved scripting API with the ability to switch layout presets.
- Improved scripting API with the ability to quit the application.
- Improved iXML data support with AAF export workflows.
- General performance and stability improvements.
DaVinci Resolve Studio 17.1 Update
March 5, 2021
This software update adds universal app support for Macs running Apple M1 processors and is compatible with Mac OS Big Sur. This update also adds support for hardware-accelerated encoding and decoding of H.265 10-bit 4:2:2 and 4:4:4 formats on supported Intel platforms. This version requires a DaVinci Resolve Studio license dongle or software activation code.
About DaVinci Resolve Studio 17
Important information regarding database management
DaVinci Resolve 17.1 requires a database upgrade from DaVinci Resolve 16.2.8 and previous versions. We strongly recommend that you back up your existing database (both DiskDB and PostgreSQL) before performing an upgrade.
What’s new in DaVinci Resolve 17.1
- Support for Apple Silicon-based Mac OS systems.
- H.265 4:2:2 hardware decode support on Apple Silicon.
- H.265 4:2:2 and 4:4:4 Intel decode support in DaVinci Resolve Studio.
- H.265 4:2:2 and 4:4:4 Intel encode support in DaVinci Resolve Studio.
- Support for GPU decoding of RED clips in OpenCL processing mode.
- Option to always perform copy and paste actions on selected color nodes.
- General performance and stability improvements.
Minimum system requirements for macOS
- macOS 10.15 Catalina
- 8 GB of system memory. 16 GB when using Fusion
- Blackmagic Design Desktop Video version 12.0 or later
- Integrated GPU or discrete GPU with at least 2GB of VRAM.
- GPU which supports Metal or OpenCL 1.2.
Minimum system requirements for Windows
- Windows 10 Creators Update.
- 16 GB of system memory. 32 GB when using Fusion
- Blackmagic Design Desktop Video 10.4.1 or later
- Integrated GPU or discrete GPU with at least 2GB of VRAM
- GPU which supports OpenCL 1.2 or CUDA 11
- NVIDIA/AMD/Intel GPU Driver version – As required by your GPU
- A minimum NVIDIA driver version of 451.82 is recommended.
Minimum system requirements for Linux
- CentOS 7.3
- 32 GB of system memory
- Blackmagic Design Desktop Video 10.4.1 or later
- Discrete GPU with at least 2GB of VRAM
- GPU which supports OpenCL 1.2 or CUDA 11
- NVIDIA/AMD Driver version – As required by your GPU
- A minimum NVIDIA driver version of 450.51.06 is recommended.
Installing DaVinci Resolve Software on Mac
Double-click the DaVinci Resolve Installer icon and follow the onscreen instructions. To remove DaVinci Resolve from your system, double-click the Uninstall Resolve icon.
Installing DaVinci Resolve Software on Windows
Double-click the DaVinci Resolve Installer icon and follow the onscreen instructions. To remove DaVinci Resolve from your system, go to the Programs and Features control panel, select DaVinci Resolve, click on Uninstall and follow the onscreen prompts.
Migrating Legacy Fairlight projects to DaVinci Resolve on Windows
In order to import legacy Fairlight DR2 projects into DaVinci Resolve, download and install the following utility on your Windows system: downloads.blackmagicdesign.com/DaVinciResolve/Fairlight-Project-Importer.zip After installing the utility, you should see an option to “Import Fairlight Project” in the Fairlight menu in DaVinci Resolve.
Installing DaVinci Resolve Software on Linux
Double-click the DaVinci Resolve Installer icon and follow the onscreen instructions. To remove DaVinci Resolve from your system, select the uninstall option after running the installer.
Additional Information
Please refer to the latest DaVinci Resolve Configuration Guide for your platform detailing support, including certified driver versions for third-party hardware. It is available from www.blackmagicdesign.com/support.
DaVinci Resolve 16.2.7 Update
This software update adds support for NVIDIA Ampere GPUs on Windows and improved reliability when importing ATEM Mini Pro ISO projects with 23.976 fps media. This version requires a DaVinci Resolve Studio license dongle or software activation code.
What’s new in DaVinci Resolve 16.2.7
Support for NVIDIA Ampere GPUs on Linux and Windows systems.
Addressed an issue with importing 23.976 fps ATEM ISO projects.
General performance and stability improvements.
DaVinci Resolve 16.2.6 Update
This update adds support for Blackmagic RAW 1.8.1, Final Cut Pro X XML v1.9, as well as general performance and stability improvements. This version requires a DaVinci Resolve Studio license dongle or software activation code.
What’s new in DaVinci Resolve 16.2.6
- Support for Blackmagic RAW SDK 1.8.1.
- Support for Final Cut Pro X XML Version 1.9.
- Multiple performance and stability improvements.
DaVinci Resolve 16.2.5
This update adds support for importing projects from ATEM switchers into DaVinci Resolve, improves the listing of numbered still frames in the media pool, addresses offline frame issues for some H.264 clips on Windows and makes relinking AAF clips in different folders more reliable. This version requires a DaVinci Resolve license dongle or software activation code.
What’s new in DaVinci Resolve 16.2.5
- Support for importing ATEM Mini Pro ISO projects in DaVinci Resolve.
- Improved listing of numbered still frames in the media pool.
- Addressed flashing offline frame issues for some H.264 clips on Windows.
- Addressed an issue with relinking AAF clips in different folders.
- Addressed issues with syncing playhead in the sync bin and timeline.
- Multiple performance and stability improvements.
DaVinci Resolve 16.2.4
Date: July 15, 2020
This software update features improved debayering support for RAW clips from EOS-1D X Mark III and EOS R5 cameras, more accurate playhead syncing on the cut page, better tone mapping in HDR projects, and faster Kakadu JPEG 2000 decode performance on Linux and Windows. DaVinci Resolve 16.2.4 also addresses an issue that affected project saving after editing audio keyframes, improves custom Fusion tool performance, adds support for Blackmagic RAW 1.8 and more. This version requires a DaVinci Resolve Studio license dongle or software activation code.
What’s new in DaVinci Resolve 16.2.4
- Support for Blackmagic RAW SDK 1.8.
- Improved debayering support for EOS-1D X Mark III and EOS R5 raw clips.
- Improved syncing of playhead between timeline and viewer in the sync bin.
- Improved tone mapping behavior when performing wipes in HDR projects.
- Improved Kakadu JPEG 2000 decode performance on Linux and Windows.
- Addressed an issue with cropping the upper track in some scenarios.
- Addressed an issue with removing freeze frames in retimed clips.
- Addressed an issue with adjusting volume on a multi-track audio clip.
- Addressed an issue with saving the project after moving audio keyframes.
- Addressed an issue with waveform displays when scrolling the timeline.
- Addressed issues with audio waveforms in sync bin and sync clip window.
- Addressed an issue with resetting the MediaIn node in the inspector.
- Addressed an issue with trimming still images in the Fusion page.
- Addressed an issue with flashing alpha on EXR clips with Fusion comps.
- Addressed a preview issue with aux channels and combiner nodes.
- Addressed an issue with slow renders for Fusion custom tools.
- Addressed an issue with gradient modifiers applied on color controls.
- Multiple performance and stability improvements.
DaVinci Resolve 16.2.3
Date: June 18, 2020
To summarize, version 16.2.3 adds support for version 4.1 of the Dolby Vision CM algorithm and provides the ability to generate v2.9 trims from v4. In addition, you can now export a Dolby Vision v2.9 XML from a v4 project. DaVinci Resolve 16.2.3 also improves performance with Canon EOS-1D X Mark III and EOS R5 clips using Apple Metal, addresses ARRIRAW playback performance, and ACES IDTs with ARRI MXF clips. This update also improves audio trimming, fixes Fairlight index display issues, layering with cloned audio clips, and now correctly moves tracks over linked audio tracks. DaVinci Resolve 16.2.3 update also includes improvements to Fusion Text+ shading, gradients, Fusion previews, and more. This version requires a DaVinci Resolve Studio license dongle or software activation code.
What’s new in DaVinci Resolve 16.2.3
- Support for Dolby Vision 4.1 CM algorithm to generate v2.9 trims from v4.
- Option to export a Dolby Vision v2.9 XML from a v4 project.
- Support for RED SDK 7.3.2.
- Faster Metal decoding for Canon EOS-1D X Mark III and EOS R5 clips.
- Addressed incorrect playback for some ARRIRAW clips.
- Addressed an issue with ACES IDTs for some ARRI MXF clips.
- Likewise, it addressed a focus and text entry issue for editable media pool fields.
- Addressed an issue rippling audio extend edits in trim mode.
- Addressed display issues with track and edit index in the Fairlight page.
- Equally, addressed a layered editing issue when cloning audio clips.
- Addressed incorrect behavior moving tracks over linked audio tracks.
- Fixed incorrect masking in Text+ when using image shading.
- Addressed incorrect behavior deleting gradient points in the inspector.
- Addressed multiple issues with blank Fusion previews.
- Similarly, they took care of an issue persisting viewer LUTs with comps in the Fusion page.
- Addressed an issue with offline reference wipe sizing in the viewer.
- Multiple performance and stability improvements.
About DaVinci Resolve 16.2.2 Update
This DaVinci Resolve Studio 16.2.2 Update adds support for hardware-accelerated H.265 Main10 renders on Mac, Blackmagic RAW LUT name viewing in clip metadata, and custom output frame rates for YouTube, Vimeo, and frame.io. DaVinci Resolve 16.2.2 update also supports frame.io task status markers, Rec. 709-A gamma for QuickTime player, level shifts with H.264 playback on Mac, and better handling of audio transitions when trimming clips in the timeline. This version requires a DaVinci Resolve Studio license dongle or software activation code.
What’s new in DaVinci Resolve 16.2.2
- Hardware-accelerated H.265 Main10 renders on supported Macs.
- Blackmagic RAW clip LUT name can now be viewed in clip metadata.
- Ability to assign a frame rate in YouTube, Vimeo, and Frame.io renders.
- Support for marking Frame.io comments in markers as complete.
- Nudge keyboard actions can be used in the sync clip dialog.
- Support for exporting .srt files without formatting.
- Support for RED 7.3.1 SDK.
- Support for the Rec.709-A gamma option for QuickTime player compatibility.
- Preference to automatically tag Rec.709 clips as Rec.709-A.
- Addressed level shifts playing some short H.264 clips on Mac systems.
- Addressed loss of audio transition when trimming clips in the timeline.
- Addressed issues with stabilization not being available in the inspector.
- Addressed issues with incorrect channel order for audio waveform display.
- Addressed an issue with previewing in Fusion when in proxies mode.
- Addressed an issue with using reference sizing with timeline wipe.
- Addressed an issue with aspect ratio metadata in some MXF renders.
- Multiple performance and stability improvements.
About DaVinci Resolve 16.2.1 Software
The free DaVinci Resolve 16.2 includes all of the same high quality processing as DaVinci Resolve 16.2 Studio and can handle unlimited resolution media files. However it does limit project mastering and output to Ultra HD resolutions or lower. DaVinci Resolve 16.2 only supports a single processing GPU on Windows and Linux and 2 GPUs on the latest Mac Pro.
If you need features such as support for multiple GPUs, 4K output, motion blur effects, temporal and spatial noise reduction, de-interlacing, HDR tools, camera tracker, multiple Resolve FX, 3D stereoscopic tools, remote rendering, an external database server and collaboration tools that let multiple users work on the same project at the same time, please upgrade to DaVinci Resolve 16.2 Studio.
We hope you do decide to upgrade as your facility grows and you do more advanced work!
What’s new in DaVinci Resolve 16.2.1
- Support for decoding H.265 4:4:4 12-bit on supported NVIDIA GPUs.
- Support for encoding H.265 4:4:4 12-bit on supported NVIDIA GPUs.
- Support for encoding 32-bit float audio in QuickTime clips.
- Support for trimming QuickTime audio clips during media management.
- Support for Metal-based R3D decode with the RED 7.3 RC SDK.
- Support for double-clicking drp files in Windows and Linux.
- Support for performing open with on FCP7 XML files on Windows.
- Improved decode support of H.265 4:4:4 clips up to 10-bit.
- Improved performance with ProRes clips on high-end CPUs.
- Improved performance with DNxHR clips on high-end CPUs.
- Improved playback performance with compressed OpenEXR clips.
- Improved performance for Dolby Vision analysis.
- Improved stability on Windows systems with Intel graphics.
- Addressed an issue with clean feed previews in Mac 10.15.4.
- Addressed an issue with decoding phone camera clips with AAC audio.
- Addressed an issue with truncated node labels on some displays.
- Addressed issues with HDR tone mapping when using adjustment layers.
- Addressed an issue with the sync bin work working with an empty timeline.
- Addressed an issue with transitions when dragging clips across timelines.
- Multiple performance and stability improvements.
About DaVinci Resolve 16.2 Software
The free DaVinci Resolve 16.2 includes all of the same high-quality processing as DaVinci Resolve 16.2 Studio and can handle unlimited resolution media files. However, it does limit project mastering and output to Ultra HD resolutions or lower. DaVinci Resolve 16.2 only supports a single processing GPU on Windows and Linux and 2 GPUs on the latest Mac Pro.
If you need features such as support for multiple GPUs, 4K output, motion blur effects, temporal and spatial noise reduction, de-interlacing, HDR tools, camera tracker, multiple Resolve FX, 3D stereoscopic tools, remote rendering, an external database server and collaboration tools that let multiple users work on the same project at the same time, please upgrade to DaVinci Resolve 16.2 Studio.
We hope you do decide to upgrade as your facility grows and you do more advanced work!
What’s new in DaVinci Resolve 16.2
Fairlight timeline editing toolset improvements.
- New mouse and keyboard based editing toolset.
- User adjustable per track scalable waveform display.
- Keyboard shortcut editing actions now include fade, cut, select and move.
- Support for alt/option dragging clips to create a clip copy.
- Support for pasting clips across timelines.
- Support for bouncing individual audio clips to files.
- Support for dragging audio clips to separate tracks using modifiers.
- Support for dragging audio clips to specific positions using modifiers.
- Support for converting multichannel tracks into linked groups.
- Support for a user preference to align audio edits to frame boundaries.
- Support for an action to trim all audio edits to frame boundaries.
Fairlight sound library.
- Release of the Fairlight sound library installer for foley effects.
- Support for searching and displaying sound library description metadata.
Effects and plugin management improvements.
- Automatic sorting of AU and VST audio effects into types and categories.
- Favorite audio plugins are now displayed at the top of the mixer plugin list.
Additional immersive audio support.
- Support for MPEG-H bussing and monitoring in DaVinci Resolve Studio.
- Improved pan and balance including the ability to constrain panning.
Track Index improvements.
- Support for the edit index in the Fairlight page.
- Drag selection of tracks, mute, solo and record controls in the track index.
- Drag and drop reordering of audio tracks in the track index.
AAF import/export improvements.
- Support for importing AAF sequences as new tracks in an existing timeline.
- Support for importing AAF sequences with an offset to an existing timeline.
- Support for importing multichannel tracks from an AAF as linked groups.
- Support for broadcast wave files when exporting an embedded AAF.
- Support for exporting audio cross fades and fade handles in AAF files.
Audio mixing improvements.
- Support for additional notch filters in clip EQ.
- Support for new FairlightFX Meters.
- Support for new FairlightFX LFE Filter.
Fairlight Audio Editor improvements.
- Support for dedicated controls for panning up and down.
- Support for editing clip EQ.
- Support for copying and pasting clip EQ.
- Support for creating and applying presets for clip EQ.
- Support for adding, managing and custom mapping of plugin parameters.
- Support for changing relative clip levels.
- Support for resetting clip levels to unity.
- Support for editing fade shapes and deleting fades.
- Support for saving and recalling user defined track view presets.
- Support for enabling layered audio editing from the desktop audio editor.
- Support for choosing automation curves from the editor panel or console.
- Improved behavior when moving track selection with no tracks selected.
- Support for improved timecode entry and high frame rate timecode.
- Support for entering relative timecode values.
- Support for inserting 00 in timecode entry by using the colon key.
- Support for master spill on console faders.
- Support for finer adjustment of controls using the mouse or audio editor.
- Support for media left and media right selection keys.
- Support for a text-only labels mode.
- Support for a traditional Fairlight keyboard layout.
Improved support for legacy Fairlight project import.
- Improved import of EQ, automation and fade from legacy Fairlight projects.
- Improved speed when importing large legacy Fairlight projects.
Editing improvements.
- Improved performance when switching to large timelines with many tracks.
- Support for creating a compound clip from an in-out range in the timeline.
- Support for previewing timeline audio during live overwrites of video edits.
- Support for editing individual angles to the timeline from a multi-cam viewer.
- Support for updating clip duration display while editing in the cut page.
- Support for a change transition duration dialog.
- Support for viewing duration in frames or timecode format in the viewers.
- Support for Fusion transition templates in the edit page.
- Support for Fusion generator templates in the edit page.
- Support for timeline view options per system in collaborative projects.
Media Pool improvements.
- Improved audio track metadata support with support for up to 24 tracks.
- Support for duplicated clips and timelines being placed in the source bin.
- Support for sorting media pool clips by date added.
- Support for showing synced audio filenames in the media pool list view.
- Support for revealing the media pool location of a clip from a smart bin.
- Support for a media pool context menu to duplicate clips and timelines.
- Support for only additional files when repeating media management copies.
Color grading improvements.
- Multiple stability and usability improvements for collaborative projects.
- Support for smart filters based on keywords and people metadata tags.
- Support for modifying primary grade values using numerical values.
- Support for retaining out of range data when monitoring at video levels.
- Support for Fusion MediaOut name tooltips on the node graph inputs.
- Support for feet and frames data burn-in options.
- Support for disabling output sizing and blanking for individual clip renders.
Scopes improvements.
- Support option for showing scopes at video level and data level.
- Support for HLG gamma when using HDR scopes.
- Support for highlighting the color viewer qualifier position in the scopes.
Codec improvements.
- Support for Blackmagic RAW SDK 1.7.
- Support for rendering audio only timelines.
- Support for decoding 32 bit floating point audio.
- Improved support for color space and gamma when decoding H.265 clips.
- Support for displaying EXR codec name based on compression method.
- Support for overriding the color space and gamma tags in render settings.
- Support for RED SDK 7.2.1 and decoding clips from the Komodo camera.
- Support for two new parameters in the RED camera raw settings.
- Support for REDWideGamut Log3G10 IDT for ACES projects.
- Support for the Canon EOS-1D X Mark III camera.
- Support for decoding u-Law Audio in QuickTime clips.
- Support for alpha channel clips with the bypass re-encode option.
Scripting, API and general improvements.
- Support for running the primary screen as a window in dual screen mode.
- Improved scripting API with the ability to close an open project.
- Improved scripting API to set frame rate for media pool clips.
- Support for new scripting functions to return ordered lists.
- Support for video monitoring advance and delay on the Fairlight page.
- Support for GPI/GPO control on the Fairlight Audio Interface.
- Multiple performance and stability improvements.
DaVinci Resolve Studio 16.1.2
This update adds new audio and video editing buttons and mark in and out buttons to the cut page, along with improved smart edit indicators. DaVinci Resolve 16.1.2 supports audio playback while trimming, new timeline zoom indicators on the edit page and improved responsiveness when using the DaVinci Resolve Editor Keyboard. This update also improves DCP and IMF support, adds support for CUDA based R3D on Windows and Linux, improves performance in collaborative projects, supports monitor names in the workspace menu, copying and pasting Dolby Vision midtone offset values, adds new scripting APIs and more. Read more
What’s new in DaVinci Resolve 16.1.2
- Support for additional audio track formats for IMF and DCP renders
- Improved decode and encode performance for Kakadu DCP and IMF formats
- Support for CUDA based R3D with the latest RED SDK on Windows and Linux
- Adds Blackmagic RAW support for latest Blackmagic URSA Broadcast update
- Support for new audio-only and video only editing modes on the cut page
- Added in and out buttons in the user interface on the cut page
- Support for audio playback when trimming on the cut and edit pages
- Improved zoom buttons for the timeline on the edit page
- Improved smart indicator in the cut page for when using in and out points
- Viewer resize icon on the cut page now correctly resizes the whole viewer
- Cut page divider between timeline and viewer can now be moved via the divider
- Close up edits in the cut page now vary the close up from 20% to 40% randomly
- Search dial is more responsive when using the DaVinci Resolve Editor Keyboard
- Removed auto jog mode on scroll with the DaVinci Resolve Editor Keyboard
- Better responsiveness using shuttle with the DaVinci Resolve Editor Keyboard
- Double press to clear in and out on the DaVinci Resolve Editor Keyboard
- Improved performance in collaborative projects with multiple DaVinci systems
- Support for monitor name in the workspace menu display options
- Support for copy/paste in Dolby Vision mid tone offset values between clips
- New scripting APIs to move media items, LUTs, markers, copy grades and more
- Now uses 2 up view in sync bin when using live overwrite editing
- Fixes a bug that caused the clip dividers in the source tape to scroll with audio
- Opening the media folder in the cut page will re-sync to that folder contents
- Multiple performance and stability improvements
What’s new in DaVinci Resolve 16.1.1
- Improved behavior when navigating to previous or next multicam angles by looping around to the last or first angle
- Addressed an issue where performing a replace with a multicam clip in the source viewer would not select the correct angle
- Addressed an issue where shift-dragging a gain keyframe in an audio clip would not work correctly on the edit timeline
- Addressed an issue where H.264 clips would be rendered incorrectly if network optimization was enabled
- Addressed an issue where render jobs would sometimes fail on some systems
- Addressed an issue where archived projects would not include mattes for stereoscopic 3D clips
- Addressed an issue where playback for 4K DNG clips would be slow
- Addressed an issue where some DNG clips would be decoded with an incorrect color science
- Addressed an issue where rendering to MXF XDCAM formats would sometimes show artefacts
- Addressed an issue where minimizing the application would not hide the video clean feed
- Addressed an issue where setting in and out points from a timeline duration marker would sometimes not work correctly in the edit page
- Addressed an issue where the show picker RGB value context option in the color viewer could not be toggled off
- Addressed an issue where AAFs with multiple embedded audio channels would be decoded incorrectly
- Addressed an issue related to decoding Blackmagic RAW on macOS Catalina
- General performance and stability improvements
Minimum system requirements for macOS
- macOS 10.14.6 Mojave
- 16 GB of system memory is recommended and 32 GB is recommended minimum when using Fusion
- Blackmagic Design Desktop Video version 10.4.1 or later
- RED Rocket-X Driver 2.1.34.0 and Firmware 1.4.22.18 or later
- RED Rocket Driver 2.1.23.0 and Firmware 1.1.18.0 or later
Minimum system requirements for Windows
- Windows 10 Update
- 16 GB of system memory is recommended and 32 GB is recommended minimum when using Fusion
- Blackmagic Design Desktop Video version 10.4.1 or later
- NVIDIA/AMD/Intel GPU Driver version – As required by your GPU
- RED Rocket-X Driver 2.1.34.0 and Firmware 1.4.22.18 or later
- RED Rocket Driver 2.1.23.0 and Firmware 1.1.18.0 or later
Minimum system requirements for Linux
- CentOS 7.3
- 32 GB of system memory is recommended minimum
- Blackmagic Design Desktop Video version 10.4.1 or later
- NVIDIA/AMD Driver version – As required by your GPU
- RED Rocket-X Driver 2.1.34.0 and Firmware 1.4.22.18 or later
- RED Rocket Driver 2.1.23.0 and Firmware 1.1.18.0 or later
Upgrading your PostgreSQL database server on Mac
Until DaVinci Resolve 12.5.2, the Mac installer used to ship with PostgreSQL version 8.4.2. Starting from macOS Sierra 10.12, PostgreSQL version 8.4 is no longer supported. If you intend to upgrade to the latest OS, you will need to upgrade your PostgreSQL database server to version 9.5.4 prior to upgrading macOS. Once your PostgreSQL installation has been upgraded and your data has been ported, you can then proceed with your macOS upgrade.
We have provided apps to simplify upgrading your PostgreSQL version on your Mac.The apps along with instructions can be found in the:
/Library/Application Support/Blackmagic Design/DaVinci Resolve/Upgrade PostgreSQL
folder. Starting from DaVinci Resolve 12.5.3, new installations will include PostgreSQL version 9.5.4.
Installing DaVinci Resolve Software on Mac
Double-click the DaVinci Resolve Installer icon and follow the onscreen instructions.
Installing DaVinci Resolve Software on Windows
Double-click the DaVinci Resolve Installer icon and follow the onscreen instructions.
Installing DaVinci Resolve Software on Linux
Double-click the DaVinci Resolve Installer icon and follow the onscreen instructions.
Removing DaVinci Resolve Software from Mac
To remove DaVinci Resolve from your system, double-click the Uninstall Resolve icon.
Removing DaVinci Resolve Software from Windows
To remove DaVinci Resolve from your system, go to the Programs and Features control panel, select DaVinci Resolve, click on Uninstall and follow the onscreen prompts.
Removing DaVinci Resolve Software from Linux
To remove DaVinci Resolve from your system, select the uninstall option after running the installer.
Migrating Legacy Fairlight projects to DaVinci Resolve on Windows
In order to import legacy Fairlight DR2 projects into DaVinci Resolve, download and install the following utility on your Windows system: downloads.blackmagicdesign.com/DaVinciResolve/Fairlight-Project-Importer.zip After installing the utility, you should see an option to “Import Fairlight Project” in the Fairlight menu in DaVinci Resolve.
Additional Information
Please refer to the latest DaVinci Resolve Configuration Guide for your platform detailing support, including certified driver versions for third party hardware. It is available from www.blackmagicdesign.com/support.
You will also need to download and install the latest Blackmagic Design Desktop Video software for monitoring with your Blackmagic Design video hardware. Desktop Video is available from www.blackmagicdesign.com/support.
© 2001-2019 Blackmagic Design Pty. Ltd. All rights reserved. Blackmagic Design, Blackmagic, DeckLink, Multibridge, Intensity, H.264 Pro Recorder and “Leading the creative video revolution” are trademarks of Blackmagic Design Pty. Ltd., registered in the U.S.A and other countries. Adobe Premiere Pro, Adobe After Effects and Adobe Photoshop are registered trademarks of Adobe Systems. Avid Media Composer and Avid Pro Tools are registered trademarks of Avid. Apple Final Cut Pro, Apple Motion and Apple Soundtrack Pro have registered trademarks of Apple Computer.
Some applications use the QT UI framework (http://www.qt.io) under the terms of the LGPL version 2.1. The QT dynamic libraries, built from the unmodified sources are included in the application bundle. A copy of the LGPL is included in the Blackmagic application support directory. The support note at http://www.blackmagicdesign/support provides further details including how to obtain the QT source.
About DaVinci Resolve 16.1 Software
The free DaVinci Resolve 16.1 includes all of the same high-quality processing as DaVinci Resolve 16.1 Studio and can handle unlimited resolution media files. However, it does limit project mastering and output to Ultra HD resolutions or lower. DaVinci Resolve 16.1 only supports a single processing GPU on Windows and Linux and 2 GPUs on the latest Mac Pro.
If you need features such as support for multiple GPUs, 4K output, motion blur effects, temporal and spatial noise reduction, de-interlacing, HDR tools, camera tracker, multiple Resolve FX, 3D stereoscopic tools, remote rendering, an external database server and collaboration tools that let multiple users work on the same project at the same time, please upgrade to DaVinci Resolve 16.1 Studio.
We hope you do decide to upgrade as your facility grows and you do more advanced work!
About DaVinci Resolve Studio 16.1 Software
What’s new in DaVinci Resolve 16.1
Cut
- Sync Bin view which shows synced clip cutaways for the current shot on the timeline in a live multi-view for up to 9 cameras
- Sync Clip window to perform timecode based, audio waveform based and in or out point-based syncing for clips
- Live overwrite from the Sync Bin multi-view where the desired camera number can be pressed on the keyboard and the cut away length can be adjusted live with the scroll dial
- Support for automatically grouping shots from one camera by analyzing timecode and camera number metadata
- Close Up is now powered by the DaVinci Neural Engine to automatically identify multiple faces in the clip and reframe and zoom in on the subjects
- Ability to extend the timeline from the Sync Bin view to easily find the next edit for your timeline
- Smart Indicators on the timeline which show where the closest edit points are based on the playhead position
- Boring detector with timeline indicators to detect edits which are running too long
- Jumpcut detector with timeline indicators for flash frames and jump cuts
- Support for a new transition dialog to quickly find and apply the desired transition to the closest edit point using the scroll dial on the DaVinci Resolve Editor Keyboard
- Support for a new picture in picture mode to quickly apply a picture in picture edit by easily selecting the image quadrant using the scroll dial in the DaVinci Resolve Editor Keyboard
- Support for a new blended scroll mode in the DaVinci Resolve Editor Keyboard that dynamically toggles between scroll and jog transport
- Support for a split clip action in the toolbar
- Support for performing a slide edit by Alt/Option + dragging the timeline clip overlay
- Support for adding bins and moving clips between bins in the media pool
- Improved representation of small cuts on the top timeline
- Improved thumbnail clip hover behavior when selecting and previewing source media in the viewer
- Improved responsiveness when scrubbing the in and out points for long clips in range editor
Edit
- Support for using embedded timecode for clip-based formats when the project setting is set to use frame count timecode
- Ability to copy and paste transitions across multiple edit points in the timeline
- Support for switching between clip and edit point selections on the timeline
- Support for temporarily toggling between selection and trim edit mode during an edit action
- Support for track name and track number burn-in and render tags
- Support for previewing audio when dynamic trimming at greater than 1x speeds
- Support for dragging adjustment clips to the media pool
- Support for renaming adjustment clips in the inspector
- Support for showing or hiding individual panels using keyboard shortcuts
- Improved default multicam naming behavior
- Ability to name angles after clip names or file names when creating a multi-cam clip
- Support for matching a multicam edit frame to the underlying source clip
- Support for switching to the correct multicam angle when performing a multicam match frame
- Improved graticule and timecode display on timeline rulers
- Support for opening Final Cut Pro 7 XML files from Finder to import media or timelines on macOS systems
- Alt/Option-clicking on a track destination selector on the edit timeline will now exclusively select that track
- Support for tooltips to show track names in the mini track view
- Support for automatically selecting the newly added take in the take selector
- Improved dual screen behavior for the edit page with support for single viewer and full height metadata and effects library
- Improved performance when analyzing clips for detecting and classifying people
- Improved easing behavior when applying smoothness to position keyframes
- Improved blade behavior when there is a clip selection
- Improved behavior when navigating between clips and edit points on the edit timeline when subtitles are present
Fusion
- Support for reading media with super scale applied in the media pool
- Support for Blackmagic Pocket Cinema Camera presets in the Camera3D and CameraTracker tools
- Improved memory management on compositions with multiple input layers
- Improved memory management on multi-GPU systems
- Improved viewer interactivity and playback performance on single GPU systems
- Improved render all savers status display
- Support for ACEScg as a gamut option
ResolveFX
- ResolveFX Stop Motion
- ResolveFX and OpenFX plugins can now process and modify the alpha channel
- Support for additive compositing for ResolveFX Light Rays and ResolveFX Glow
- Support for automatically enabling usage of OFX alpha for ResolveFX Match Move and ResolveFX Drop Shadow
Color
- Support for viewing flags applied on the current clip on the video monitoring output
- Support for limiting viewer overlays in HDR mode to 100 nits
- Support for an option to update the shared node grade from a version stored in a gallery still
- Support for stereoscopic controls in the Blackmagic DaVinci Resolve Mini panel
- Support for OpenFX controls in the Blackmagic DaVinci Resolve Mini panel
- Support for generating high resolution 65-point cube LUTs from color page thumbnails
- Ability to paste a power window by appending to the existing windows from the Power Windows option menu
- Support for a user preference under color to restrict node navigation to color corrector nodes and avoid mixer nodes and splitter and combiner nodes
- Improved CIE scopes with a 1976 u’v’ view and the ability to show an additional reference gamut
- Improved color match processing powered by the DaVinci Neural Engine
- Ability to step the timeline wipe frame forward and back from the view menu and using the relevant shortcuts
- Support for previewing timeline clip grades from the gallery when live preview is enabled
- Support for a 2.0:1 output blanking preset in the timeline menu
- Support for Fujifilm F-Log colorspace
- Restored menu entries for half step printer lights in the color application menu
Fairlight
- Support for 96 KHz and 192 KHz sample rates at a project level for DaVinci Resolve Studio
- Support for clipping indicator for main buses on the Fairlight mixer
- Improved sound library search with support for binary and wildcard searches
- Support for enabling extended bounce tail durations from the option menu for audio clips with reverb and other tail effects
- Support for customizing the tail duration threshold for reverb and other tail effects
- Support for automatically enabling Insert In for an audio track when manually patching track inputs
- Improved performance when loading and switching timelines
- Improved performance when generating waveform profiles for nested timelines
- Improved peak hold and decay behavior for meters in FairlightFX plugins
- Support for displaying and persisting individual audio effect windows on top of other windows
Media and Delivery
- Ability to preserve video essence for faster rendering of uncompressed clips without content changes
- Support for decoding and encoding ProRes IMFs
- Support for decoding and encoding DNxUncompressed half float formats
- Support for decoding IMA4 format audio in QuickTime clips
- Support for decoding floating point audio in QuickTime clips
- Support for a preference to stop renders when a frame or clip cannot be processed
- Support for decoding floating point TIFF images
- Support for decoding DPX 10-bit RGBA files
- Support for encoding AVC Intra 50, 100 and 200 on DaVinci Resolve Studio
- Support for user selectable audio sample rates for timeline renders
- Improved performance when decoding H.264 and H.265 clips using GPU acceleration on AMD graphics cards
- Improved encoding to Panasonic SHV 8K with support for 50fps in DaVinci Resolve Studio
- Improved support for reading QuickTime container metadata
- Ability to disable video on Pro Tools and audio only exports
- Support for exporting EDLs with multiple audio tracks
- Ability to render adaptive audio tracks as discrete mono channels
- Ability to export subtitles when exporting a timeline to Pro Tools using the deliver page preset
- Support for rendering embedded audio timecode for synced audio clips when using the Pro Tools export preset
- Support for GPU accelerated debayering on CUDA systems when decoding ARRIRAW clips using the ARRI SDK Full Res debayer
- Improved Vimeo render settings with options for setting description, visibility and password for the uploaded video
- Support for a warning when exporting an IMF or DCP package with an incorrect audio track setup
- Support for decoding spanned AVCHD MTS clips
- Improved playback speed when decoding JPEG 2000 clips
- Improved performance when media managing long wav files
- Improved performance when rendering QuickTime clips to network mounted drives
- Improved performance when switching to bins that contain a large number of clips
- Improved performance when deleting a large number of media pool clips
- Improved behavior when rendering a single multi-channel audio track as individual wav files
- Improved ProRes 4444 playback performance
- Support for identifying and importing multiple Panasonic P2 shots in a single folder as separate clips
General
- Support for a Clean Feed viewer mode on an additional display on DaVinci Resolve Studio
- Ability to halve the current playback speed as well as playback at half, quarter and 1/8th speed using the Play Slow command
- Support for additional flag and marker colors
- Support for resolving the good take tag to # instead of 1
- Ability to repeat alternate frames for 48fps clips in Clip Attributes to emulate 24fps capture and playback
- Support for retaining the original creation date metadata when restoring or importing projects
- Improved behavior when editing parameter values using Wacom tablets
- Improved playback performance in the media, edit and cut pages
- Improved performance when live saving projects
- Improved performance when saving projects in collaboration workflows
- Improved playback quality for variable frame rate QuickTime files
- Improved scripting API with support for deleting a project
- Improved scripting API when getting and setting frame rate and super scale properties from project settings and clip attributes
- Support for disabling unbuffered I/O for any media storage location on macOS systems
- Support for decoding ALAC files on Windows and Linux systems
- Support for an option to optimize projects in disk databases by Option/Alt right clicking a project in the project manager
- Support for accessing and editing project notes from the File menu
- Support for choosing the preferred network interface from the project server application when sharing databases and generating access keys
- General performance and stability improvements
Pre-installation Notes
DaVinci Resolve Studio 16.1 requires a firmware update for the DaVinci Resolve Micro and Mini Panels.
What’s new in CaVinci Resolve 15.3 – March 2019
- Support for the Blackmagic Design URSA Mini Pro G2 camera
- Support for the latest Blackmagic RAW SDK 1.3
- Improved support for audio metadata in AAF exports including clip volume, pan data, track volume and automation
- Improved performance when selecting clips in the Edit timeline
- Improved responsiveness when using Wacom tablets on Windows
- Improved playback behavior on the Edit page
- Improved timecode support for high frame rate EXR clips
- Improved handling of AAC audio on Windows
- General performance and stability improvements
What’s new in DaVinci Resolve 15.2 – November 2018
Key new features
- Improved Edit timeline performance and responsiveness
- Support for improved visual animations when editing the timeline on the Edit page
- Support for a visual keyboard customization utility to find, add and modify shortcuts
- Support for per-module customizable shortcuts, including module specific actions and context menus
- Support for showing the currently focused module in the user interface
- Support for displaying duplicate frame ranges for clips on the timeline on the Edit page
- Support for cleaning up and flattening video tracks on the Edit timeline
- Support for adding, editing and exporting custom keyword sets from the keyword dictionary in the Workspace menu
- Support for option to export gallery stills using the still label name
- Support for ResolveFX Beauty in DaVinci Resolve Studio
- Support for ResolveFX Blanking Fill for portrait videos
- Support for VCA groups
- Support for FairlightFX Multiband Compressor
- Support for FairlightFX Stereo Fixer
- Support for decoding Panasonic 8K SHV clips in DaVinci Resolve Studio
Edit
- Improved Edit timeline performance and responsiveness
- Support for improved visual animations when editing the timeline on the Edit page
- Support for displaying duplicate frame ranges for clips on the timeline on the Edit page
- Support for viewing inspector properties for the highest visible clip under the playhead in the Edit timeline when there is no active selection
- Support for viewer overlay controls for the highest visible clip under the playhead in the Edit timeline when there is no active selection
- Support for marking a clip within a compound clip or a timeline in the source viewer
- Support for cleaning up and flattening video tracks on the Edit timeline
- Support for resizing audio transitions to sub-frame boundaries
- Support for setting ease-in and ease-out on keyframes from the keyframe context menu in the Edit and Fairlight page inspectors
- Support for setting ease-in and ease-out on keyframes from the keyframe context menu in the Edit timeline
- Support for temporarily toggling snapping while scrubbing the playhead by invoking the snapping shortcut in the Edit timeline
- Support for defining characters per second thresholds to highlight non-conforming subtitle captions in the inspector
- Support for automatically enabling dynamic zoom when on-screen controls are modified on the Edit page
- Support for timeline indicators for clips with updated grades or compositions in collaborative projects
- Support for toggling the visibility of retime controls and retime curves by invoking the context menu or the shortcut in the Edit timeline
- Support for fast timecode entry in clip attributes, marker dialog, new timeline, render settings and other timecode widgets
- Support for quickly accessing recent undo/redo actions from the Edit menu
- Improved results when performing transitions on clips being composited with other layers
- Improved behavior when using the Push video transition on a title clip
Fusion
- Improved scripting API support with ability to import and export Fusion compositions
- Support for GPU acceleration for the Trails tool in the Fusion page
Color
- Support for ResolveFX Beauty in DaVinci Resolve Studio
- Support for ResolveFX Blanking Fill for portrait videos
- Support for ResolveFX ACES Transform
- Support for ResolveFX Gamut Limiter
- Support for bypassing a mixer node input by disabling the node connected to that input
- Support for option to export gallery stills using the still label name
- Support for Camera RAW controls for Canon and Panasonic clips from the DaVinci Resolve Advanced and Mini panels
- Support for clipping output gamut to a different display gamut
- Support for an ST.2084 3000 nits gamma option in Resolve Color Management
- Support for improved color matching using color charts
- Support for OpenFX extension for a plugin to describe itself as not spatially aware
Check Developer Documentation in the Help menu for more details
- Support for including non-spatially aware OpenFX plugins when generating LUTs on the Color page
- Support for including the ResolveFX Color Transform plugin when generating LUTs on the Color page
- Support for importing Dolby Vision metadata for clips in the Color page Dolby Vision option menu
- Support for previewing tone mapping using embedded, imported or custom metadata for Dolby Vision IMF clips
- Support for for up to 64 controls when creating DCTLs
- Updated OpenFX developer documentation with OpenFX 1.4 samples
- Updated OpenFX developer documentation with temporal frame access samples
- Updated OpenFX developer documentation with transition sample
- Improved support for handling aspect ratios for various ResolveFX plugins
- Improved support for handling UI overlays for projects with output scaling applied
- Improved behavior when closing Power Curve Windows drawn on the Color page
Fairlight
- Support for VCA groups
- Support for FairlightFX Multiband Compressor
- Support for FairlightFX Stereo Fixer
- Support for customizable test tones and noise generation from the Fairlight menu
- Support for selecting and modifying audio transitions
- Support for navigating the Fairlight timeline using timecode entry
- Support for setting audio monitoring output delay in system preferences
- Support for indicating clips with changed inspector properties on the Fairlight timeline
- Support for applying a FairlightFX plugin to multiple selected audio clips
- Support for additional Fairlight Audio Accelerator IO settings on Windows
- Support for Fairlight Audio Interface RS-422 9-Pin serial control on Windows
- Support for Talkback using the Fairlight Audio Accelerator on Windows
- Support for Fairlight MADI expander for the Fairlight Audio Accelerator on Windows
- Support for additional Fairlight edit operations including cut or copy the head or tail of the current clip from the Edit menu
- Improved playback performance when performing audio automation
- Improved handling of custom multi-channel format mappings for Audio FX
Media and Deliver
- Support for decoding Panasonic 8K SHV clips in DaVinci Resolve Studio
- Support for hardware accelerated encoding of H.264 and H.265 using specific NVIDIA GPUs on DaVinci Resolve Studio; Windows and Linux only
- Support for hardware accelerated encoding of H.264 and H.265 using Intel Quick Sync on supported hardware on DaVinci Resolve Studio; Windows only
- Support for decoding Canon RMF clips using the Canon SDK
- Support for encoding Dolby Vision version 4 metadata in IMF renders
- Support for creating a subclip from a Media Pool clip marker
- Support for clip usage indicators in the Media Pool clip thumbnail for the active timeline
- Support for a clip usage listing in the Media Pool clip context menu for the active timeline
- Support for showing usage indicators for clips inside a compound clip on the active timeline
- Support for adding flags to clips when focused on the source viewer
- Support for duplicating media pool clips and current timelines from the Edit menu
- Support for a toggle control for switching between single and dual pane mode in Media Pool on the Edit page
- Support for storing the alpha channel in optimized media for clips with an embedded alpha channel
- Support for an option to render alpha channel either as straight or premultiplied when rendering individual clips
- Support for Sony XAVC Long GOP encoding on DaVinci Resolve Studio
- Support for Episode and Chapter in content metadata options for IMF exports
Cintel
- Improved sub-pixel stabilization
- Support for storing Cintel settings with each DaVinci Resolve project
- Support for single frame captures
- Addressed an issue with debayering artefacts that would sometimes affect pixel highlights
- Addressed an issue with incorrect audio sync offsets when using Capture Now
General
- Support for a visual keyboard shortcut mapping utility to find, add and modify shortcuts
- Support for per-module customizable shortcuts, including module specific actions and context menus
- Support for showing the currently focused module in the user interface
- Support for adding, editing and exporting custom keyword sets from the keyword dictionary in the Workspace menu
- Support for live save and backups for unsaved projects
- Support for remembering the last used locations in the file browser for various import and export operations
- Support for collaborating on projects in a PostgreSQL database with machines across multiple subnets
- Support for toggling Mute and Dim in all pages from the Fairlight application menu
- Support for configuring the gallery path during project import by Alt/Option-clicking Import Project
- Improved organization of System Preferences with a new section for decode options
- Support for easyDCP on Linux
Issues Addressed
- Addressed an issue where reading file and folder paths of more than 200 characters on Windows systems would not work correctly
- Addressed an issue where project thumbnails would sometimes not be correctly saved
- Addressed an issue where deleting gallery stills would be slow when Live Save was enabled
- Addressed an issue where dragging media into a new project to create a timeline would not prompt for setting the project frame rate
- Addressed an issue where importing older DaVinci Resolve projects would sometimes ignore static keyframes from OpenFX plugins
- Addressed an issue where opening an older DaVinci Resolve project with a lens flare plugin would cause a crash
- Addressed an issue where older projects would sometimes show incorrect node cache previews
- Addressed an issue where importing a Final Cut Pro XML would not preserve audio transitions
- Addressed an issue where copying a project in collaboration mode would sometimes not work correctly
- Addressed an issue where clips in locked bins could be replaced in a collaboration project
- Addressed an issue where in and out points could be modified for clips in locked bins in a collaboration project
- Addressed an issue where dragging a folder to the media pool would not add any subtitle elements inside the folders
- Addressed an issue where adding a flag to a media pool clip and undoing would not refresh correctly
- Addressed an issue when adding clip and marker keywords on Linux
- Addressed an issue where keyword suggestions would not work correctly in the marker dialog
- Addressed an issue where the subtitle characters per second count in inspector would not be calculated correctly
- Addressed an issue where track destination hotkeys would not allow setting the destination to the last track
- Addressed an issue where disabling freeze frame on an edited clip would restore the clip to a wrong media offset
- Addressed an issue where selecting clips forward or backward would not work correctly when audio layers are present
- Addressed an issue where keyframe controls would be shown for ResolveFX and OpenFX controls that did not support keyframes
- Addressed an issue where holding down the Alt/Option key during playback or trimming would affect performance
- Addressed an issue where adding markers to adjacent timeline frames would behave incorrectly on the Edit timeline
- Addressed an issue where adding or removing audio track layers would sometimes not correctly update the track heights
- Addressed an issue where enabling selection follows playhead and dragging a sound library clip to the timeline would cause a crash
- Addressed an issue where Text+ titles would not show all typeface options for some fonts
- Addressed an issue where duration markers created from in/out durations would not align correctly
- Addressed an issue where decomposing compound clips would not work correctly when the Edit timeline would have in and out marks
- Addressed an issue where transitions between Fusion clips with an alpha channel would not work correctly
- Addressed an issue where setting fade in or fade out handles for a clip with an alpha channel would not work correctly
- Addressed an issue where adding MediaIn nodes to a Fusion composition and deleting the underlying media pool clip would not invalidate the MediaIn node correctly
- Addressed an issue where previewing Fusion compositions with BSpline nodes would sometimes cause a crash
- Addressed an issue where some Fusion settings changes would not be reflected correctly on Fusion generators
- Addressed an issue where some Fusion UI settings changes would not be persisted correctly across application restarts
- Addressed an issue where playing back PSD files would sometimes cause the application to hang
- Addressed an issue where adding a mask to a Fusion composition with a background node would show incorrect background colors
- Addressed an issue where canceling a Saver node render would repeatedly display a confirmation dialog
- Addressed an issue with monitoring dual HDR/SDR outputs where both outputs would sometimes show the HDR image
- Addressed an issue where trying to grade a locked node would incorrectly reset node cache
- Addressed an issue where clip filter controls would sometimes be shown on the clip thumbnails area in the Color page in dual screen mode
- Addressed an issue where resetting primary controls in Log mode would not correctly refresh some controls
- Addressed an issue where switching between nodes in the Color page would not correctly refresh the node sizing controls
- Addressed an issue where applying ResolveFX Color Stabilizer would sometimes result in darkened image frames
- Addressed an issue where a warp point could not be created when applying ResolveFX Warper on a Fusion composition
- Addressed an issue where the Camera RAW ISO control for CinemaDNG clips would not reflect the correct value on the DaVinci Resolve Mini panel
- Addressed an issue where the Camera RAW temperature and tint controls could not be changed from the DaVinci Resolve Mini panel
- Addressed an issue where older GoPro CineForm clips would sometimes be decoded incorrectly
- Addressed an issue where ResolveFX and OpenFX plugins used on the timeline node graph would sometimes not be applied
- Addressed an issue where the Color page thumbnail indicator for clip color would sometimes be inconsistent with the clip color as shown in the Edit timeline
- Addressed an issue where grades could be reset on a locked node in the Color page
- Addressed an issue where default trims were incorrectly being applied instead of interpolated trims when using Dolby Vision external CMUs
- Addressed an issue where copying grades with preserved nodes would incorrectly reset ResolveFX or OpenFX on the preserved nodes
- Addressed an issue where copying grades with preserved nodes would invalidate the cache for those nodes
- Addressed an issue where stills captured in proxy mode with center crop would be captured with blanking
- Addressed an issue where moving a clip with an echo or reverb applied would sometimes result in glitches during playback through its original position
- Addressed an issue where opening a project with FairlightFX applied to clips would sometimes preview the effect only on the left channel
- Addressed an issue where the control room monitor gain would not correctly reflect the output
- Addressed an issue where it was possible to add effects or modify mixer properties for locked audio tracks
- Addressed an issue where an audio track listening for sidechain changes would behave incorrectly if subsequently included in a linked group
- Addressed an issue where the effects library would be filtered by transitions and appear blank on the Fairlight page
- Addressed an issue where recording to multi-channel tracks would produce an audio clip with an incorrect number of channels
- Addressed an issue where rendering a marked timeline section using the Pro Tools preset would sometimes result in files without audio
- Addressed an issue where hiding tracks from the Fairlight page track index would sometimes hide the incorrect track
- Addressed an issue with drawing automation curves when the mouse cursor would go outside the bounds of the clip
- Addressed an issue where clips with Unicode character names would not display correctly on the Fairlight timeline
- Addressed an issue where changing the video track color in the Fairlight timeline would not change the color of generators and titles on the track
- Addressed an issue with selecting clips after switching pages in the sound library
- Addressed an issue where rendering compound clips in the audio-only mode as individual clips would not work correctly
- Addressed an issue where setting an in-out range in the Deliver page and switching pages would not correctly honor the range for subsequent render jobs
- Addressed an issue where linked audio track formats would be shown incorrectly in the render settings
- Addressed an issue where rendered MXF XAVC clips would not have color space and gamma tagged correctly
- Addressed an issue where embedded CEA-608 subtitles in H.264 clips would be rendered with incorrect durations
- Addressed an issue where rendering embedded CEA-608 subtitles would incorrectly show errors for some multiline captions
- Addressed an issue where switching IMF profile levels on the Deliver page would not always update the bitrate to match
- General performance and stability improvements
What’s new in DaVinci Resolve 15.1.2
- Addressed an issue where starting DaVinci Resolve would cause a crash on some CUDA enabled Windows laptops with integrated graphics
- Addressed an issue where the viewer would flash between video and data levels during playback on some systems running on CUDA
- Addressed an issue where the Delete Through Edit context menu option would incorrectly be shown for all edit points on the Edit page
- Addressed an issue where reconforming clips with remote grades would sometimes cause a crash in collaborative projects
- Addressed an issue where dragging an audio clip into audio track layers would sometimes cause a crash in the Edit page
- Addressed an issue where dragging an audio clip with no mapped channels into the timeline would cause a crash
- Addressed an issue where track mute controls would sometimes show an incorrect automation state on the Edit page
- Addressed an issue where copying clips in the Fairlight page would sometimes cause a crash
- Addressed an issue where incorrect audio formats would be shown for muted audio tracks in the Deliver page
- Addressed an issue where Fusion comps with the paint tool applied would sometimes result in the first frame being black
- Addressed an issue where RGBA images would not be processed premultiplied when using some OpenFX plugins
- Addressed an issue where applying stabilization on video clips with odd resolutions would cause a crash
- Addressed an issue where source render cache would not be preserved when applying grades from stills or other clips
- Addressed an issue where adding a ResolveFX node to a clip during playback in the Color page would display a critical exception
- Addressed an issue with the DCDM (P3D65 Limited) IDT in ACES 1.1 projects
- Addressed an issue where trimming some MP4 clips using media management would not succeed
- Addressed an issue when rendering to QuickTime ProRes 4444 where the output would sometimes have chroma overflow artefacts
- Addressed an issue where the ISO selection would sometimes incorrectly be hidden when using RAW clips
- Addressed an issue where playing back some smartphone clips captured in portrait mode would cause a crash
- Addressed an issue where rendering Sony clips with Japanese file names using source filename would not work correctly on Windows
- Addressed an issue where the Photon validation options for IMF packages would not be displayed when Java Development Kit version 11 was installed
- Addressed an issue with stability in remote grading sessions when the client machine had live save enabled
- Addressed an issue with running DaVinci Resolve on case-sensitive volumes on Mac
- General performance and stability improvements
Pre-installation Notes
- Support for decoding and encoding of easyDCP formats is not currently available on Linux
Performing Audio Ducking using Sidechain
DaVinci Resolve now supports automatic audio ducking using sidechain in the Fairlight page Dynamics effect.
Enable “Send” in the track dynamics compression section on one of the multiple tracks where you would like to emphasize or prioritize the audio. Then enable Compression and “Listen” on all the tracks you would like to compress or duck. The threshold and ratio can be adjusted in the compression settings to modify the amount of compression in the signal.
External Audio Processes
DaVinci Resolve now has support for a round-trip mechanism that allows any clip on the timeline to be sent to an external application for audio processing. The updated file created by the external audio process is automatically added to the timeline as a new layer.
External Audio Processes can be added and managed in the Audio Plugins section of System Preferences. The round-trip process can be triggered from the clip context menu on the timeline.
Generating Supplemental IMF Packages
DaVinci Resolve Studio now supports generation of supplemental packages for IMFs when using Resolve’s Kakadu-based J2K decoder and encoder. Please note that you will need to disable the easyDCP decoder option in the Configuration tab of System Preferences to enable this feature.
With an IMF composition in the Media Pool, you can select “Create New Timeline Using Composition Playlist” in the clips context menu to create a new timeline. If the IMF package has any associated Dolby Vision metadata, it can be applied using an option in the creation dialog.
Any portions of the IMF timeline can now be replaced with source clips from the Media Pool. The timeline clip’s context menu has an option for not including the replacement clip for supplemental packages. There is an additional context menu option for selecting either the original or updated Dolby Vision analysis and trim metadata.
In the Deliver page, the “Supplemental Package” option can be enabled in order to generate the supplemental IMF using the new clips and the Dolby Vision metadata.
Performing Photon validation on IMF packages
DaVinci Resolve Studio now supports the validation of IMF packages using Photon. In order to activate this feature, the Java Runtime Environment (JRE) will need to be installed on the machine.
Photon validation can be performed by right-clicking on IMF packages in the Media Pool and selecting “Perform Photon Validation”. Additionally, there is a checkbox in the Deliver page advanced video settings to perform Photon validation after the IMF package is rendered.
What’s new in DaVinci Resolve 15.1.1
- Support for joining through edits in the Edit timeline from the context menu
- Improved playback performance when Selection Follows Playhead is enabled in the Edit page
- Support for scripting API to set output file name for rendering
- Addressed an issue where decoding some AVI files with lossless JPG content would cause a crash
- Addressed an issue where pre-clip and post-clip group grades would sometimes not be saved
- Addressed an issue where output sizing would not be applied to the HDR output when in dual SDI mode in Dolby Vision or HDR10+ projects
- Addressed an issue where creating stereoscopic 3D clips from stereo CineForm files would not work correctly
- Addressed an issue where a stereoscopic 3D clip created from clips with partially overlapping timecodes would show offline media frames
- Addressed an issue where white balance settings for Blackmagic RAW clips would not be saved correctly
- Addressed an issue where OpenFX keyframes in the timeline node graph in older Resolve projects would not be recalled correctly in the Color page
- Addressed an issue where duplicating a timeline with a shared node and modifying the shared node would cause a crash
- Addressed an issue where applying stabilizer could cause a crash on some Nvidia graphics platforms in OpenCL GPU processing mode
- Addressed an issue where color keyframes in stereoscopic 3D clips would sometimes not be loaded correctly
- Addressed an issue where appending a node in ripple mode would place the node in an incorrect position
- Addressed an issue where using OpenFX or ResolveFX plugins in a remote grading session could cause the client viewer to flicker while grading
- Addressed an issue where applying P3 D65 ST2084 ODTs in ACES 1.1 projects would show incorrect results
- Addressed an issue where applying certain IDTs and ODTs in ACES 1.1 projects would show black frames when the GPU processing mode was set to CUDA
- Addressed an issue where upgrading disk databases from Resolve 12.5 would result in loss of Power Grades in some scenarios
- Addressed an issue where image resolutions for certain ARRI QuickTime clips would not be recognized correctly
- Addressed an issue where media imported from an XML would be imported twice if it was listed inside a bin in the XML
- Addressed an issue where subtitles with inconsistent line-endings would not be imported correctly
- Addressed an issue where exporting a subtitle file on some Windows systems would cause a crash
- Addressed an issue where selecting subtitles from the Edit inspector would cause a crash in some projects
- Addressed an issue where Alt/Opt+clicking on an Edit timeline track would sometimes reset its auto-select state
- Addressed an issue where ripple-overwriting a clip with transitions would behave incorrectly
- Addressed an issue where dragging to select clips in the Edit timeline would incorrectly scroll through audio tracks
- Addressed an issue where audio playback for linked clips with smoothened speed change would not work correctly
- Addressed an issue where toggling Solo Safe on the Fairlight Mixer would sometimes behave inconsistently
- Addressed an issue where the automation indicators on the Fairlight mixer would sometimes be displayed incorrectly when loading a project
- Addressed an issue where linked track groups would display incorrect clip counts on the Fairlight page
- Addressed an issue where rendering timelines from the delivered page would sometimes fail with a timeout error
- Addressed an issue where the first frame of some Fusion comps could sometimes display a black frame
- Addressed an issue where canceling a saver node render would repeatedly display confirmation messages to the user
- Improved chroma subsampling for 4:2:2 renders
- General performance and stability improvements
Pre-installation Notes
- Support for decoding and encoding of easyDCP formats is not currently available on Linux
Performing Audio Ducking using Sidechain
DaVinci Resolve now supports automatic audio ducking using sidechain in the Fairlight page Dynamics effect.
Enable “Send” in the track dynamics compression section on one of the multiple tracks where you would like to emphasize or prioritize the audio. Then enable Compression and “Listen” on all the tracks you would like to compress or duck. The threshold and ratio can be adjusted in the compression settings to modify the amount of compression in the signal.
External Audio Processes
DaVinci Resolve now has support for a round-trip mechanism that allows any clip on the timeline to be sent to an external application for audio processing. The updated file created by the external audio process is automatically added to the timeline as a new layer.
External Audio Processes can be added and managed in the Audio Plugins section of System Preferences. The round-trip process can be triggered by the clip context menu on the timeline.
Generating Supplemental IMF Packages
DaVinci Resolve Studio now supports a generation of supplemental packages for IMFs when using Resolve’s Kakadu-based J2K decoder and encoder. Please note that you will need to disable the easyDCP decoder option in the Configuration tab of System Preferences to enable this feature.
With an IMF composition in the Media Pool, you can select “Create New Timeline Using Composition Playlist” in the clips context menu to create a new timeline. If the IMF package has any associated Dolby Vision metadata, it can be applied using an option in the creation dialog.
Any portions of the IMF timeline can now be replaced with source clips from the Media Pool. The timeline clip’s context menu has an option for not including the replacement clip for supplemental packages. There is an additional context menu option for selecting either the original or updated Dolby Vision analysis and trim metadata.
In the Deliver page, the “Supplemental Package” option can be enabled in order to generate the supplemental IMF using the new clips and the Dolby Vision metadata.
Performing Photon validation on IMF packages
DaVinci Resolve Studio now supports validation of IMF packages using Photon. In order to activate this feature, the Java Runtime Environment (JRE) will need to be installed on the machine.
Photon validation can be performed by right-clicking on IMF packages in the Media Pool and selecting “Perform Photon Validation”. Additionally, there is a checkbox in the Deliver page advanced video settings to perform Photon validation after the IMF package is rendered.
What’s new in DaVinci Resolve 15.1
Key new features
- Support for decoding Blackmagic RAW clips from Blackmagic Design cameras
- Support for audio ducking using sidechain compression in track dynamics in the Fairlight page
- Support for round-tripping audio clips to third-party audio processing applications from the Fairlight timeline
- Support for an IMF preset to generate Netflix IMF deliverables
- Support for creating and delivering supplemental IMF packages
- Support for Photon validation of IMF packages
Fairlight
- Support for audio ducking using sidechain compression in track dynamics
- Support for round-tripping audio clips to third-party audio processing applications from the Fairlight timeline
- Support for caching clips with FairlightFX and AudioFX
- Support for bouncing clips with FairlightFX and AudioFX to a new layer
- Support for sub-bus and aux-bus routing in nested timelines
- Support for solo-safe for audio tracks by Cmd/Ctrl+Option/Alt-clicking the Solo button in the Fairlight mixer
- Support for pasting attributes to audio tracks
- Support for removing attributes from audio tracks
- Support for Fairlight FX Soft Clipper
- Support for clip level panning in the Edit and Fairlight page inspector
Fusion
- Support for creating and opening new Fusion compositions from the Media Pool
- Support for Fusion composition generators in the Edit page effects library for creating comps without source media
- Support for Loader nodes in the Fusion node graph
- Support for automatically scaling the frame range sliders to the edit range
Edit
• Support for showing source timecode overlays for audio and video tracks in the timeline viewer
• Support for displaying clip marker annotations and overlays for the selected clip marker under the playhead
• Support for holding shift while modifying title, transform and dynamic zoom viewer overlays to restrict motion to the vertical or horizontal direction
• Support for an indicator for clips with color grading and Fusion comp updates available in collaborative projects
• Support for actions to update either a single clip or all clips with color grading or Fusion comp updates in collaborative projects
• Support for duplicating multiple selected timelines in the media pool
• Support for displaying the multicam angle name in the timeline, source viewer and the color page clip information
• Support for keywords in clip and timeline markers
• Support for a marker keywords column on the edit index
• Support for exporting subtitle files in project archives
• Support for inserting media pool clips in order of filename when creating a timeline using clips
• Support for importing subclips when importing media from Final Cut Pro 7 XMLs
• Improved freeze-frame behavior to freeze the clip forward from the playhead instead of the whole clip
Color
• Support for ResolveFX and OpenFX static keyframes from the keyframe context menu
• Support for ACES 1.1
• Support for accessing and selecting from multiple inputs for OpenFX nodes
• Support for modifying temperature and tint values in the Camera Raw widget without needing to manually set white balance to custom
• Improved behavior for the ResolveFX Warper plugin
Media and Deliver
• Support for decoding Blackmagic RAW clips from Blackmagic Design cameras
• Support for an IMF preset to generate Netflix IMF deliverables
• Support for creating and delivering supplemental IMF packages
• Support for Photon validation of IMF packages
• Support for stereoscopic 3D multi-view EXR files
• Support for encoding per frame timecode metadata in Grass Valley HQ and HQX clips
• Improved layer metadata support when importing PSD images in Fusion
General
• Improved playback performance on large timelines in a zoomed out state
• Improved performance and interactivity in the Fusion page
• Improved performance of some title templates available in the Effects Library
• Improved thumbnail loading speed when switching bins in the media pool
• Improved scripting support with the ability to import and export Fusion comps
• Support for automatic generation of MD5 media hash lists from Clone Tool operations
• Addressed an issue where searching by marker name or marker notes would not work in thumbnail view
• Addressed an issue where switching multicam angles would not refresh the thumbnails
• Addressed an issue where some edit operations would lead to video transitions being placed outside frame boundaries
• Addressed an issue where turning off stroke for a subtitle would not work correctly
• Addressed an issue where the minimum height for audio tracks in the Edit timeline would not be set correctly
• Addressed an issue where subtitle files with overlapping captions would not be imported correctly
• Addressed an issue where compositing compound clips on top of clips with transitions would not work correctly
• Addressed an issue where middle-clicking to pan the Edit timeline would sometimes deselect clips
• Addressed an issue where Text+ clip thumbnails would sometimes be shown as media offline
• Addressed an issue where adding a Text+ tool to a power bin would sometimes cause a crash
• Addressed an issue where selecting a Fusion comp in a Power Bin would cause a crash
• Addressed an issue where opening or saving a Fusion macro in the macro editor would sometimes cause a crash
• Addressed an issue where channel mapping changes for EXR clips on the Fusion page would not be persisted across application restarts
• Addressed an issue where removing curve in the MediaIn tool in sRGB gamma space would sometimes cause a crash
• Addressed an issue where importing SVG files would incorrectly ignore a user-specified input resolution
• Addressed an issue where the channel chooser would show incorrect labels when multi-channel EXR files were loaded in the Fusion viewer
• Addressed an issue where adding particles would cause the application to hang
• Addressed an issue where enabling motion blur for mask tools in Fusion page would not work correctly
• Addressed an issue where repositioning matte masks of different resolutions in the Fusion viewer would sometimes show incorrect results
• Addressed an issue where some FairlightFX controls with automation would not correctly reflect their automation status
• Addressed an issue where pasting a long clip on the Fairlight timeline would sometimes change the timeline zoom
• Addressed an issue where the Bus format dialog would display the wrong Main bus formats when switching between timelines
• Addressed an issue where adding audio plugins to a linked audio track would behave incorrectly
• Addressed an issue where selecting linked audio tracks for rendering would show the incorrect format
• Addressed an issue where recording audio to linked tracks would record only to the first track in the group
• Addressed an issue where unlinking a linked track group would not retain boom settings
• Addressed an issue where resizing some audio transitions would not work properly
• Addressed an issue where ADR recordings would not be visible when opening older projects
• Addressed an issue where playing back audio files with specific sample rates would result in some artefacts
• Addressed an issue where dragging the scrollbar in the Fairlight timeline in locked playhead mode would cause playback to stop
• Addressed an issue where the mute setting for aux bus sends would not be honored when using the pre-fader option
• Addressed an issue where an audio track would not be automatically disarmed when un-patched
• Addressed an issue where switching to the Fairlight page would sometimes cause an audible pop
• Addressed an issue where adjusting sliders in the CameraRAW palette would not refresh the viewer smoothly
• Addressed an issue where previewing composite modes on a layer mixer node would sometimes cause a crash
• Addressed an issue where viewing clips with handles with backups, and live save enabled would cause a crash
• Addressed an issue where the unmix mode and looped playback states would not be persisted across application restarts
• Addressed an issue where toggling Clip, Timeline, and Unmix from the DaVinci Resolve Advanced panel would cause a crash
• Addressed an issue where the DaVinci Resolve Advanced panel would not work with multiple logins on CentOS 7.3 systems
• Addressed an issue where rippling grades to a group would not work if unmix mode was enabled
• Addressed an issue where performing a flip in Clip Attributes in stereoscopic 3D clips would cause power windows to behave incorrectly
• Addressed an issue where remote grading on clips that have OFX plugins applied would sometimes cause a crash
• Addressed an issue where duplicating a timeline with a shared node would not correctly copy the shared node
• Addressed an issue where Quicktime files rendered with Dolby Vision tone mapping would have incorrect colorspace and gamma tags
• Addressed an issue where Resolve was unable to decode some AAC audio clips
• Addressed an issue where rendered 5.1 and 7.1 Linear PCM audio would not have the correct channel mapping metadata
• Addressed an issue where importing some projects from older versions of DaVinci Resolve would cause a crash
• Addressed an issue where projects inside a folder in Project Manager could not be loaded using scripting API
• General performance and stability improvements
Pre-installation Notes
Support for decoding and encoding of easyDCP formats is not currently available on Linux
Performing Audio Ducking using Sidechain
DaVinci Resolve now supports automatic audio ducking using sidechain in the Fairlight page Dynamics effect.
Enable “Send” in the track dynamics compression section on one of the multiple tracks where you would like to emphasize or prioritize the audio. Then enable Compression and “Listen” on all the tracks you would like to compress or duck. The threshold and ratio can be adjusted in the compression settings to modify the amount of compression in the signal.
External Audio Processes
DaVinci Resolve now has support for a round-trip mechanism that allows any clip on the timeline to be sent to an external application for audio processing. The updated file created by the external audio process is automatically added to the timeline as a new layer.
External Audio Processes can be added and managed in the Audio Plugins section of System Preferences. The round-trip process can be triggered by the clip context menu on the timeline.
Generating Supplemental IMF Packages
DaVinci Resolve Studio now supports a generation of supplemental packages for IMFs when using Resolve’s Kakadu
FAQs
Tutorials

How to Use Krotos Studio in DaVinci Resolve 18.6
Krotos Studio is fully integrated with DaVinci Resolve. Learn how to use the combination to make your sound effects workflow faster than ever before, in this quick guide.
More...
Sound Design Entire Scenes With Krotos Studio
Sound design with Kroto Studio is easy. This tutorial shows you how to design an entire scene using Krotos Studio and DaVinci Resolve.
More...
How to use the 3D Color Cube in Nobe OmniScope
Blackmagic DaVinci Resolve trainer Daria Fissoun explains the 3D Color Cube tool in timeinpixels Nobe OmniScope.
More...

10 PRO Colorist Hacks You NEED to Know
Colorist Darren Mostyn shares 10 great hacks for the Color page in DaVinci Resolve Studio. #9 is getting the most reaction.
More...
In Depth: Upscaling Video (Updated 8 Feb 2024)
If you work with old video footage in standard format or can't shoot 4K, learn how to make the job smoother and get better results.
More...
20 Tips For Video Editors in 2024 from Olufemii
Josh Olufemii has 20 timely tips for video editors to get 2024 started with a bang. The software agnostic tips are for editors using any NLE.
More...
Horror SFX DaVinci Resolve 18 with Krotos Studio
Learn how to use Krotos Studio with DaVinci Resolve to easily add tension to your horror scenes, with this quick tutorial.
More...
In Depth: DaVinci Resolve Studio vs the Free Version (Updated)
Is Blackmagic DaVinci Resolve Studio version worth the investment over the free version? Yes, it is! Read DaVinci Resolve Studio vs Free to learn more.
More...
Davinci Resolve: Removing Background Noise Using BorisFX CrumplePop
Background noise is hard to avoid when recording audio. Boris FX has a great step-by-step guide on how to diminish/remove unwanted noise in DaVinci Resolve with CrumplePop. It explains what background audio noise is, which filters work best for which situations, how to create a Noise Reduction Preset, and even how to add a noise reduction plug-in to a track in Fairlight.
More...

Getting Washed Out Color from Resolve on Mac? Here's the Fix
Get great color from DaVinci Resolve using the right settings in preferences. We'll explain the settings, including Rec.709, plus a few tools to help with workflow.
More...
Indie Filmmaking in Resolve: Filmmaker Damien LeVeck
Watch Boris FX Live on Wednesday, December 14 where the team interviews award-winning indie filmmaker and Sapphire power user Damien LeVeck.
More...
Burning Question: How Do I Quickly Give My Project a Letterbox Look?
Add the look of letterboxing and give your video a film look. Learn about the tools, techniques, and terminology of letterboxing. New Freebies!
More...
Burning Question: How do I improve Performance in DaVinci Resolve?
Learn several simple ways to improve performance in DaVinci Resolve, from using Proxy Mode to enabling Smart Render Cache.
More...
Proxy Workflow Resolve to AVID
Premium Beat explains the best practices for using DaVinci Resolve to sync, color grade, and transcode proxies for ingest into AVID.
More...
The EASIEST/Best Way to Color Grade Log Footage in Resolve
Creative Video Tips walks you through how to color grade flat-looking Log footage in DaVinci Resolve, without using any LUTs.
More...
5 HIDDEN Features in Resolve's Edit Page
Jay Lippman shows 5 HIDDEN features in Resolve's Edit Page that will speed up your workflow. Watch the video and take notes!
More...
Free Training: DaVinci Resolve 17 Video Series
Blackmagic released several free video training series for DaVinci Resolve 17 last month. There are also free training ebooks for download.
More...
5 Steps System to Grade LOG Footage in 11 Seconds in DaVinci Resolve
Alex Jordan from Learn Color Grading explains how to quickly grade LOG footage in Resolve. Just 5 simple steps to get you started.
More...
Toolfarm's Top 10 Tutorials of 2021
What are Toolfarm's 10 most popular tutorials in 2021? We have some for Resolve, some for Cinema 4D, and some more general. Enjoy!
More...Dive into the Brand New DaVinci Resolve 17.4 Track Feature
Branden Arc discusses the brand new Track Forward/Track Backward feature in DaVinci Resolve 17.4. Learn what the new feature can do for you.
More...
In Depth: Create Subtitles and Captions for Your Videos (Updated!)
Create subtitles and closed-captioning to help your video gain reach and appeal to a wider audience on broadcast and streaming videos.
More...
Batch Rename Clips FAST & EASY! Davinci Resolve 17 Tutorial
Creative Video Tips has another useful DaVinci Resolve 17 tutorial, this time explaining how to automatically batch rename clips.
More...Livestream Video & Audio Output from DaVinci Resolve using NDI and OBS
Finn Jäger explains how to use NDI and OBS with timeinpixels Nobe Display NDI to livestream from Resolve Studio, for both video and audio.
More...
DaVinci Resolve SPEED EDITOR Search Dial - Cut Page Tutorial
Creative Video Tips explains how to use the Search Dial on Speed Editor to work faster in the Cut Page. Plus, save big on Speed Editor now!
More...
How to MOVE a DaVinci Resolve Project File Location EASILY!
Creative Video Tips Demystifies Databases and shows you how to move your files in DaVinci Resolve. Plus tons of other great workflow tips.
More...
Using the Trim Tool in Blackmagic DaVinci Resolve
In this tutorial, Sean Berry from videomaker.com walks you through the use of the trim tool in DaVinci Resolve. It's a bit different than other trim tools (especially if you're used to Premiere Pro) and takes some getting used to, but once you learn it, it makes editing much easier.
More...
In Depth: The Ultimate Guide to Building a Great Demo Reel
Get advice from seasoned pros on putting together a reel that will get you jobs! Learn what work to include on your reel, music choices, etc.
More...
How do I use Scopes in DaVinci Resolve?
This series is focused on DaVinci Resolve, but are applicable to scopes most video tools. Learn to read scopes and stop guesstimating!
More...
Accusonus ERA 5 Audio Plugins for DaVinci Resolve
Jay Lippman walks you through using Accusonus ERA 5 Audio Plugins in Blackmagic DaVinci Resolve. Try a free demo of ERA 5 plugins today.
More...
In Depth: Immersive Audio
Immersive audio experiences are found in movies, computer games, VR/360° video, YouTube, Facebook 360, and more. Find out what it's all about!
More...
Burning Question: Can I Get Resolve Studio as a Download Delivery?
As a matter of fact, Toolfarm is the ONLY place that you can get Resolve Studio as a Download Delivery. Get it today, without the wait!
More...
Davinci Resolve/Fusion: Create a Retro Scrolling Parallax Background
A Blackbird called Sue explains how to make a Retro Scrolling Parallax Background using the Custom Tool that ships with version 16.2.4.
More...
How To Stabilize Video In DaVinci Resolve 16, Fast & Easy
Learn to stabilize your shaky footage in DaVinci Resolve with the built-in image stabilization tool. Analyze shots and stabilize quickly and easily.
More...
Burning Question: How Do I Edit and Export with My NLE for TikTok?
Learn about how to edit and export for TikTok with your pro video tools. We're featuring Premiere Pro, Final Cut Pro X, Vegas Pro, and DaVinci Resolve.
More...
Burning Question: How Can I Input ASC-CDL Values into After Effects?
Prolost CDL is a free preset from Stu Maschwitz at Prolost that allows users to type CDL values right into After Effects.
More...
Burning Question: What is a Cinemagraph and How Do I Create One?
Cinemagraphs is a format that combines photos and video. It's a still photograph where a small area of the image has repeated or looped movement occuring to draw your attention. Cinemagraphs can be published as movies or an animated GIF or in other video formats.
More...
FilmConvert Nitrate for OFX (DaVinci Resolve) #gettingstarted
In this tutorial, Gerald Undone goes over the basics of applying a lut in Resolve, the new functionalities of Nitrate and how to get a nice color grade quickly.
More...
Davinci Resolve 16 - Beginner to Hero Tutorial
Denver Riddle from Color Grading Central eases you into using DaVinci Resolve for color grading, how to not get intimidated, and go from a beginner to a hero.
More...
Blackmagic Design Fusion: Particle Tutorial : Text to 3D Butterflies
In this tutorial, VFX Generalist Chetal Gazdar shows you how to make text turn into 3d butterflies using an emitter source and the particle system within Blackmagic Design Fusion.
More...
6 Davinci Resolve 15 Training Videos from Blackmagic Design
Blackmagic Design recently released some new official training videos for DaVinci Resolve. If you’ve been wanting to try out Resolve, there’s no time like right now. This training is taught by media professionals and these videos go pretty deep! They cover managing media, working with audio, 3D and compositing with Fusion VFX, and more.
More...
3 Tips to Speed Up Your Editing in DaVinci Resolve 15
Learn three techniques to speed up the time you spend on your edits in Davinci Resolve 15.
More...
Sky Replacement in FCP X + Other Hosts
Steve at Ripple training shows you how to do a Sky Replacement with Final Cut Pro X’s powerful Keyer effect and a few color correction tools.
More...
Create Beautiful Volumetric Lighting in Davinci Resolve with Sapphire EdgeRays
Create photorealistic lighting effects with Blackmagic Davinci Resolve and Sapphire Edge Rays. For more cool lighting effects, Check out Boris FX Sapphire for Davinci Resolve, After Effects, Premiere Pro, and other hosts.
More...
Fusion: Getting Started with Fusion in Davinci Resolve
Vito LaManna, better known as ConFusion to Fusion users, has started a tutorial series to help DaVinci Resolve users get started with the node-based compositor, Fusion. Get to know DaFusion!
More...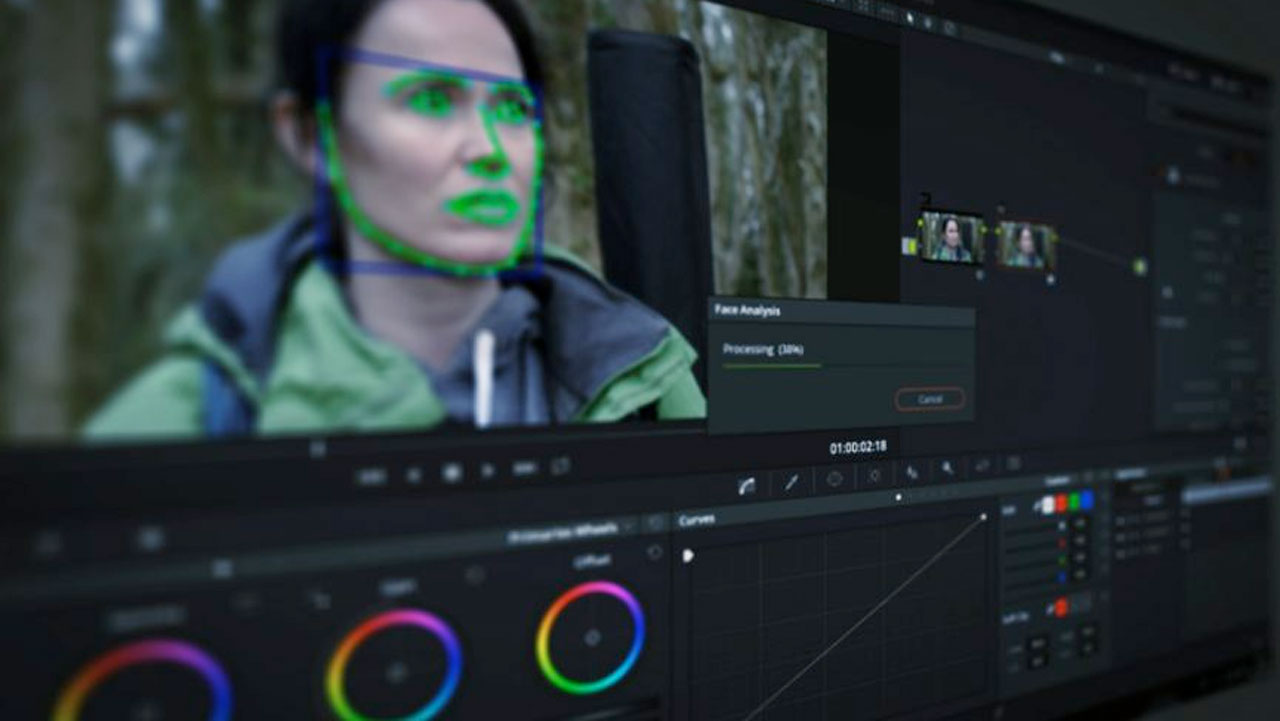
DaVinci Resolve: Face Refinement Plug-in
The Face Refinement tool in DaVinci Resolve Studio is a digital make-up tool that allows colorists and editors to retouch complexions, modify lip or cheek color, and much more. Learn how easy and powerful this hidden gem is with this tutorial from Lewis McGragor at Premium Beat.
More...
5 Blade Runner 2049 Inspired Tutorials
Blade Runner 2049 has really interesting visuals and sound design. Learn to recreate some of these effects with these five tutorials inspired by the film.
More...
5 Ways to Edit Faster
Whether you've been editing for years or you're new to the process, everyone wants to edit faster. Although these tips are geared toward new editors, even seasoned editors will hopefully pick up a few tips to speed up their workflow.
More...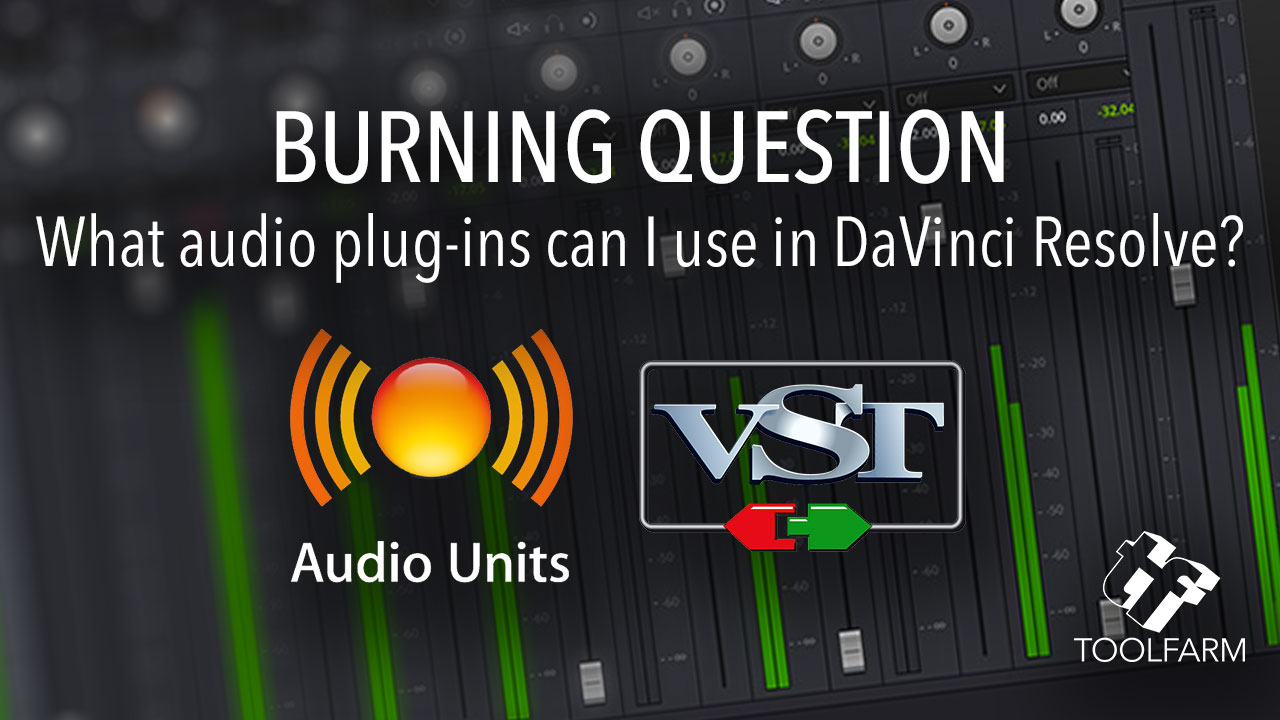
Burning Question: What Audio Plug-ins can be used in DaVinci Resolve?
There are quite a few audio plug-ins that will work in DaVinci Resolve, both VST and AU. Learn about what works to expand your arsenal!
More...Sky Replacement/Fake HDR - Davinci Resolve Tutorial
MiesnerMedia explains a "party trick" about how to replace a sky in Resolve. He recommends using a compositor like After Effects instead so this is why he calls it a party trick. It's an informative tutorial covering a complex technique, hopping into the topic of dynamic range of cameras.
More...Enhance Your Sky in Under Five Minutes in DaVinci Resolve
It's not always easy when contrast is a concern. It's important to get your exposure right and know which filters to use. Here are some tips from Lewis McGregor at Premium Beat on enhancing your sky in DaVinci Resolve.
More...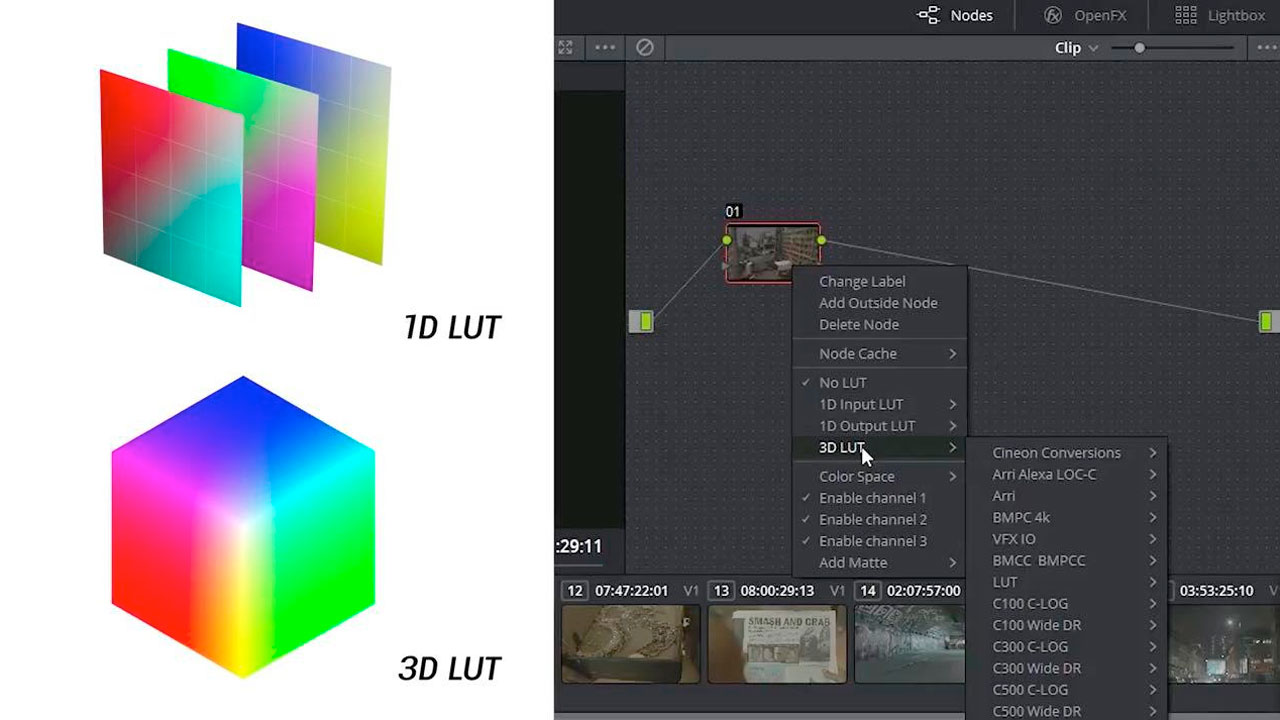
Tutorials: Colour Grading Tutorials for DaVinci Resolve
Get coloring tips from professional colorists, troubleshoot common Resolve problems, learn FCPX/Premiere Pro workflows, and more, with this DaVinci Resolve color grading tutorial compilation from film editor Danny Elwin.
More...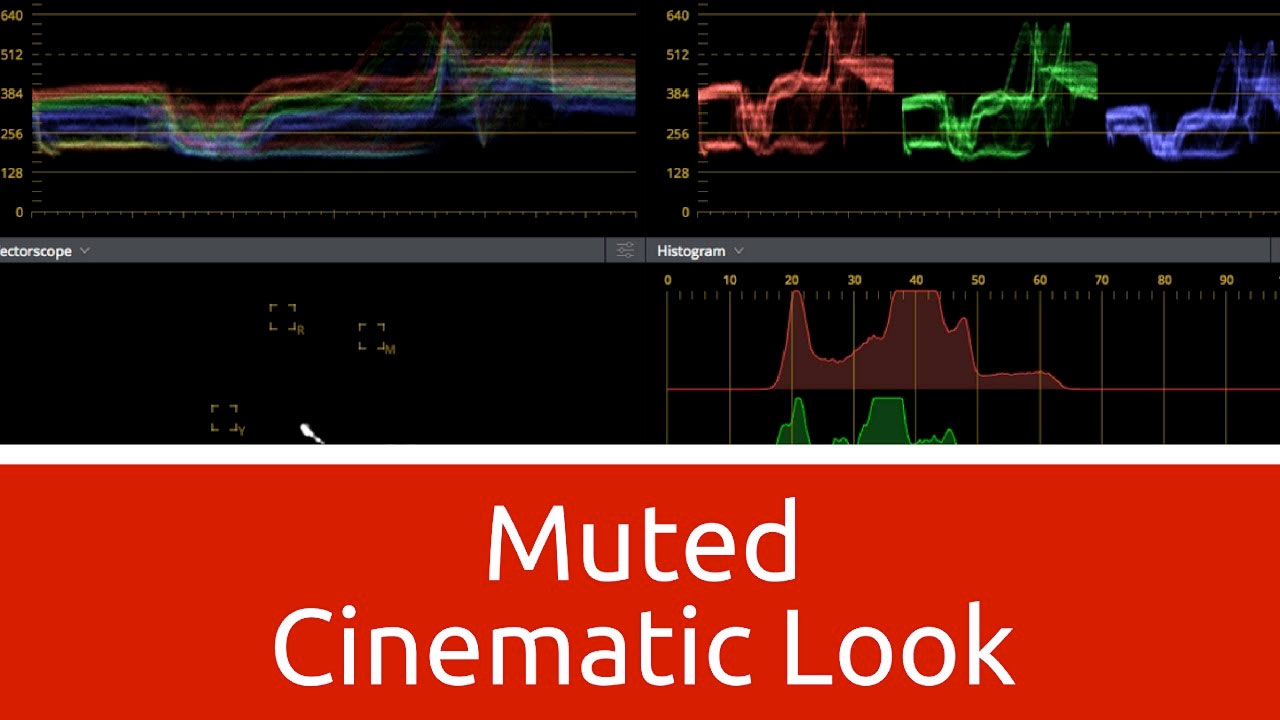
How to - Muted Cinematic Look in Davinci Resolve 12.5 + Free LUT
Alex Jordan from LearnColorGrading.com has a tutorial that shows how to create a muted film look in Davinci Resolve and is offering the Film Emulation LUTs based on that look for free.
More...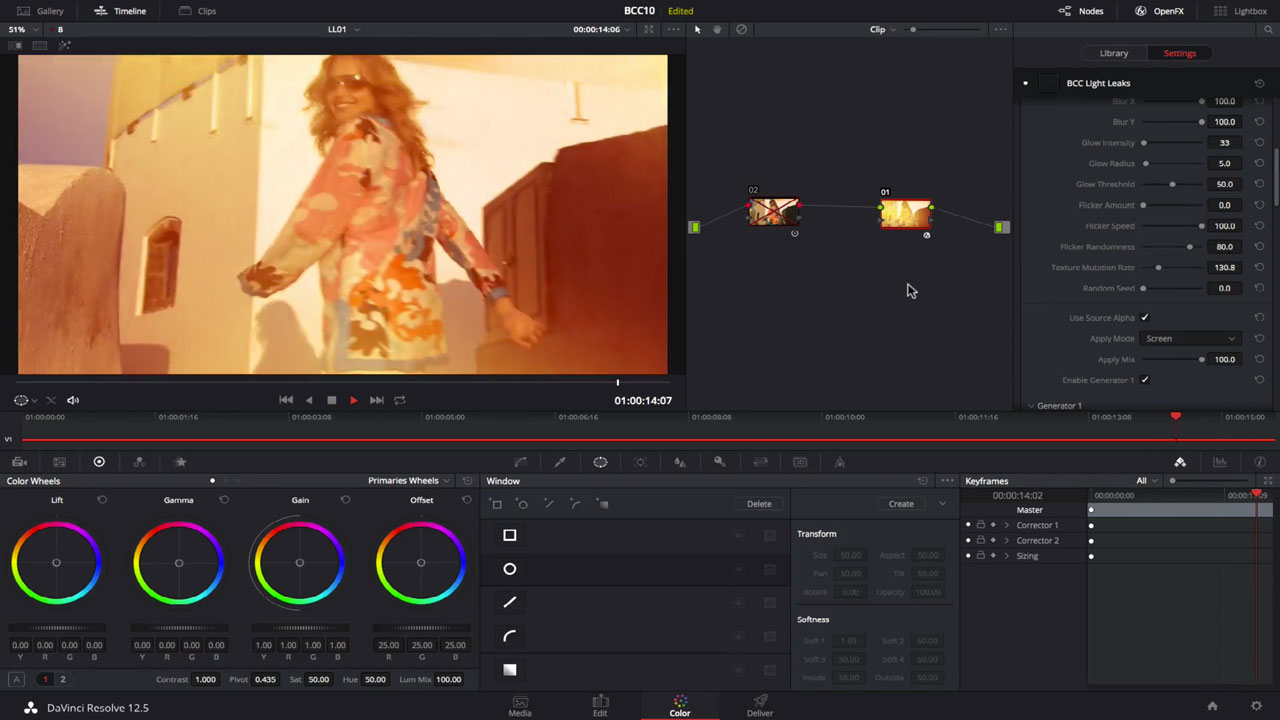
DaVinci Resolve and BCC 10 - Light Leaks and Video Glitch
Colorist Dan Harvey shows DaVinci Resolve users how to quickly apply new style effects & transitions from Boris FX with BCC 10.
More...
Anatomy of a DaVinci Resolve Composite
“In this video, I show you how I pushed DaVinci Resolve further than I have yet. A project came in that needed a bit of compositing, and I tackled in right in DaVinci Resolve. And with a little help from Boris Continuum Complete, it all came together beautifully.” -Mike Wolf
More...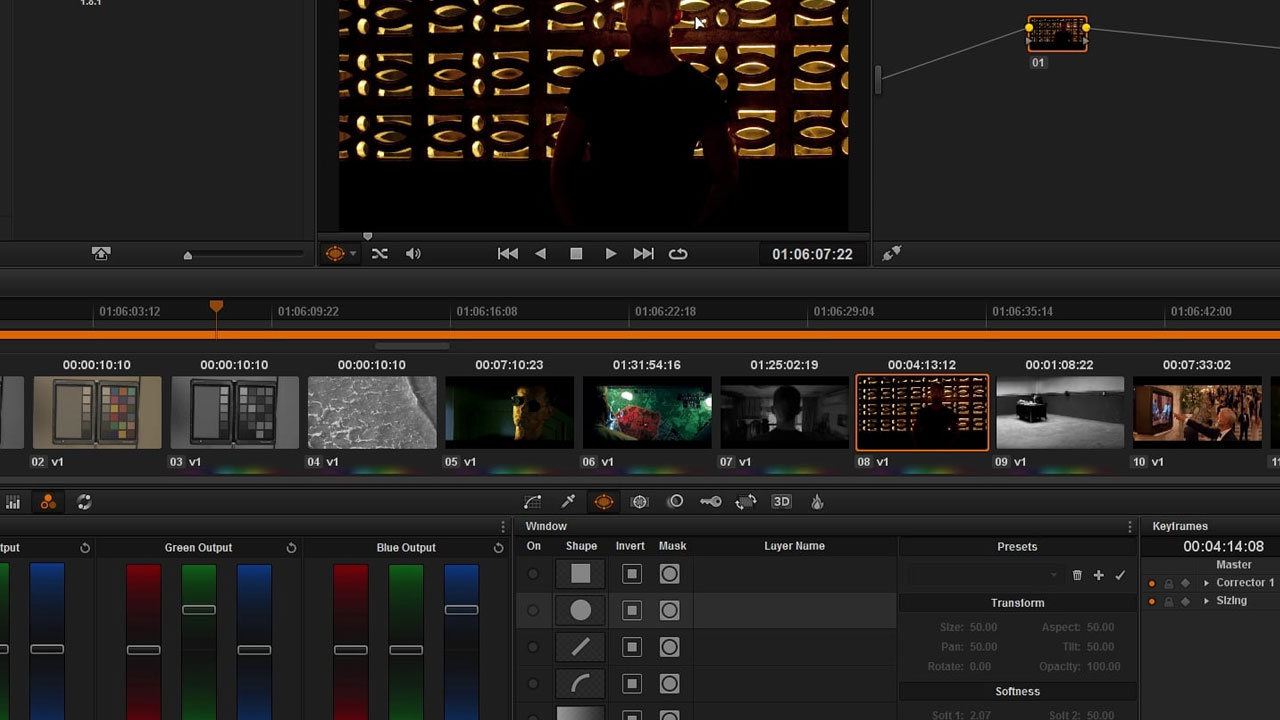
How to Convert Color Video to Monochrome in DaVinci Resolve
“Carver Moore shows us how to convert footage to Black and White in DaVinci Resolve.” - WolfCrow
More...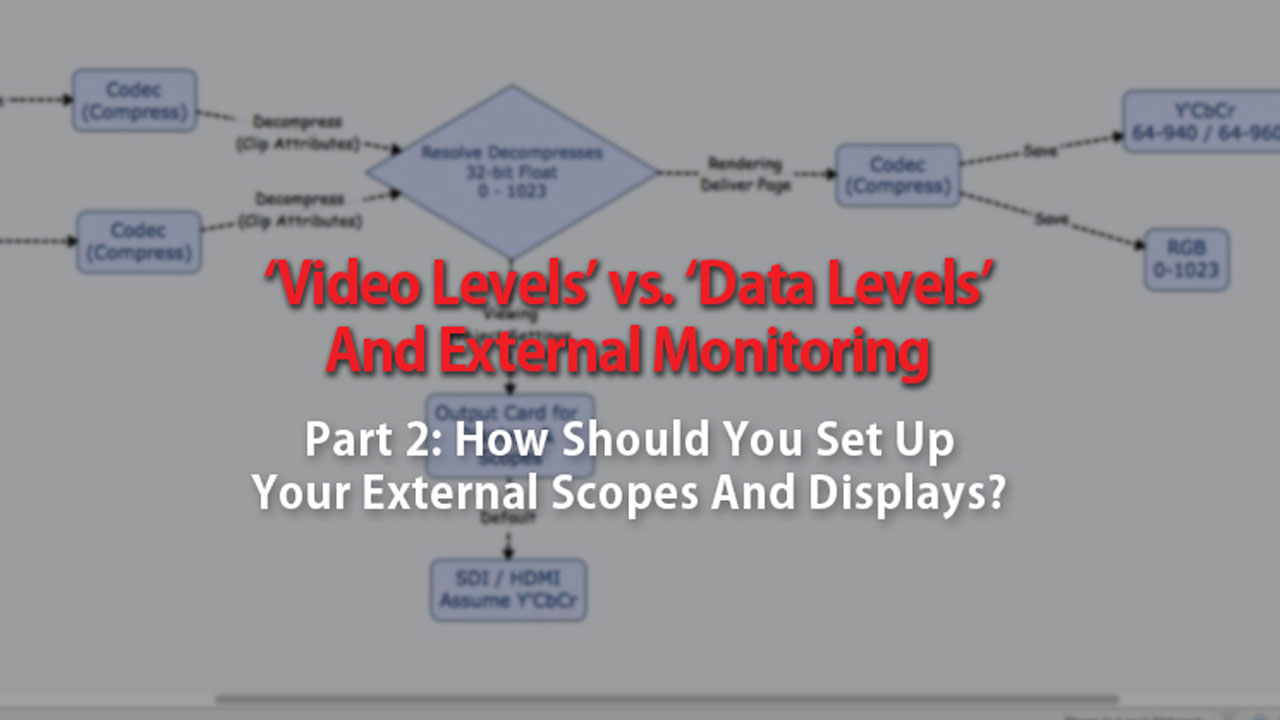
How to Use External Scopes with Video vs Data Levels in DaVinci Resolve
How to Use External Scopes (and Where to Set Your Black and White Levels). A follow-up to understanding Video Levels and Data Levels in DaVinci Resolve
More...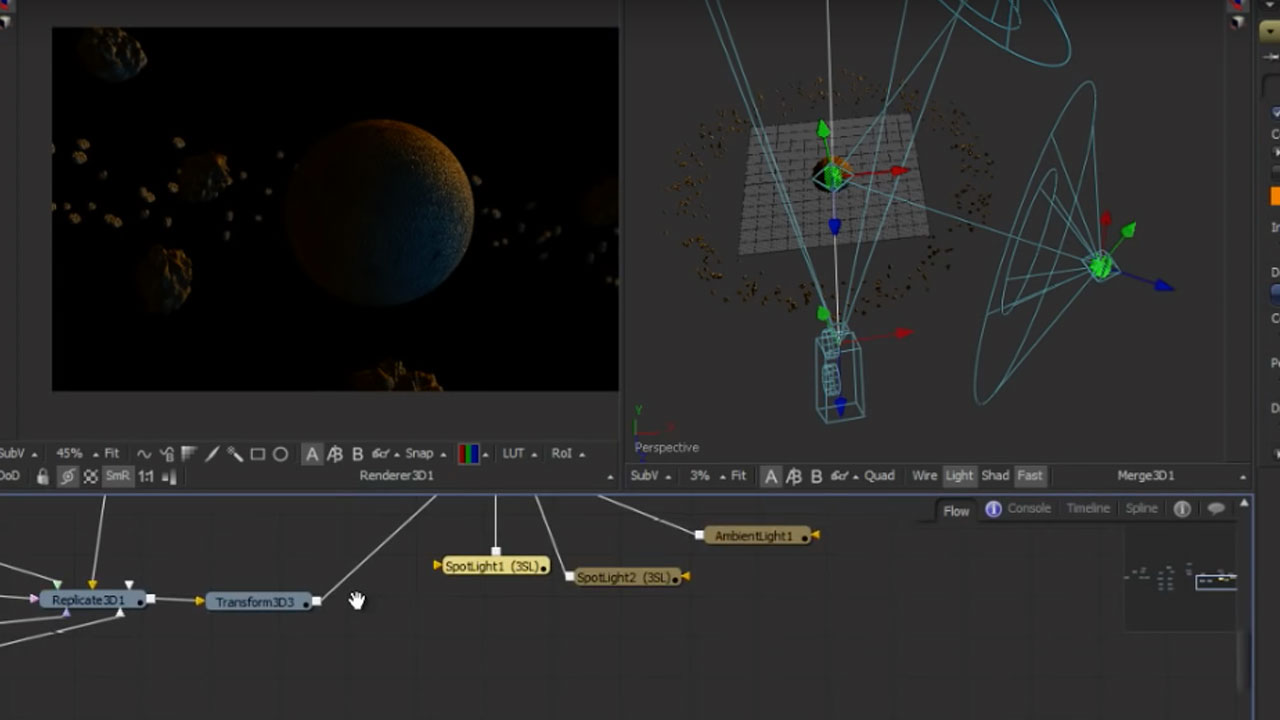
Create a Space Scene Entirely in Blackmagic Design Fusion
“Chetal Gazdar leverages Fusion’s 3D environment and particles to create a space scene.” - Lester Banks
More...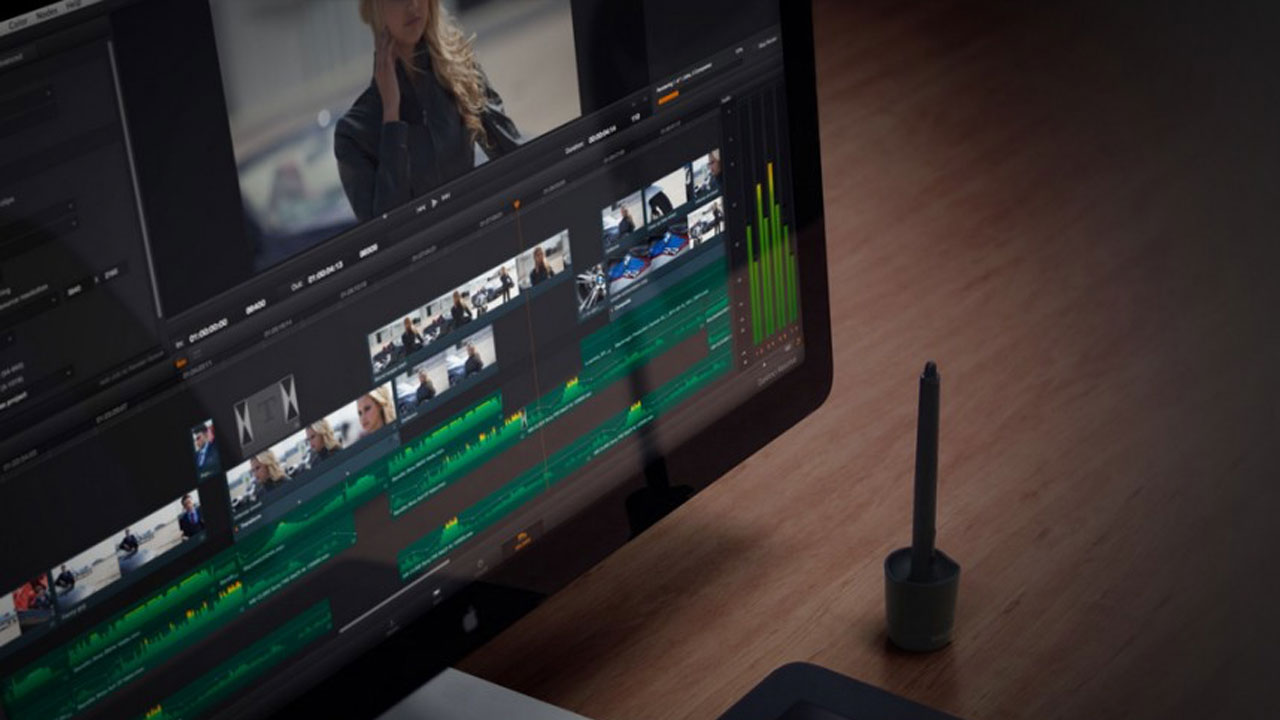
Using Offline Reference Clips in DaVinci Resolve
Using offline clips is important when establishing yourself as a serious colorist. Learn how in this DaVinci Resolve Tutorial.
More...
Grading, Compositing, and Editing in Resolve
Having Fun With Post! Creating and Finessing with Alexis Van Hurkman.
More...
DaVinci Resolve Tip: Create a Duotone Look in 2 Steps
This tutorial from Noam Kroll, with Premium Beat, shows us how to achieve great results with the duotone color style with only two simple steps in DaVinci Resolve.
More...The Video Editors Guide to Color Grading
ncreasingly, color grading is being handled by video editors working on laptops and desktops instead of calibrated displays. Here are some ways to make this reality work for you.
More...
The Art Of Predicting The Metadata Match of Three
One piece of the metadata puzzle for both external and internal relinking with Resolve & Avid!
More...
Burning Question: How do I get started with Blackmagic Design DaVinci Resolve?
DaVinci Resolve is on my list of software to learn this year, too. You’re in luck. I’ve been collecting tutorials together in a list that either look like I’d learn a lot from them or have an interesting outcome. Here are some that will hopefully get you started.
More...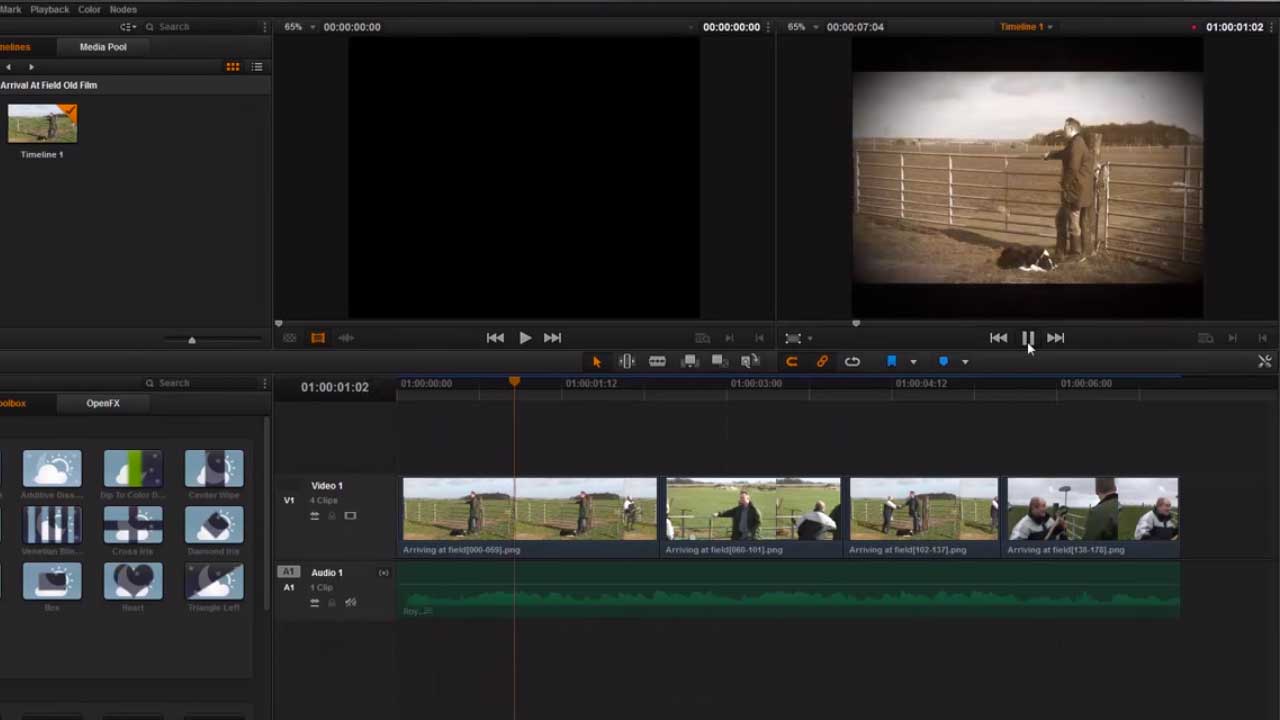
Retro Film Effects with BCC OFX
Learn how to recreate the look of a silent film using BCC Film Styles using BCC for OFX in DaVinci Resolve. Trainer Andrew Devis shows also explains when to apply a filter to a clip versus your timeline.
More...
Avid MC/Resolve Round-Trip Workflow
Scott Freeman has a tutorial up at Creative Cow named “3 Fields for Flawless Conform. Every File. Every Time.” Scott explains the three metadata fields to watch for seamless Avid-Resolve roundtripping.
More...
Advanced Finishing in Resolve 11
Take your Resolve grading work to the next level of finishing and vfx with BCC and mocha. Resolve Trainier and colorist Alex Van Hurkman shows us how to use Boris Continuum Complete (BCC) and mocha Pro together inside Resolve to create visual effects and some finishing. He even explains it in term us NLE editors can understand.
More...Avid Media Composer and Davinci Resolve Roundtripping
Here are multiple videos about the round-trip workflow with Avid and Blackmagic Design’s Davinci Resolve. Managing Resolve/Avid Workflows with Scott FreemanAvid Media Composer - DaVinci Resolve : Double Round TripRound Trip Between Avid Media Composer and Davinci ResolveRound Trip? AAF Blackmagic Design DaVinci Resolve/Avid Symphony
More...Davinci Resolve Fundamentals (10 Videos)
We’ll kick off Tutorial Tuesday with a series by Bran Hvítabjörninn and AE Tuts+ on the Davinci Resolve.
More...


'%3e%3cg id='Final-Copy-2_2_' transform='translate(1275.000000, 200.000000)'%3e%3cpath class='st0' d='M7.4,12.8h6.8l3.1-11.6H7.4C4.2,1.2,1.6,3.8,1.6,7S4.2,12.8,7.4,12.8z'/%3e%3c/g%3e%3c/g%3e%3c/g%3e%3cg id='final---dec.11-2020'%3e%3cg id='_x30_208-our-toggle' transform='translate(-1275.000000, -200.000000)'%3e%3cg id='Final-Copy-2' transform='translate(1275.000000, 200.000000)'%3e%3cpath class='st1' d='M22.6,0H7.4c-3.9,0-7,3.1-7,7s3.1,7,7,7h15.2c3.9,0,7-3.1,7-7S26.4,0,22.6,0z M1.6,7c0-3.2,2.6-5.8,5.8-5.8 h9.9l-3.1,11.6H7.4C4.2,12.8,1.6,10.2,1.6,7z'/%3e%3cpath id='x' class='st2' d='M24.6,4c0.2,0.2,0.2,0.6,0,0.8l0,0L22.5,7l2.2,2.2c0.2,0.2,0.2,0.6,0,0.8c-0.2,0.2-0.6,0.2-0.8,0 l0,0l-2.2-2.2L19.5,10c-0.2,0.2-0.6,0.2-0.8,0c-0.2-0.2-0.2-0.6,0-0.8l0,0L20.8,7l-2.2-2.2c-0.2-0.2-0.2-0.6,0-0.8 c0.2-0.2,0.6-0.2,0.8,0l0,0l2.2,2.2L23.8,4C24,3.8,24.4,3.8,24.6,4z'/%3e%3cpath id='y' class='st3' d='M12.7,4.1c0.2,0.2,0.3,0.6,0.1,0.8l0,0L8.6,9.8C8.5,9.9,8.4,10,8.3,10c-0.2,0.1-0.5,0.1-0.7-0.1l0,0 L5.4,7.7c-0.2-0.2-0.2-0.6,0-0.8c0.2-0.2,0.6-0.2,0.8,0l0,0L8,8.6l3.8-4.5C12,3.9,12.4,3.9,12.7,4.1z'/%3e%3c/g%3e%3c/g%3e%3c/g%3e%3c/g%3e%3c/svg%3e) Your Privacy Choices Notice at Collection
Your Privacy Choices Notice at Collection