Automatic Audio Sync Based on Timecode with Pomfort Silverstack Lab
Video Transcript (via YouTube)
Automatic audio sync enables you to synchronize externally-recorded audio tracks to their corresponding video clips. This can be achieved via a timecode sync operation.
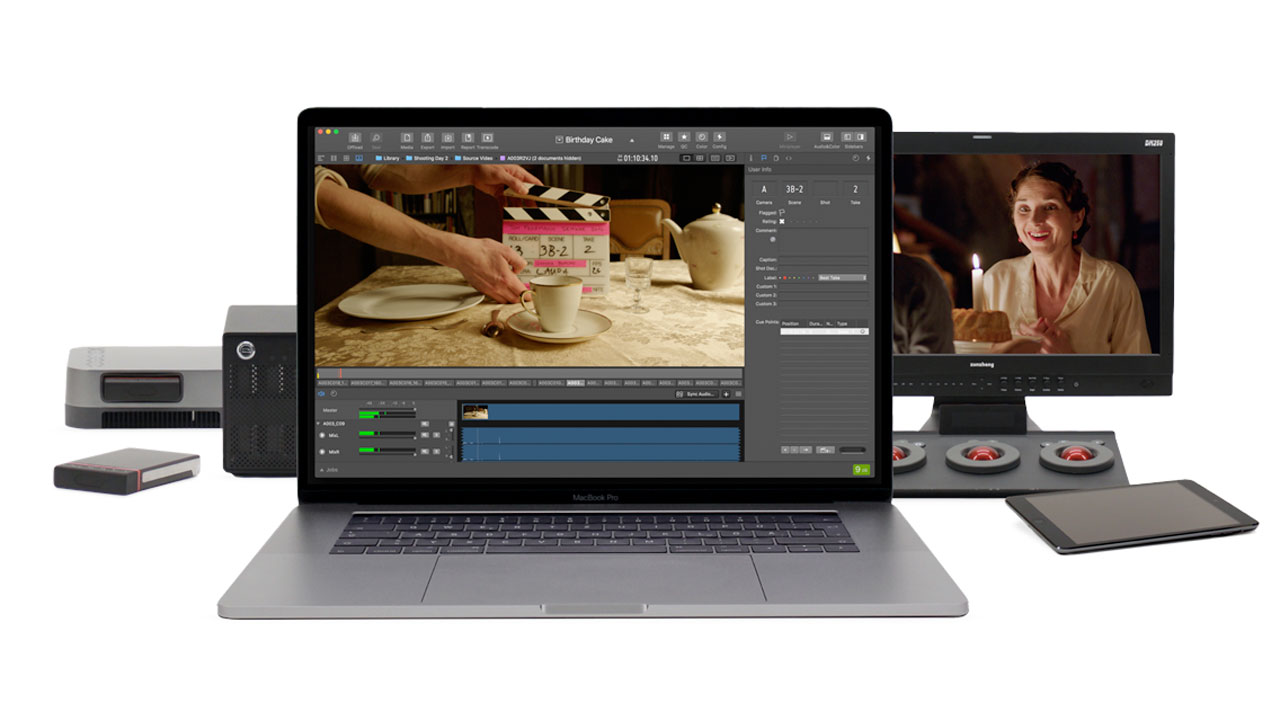
In Silverstack Lab, first, make sure to have all the required assets registered in the library. Video bins are purple, audio bins are yellow.
When ingesting broadcast wave files, audio tracks will automatically be assembled as audio clips capable of holding multiple audio tracks. In the sync step, we will sync the audio clips to the video clips.
To start the audio sync choose the video bin that you want to sync audio to. Now open the “Audio&Color” panel by clicking on the button at the top right of the user interface.
In the audio panel, we can see that the video clips currently hold no audio tracks. To access the audio sync wizard click the “Sync Audio…” button in the toolbar of the audio panel.
You are now in the audio sync wizard. At the top choose the right audio bin for the selected video clips. The panel reflects the structure of the library so you can easily navigate to the right location.
In the table view of the wizard, you can see the video clips on the left side and the matching audio clips on the right. Timecode information is present to perform a sanity check if intended.
In our case everything matches perfectly, Silverstack Lab tells you that it will sync 9 of 9 video clips and a blue checkmark indicates that the sync will be performed. You are therefore already good to go.
There’s one little detail I want to explain: With the checkbox at the bottom, you are able to take over the slate info of the audio clips to the video clips they are synced to. In a lot of cases the most accurate slate information comes from the audio files and like this, you are able to automatically take it over to the video clips.
To complete the operation click the “Sync” button.
The audio clips have immediately been taken over to the audio panel where you can see a waveform of the different tracks.
The name of the audio clip and the track names can be found on the left as well as other standard audio controls.
In the collection view, we can make sure that all video clips received an external audio clip by checking the little sound speaker icon with the “e” for “external”.
By going to the player we can now perform a final check if the audio is in sync:
The sync looks good so we’re already good to move on with our next task.
This was a quick introduction to automatic audio sync based on timecode in Silverstack Lab. Please visit our KnowledgeBase for more information.
Posted by Michele
'%3e%3cg id='Final-Copy-2_2_' transform='translate(1275.000000, 200.000000)'%3e%3cpath class='st0' d='M7.4,12.8h6.8l3.1-11.6H7.4C4.2,1.2,1.6,3.8,1.6,7S4.2,12.8,7.4,12.8z'/%3e%3c/g%3e%3c/g%3e%3c/g%3e%3cg id='final---dec.11-2020'%3e%3cg id='_x30_208-our-toggle' transform='translate(-1275.000000, -200.000000)'%3e%3cg id='Final-Copy-2' transform='translate(1275.000000, 200.000000)'%3e%3cpath class='st1' d='M22.6,0H7.4c-3.9,0-7,3.1-7,7s3.1,7,7,7h15.2c3.9,0,7-3.1,7-7S26.4,0,22.6,0z M1.6,7c0-3.2,2.6-5.8,5.8-5.8 h9.9l-3.1,11.6H7.4C4.2,12.8,1.6,10.2,1.6,7z'/%3e%3cpath id='x' class='st2' d='M24.6,4c0.2,0.2,0.2,0.6,0,0.8l0,0L22.5,7l2.2,2.2c0.2,0.2,0.2,0.6,0,0.8c-0.2,0.2-0.6,0.2-0.8,0 l0,0l-2.2-2.2L19.5,10c-0.2,0.2-0.6,0.2-0.8,0c-0.2-0.2-0.2-0.6,0-0.8l0,0L20.8,7l-2.2-2.2c-0.2-0.2-0.2-0.6,0-0.8 c0.2-0.2,0.6-0.2,0.8,0l0,0l2.2,2.2L23.8,4C24,3.8,24.4,3.8,24.6,4z'/%3e%3cpath id='y' class='st3' d='M12.7,4.1c0.2,0.2,0.3,0.6,0.1,0.8l0,0L8.6,9.8C8.5,9.9,8.4,10,8.3,10c-0.2,0.1-0.5,0.1-0.7-0.1l0,0 L5.4,7.7c-0.2-0.2-0.2-0.6,0-0.8c0.2-0.2,0.6-0.2,0.8,0l0,0L8,8.6l3.8-4.5C12,3.9,12.4,3.9,12.7,4.1z'/%3e%3c/g%3e%3c/g%3e%3c/g%3e%3c/g%3e%3c/svg%3e) Your Privacy Choices Notice at Collection
Your Privacy Choices Notice at Collection