In Depth: Time Effects – Time Displacement aka Slit Scan, with Examples

Table of contents
Learn all about the Time Displacement filter, which creates an effect known as slit scan, a trippy looking time manipulation that can be used to represent a time travel, a warp in the space-time continuum, a drug trip and much more.
Introduction
A few months ago, Eddy Bergman posted a tutorial Slit Scan or Time Displacement Effect Tutorial for his site After Effects Tutorials, on our After Effects Portal Facebook group. He used the Muse video, Unintended, as an example, which utilizes the slit-scan Photography technique. Now, I’m a HUGE fan of Muse and I had never seen this video. What can I say? It’s trippy! The slit-scan effect is used throughout the video and applied to slow-mo footage.
Featured image credit: Michele Terpstra
Muse – Unintended
Slit-scan Photography has been around for years, but unless you’ve done it, you may not know exactly what it is. There’s a really well-known sequence in Stanley Kubrick’s 2001: A Space Odyssey that uses the slit-scan technique, and you’ve probably seen it but may have not known what it was called. (By the way, you can see the original images used in the 2001 slit-scan sequence here.)
So, what is slit-scan photography? According to Wikipedia, using traditional methods:
The slit-scan photography technique is a photographic and cinematographic process where a moveable slide, into which a slit has been cut, is inserted between the camera and the subject to be photographed.
With modern software, you’re basically playing one portion of the frame faster than another portion so that footage and elements in the video are stretched, squeezed and twisted, based on movement. This effect really gives footage a strange, surreal look, which works well when filmmakers are trying to show another dimension, time travel, or an LSD trip.
More Examples
So that you get a better feel about what can be done with this technique, here are a few samples.
World bending videography | Slit-Scan FPV
Joan Charmant created this very trippy video, which could induce motion sickness for wimps like me! She says, “In this experiment, I implemented non-linear slit-scan video and applied it to my aerial footage.”
Doctor Who title sequence (1973-74)
Total Recall Title Sequence
c
We’re talking about the original from 1990, by Title Designer Wayne Fitzgerald, also known for Bonnie and Clyde, Rosemary’s Baby, Guess Who’s Coming to Dinner, Footloose, Tootsie, Splash, Ghost and so many more.
Day 244 / Slitscan Experimentation
Day 244 / Slitscan Experimentation from Charlie Visnic on Vimeo.
How to Make Your Own Slit-scan Effect in After Effects
Watch the video below to see a quick comparison of similar settings in After Effects Time Displacement, Boris Continuum BCC TimeDisplacement, and Sapphire S_TimeDisplace. I will be referring to these examples in the following descriptions.
After Effects Time Displacement Filter
Although it looks cool and complex, Time Displacement is a very simple effect to apply. It will definitely take some finessing. The effect consists of two parts: the footage layer and a gradient, which feeds luminance levels to the time displacement. Here’s how you do it (and I’ll assume that you know the basics of After Effects… you know, things like pre-comping, basic effects, etc.).
Apply Time Displacement
 Apply the Time Displacement effect to your footage that you want to distort. After Effects uses the layer your footage layer in its original form. If you applied any effects (other than Time Displacement), masks or transformations, you must precompose those effects, masks, etc. using the Move All Attributes check box in the precomp dialog box. Then apply Time Displacement.
You will notice it looks all funky and this is because it’s using the layer of footage as the Time Displacement Layer.
Create a Gradient
Create a New Solid layer that is comp sized. Apply a grayscale gradient or ramp to the layer. Precomp the gradient, moving all attributes to the precomp. A note on the gradient. The Adobe Help docs explain it well enough:
In grayscale images, the luminance value range extends from 0 to 255, and it’s converted to a scale ranging from -1 to 1. A luminance value of 0 produces maximum backward displacement, meaning that pixels at the current time are replaced by pixels from a previous time. A luminance value of 255 produces maximum positive displacement, meaning that pixels at the current time are replaced by pixels at a future time. Finally, a luminance value of 128 produces no displacement. For other values in grayscale displacement maps, you can calculate the displacement amount, in seconds, using the following equation:
Displacement amount in seconds = maximum_displacement_time * (2 * (luminance_value – 128) / 256)
Modify Time Displacement Parameters
In the Time Displacement effect, choose the gradient layer as your Time Displacement layer. You can place it below your footage and turn off the visibility for the gradient layer.
When you preview, you should now see the effect. This is where you’ll want to tweak the values for Max Displacement Time [sec] and Time Resolution [fps]. You will also likely want to adjust your gradient.
Tip: Notice how the effect does not look as good in the video footage at the beginning of this section but looks stellar on the text sample with the word “Toolfarm”. The clean edges were achieved by cranking up Time Resolution to 150fps. The drawback to upping the value of Time Resolution is that there is a huge render hit.
Rolling Shutter in After Effects
Here’s Smarter Every Day once again with a technique for creating the effect in After Effects. Rolling Shutter is pretty much a slit scan effect.
 Boris Continuum BCC Time Displacement
Included with Boris Continuum and the Boris Continuum Unit: Time.
Perpetual License Annual Subscription
Host support:
- Adobe After Effects CS5.5+
- Adobe Premiere Pro CS5.5+
- Avid Media Composer 6.5+
- Blackmagic DaVinci Resolve 12.5+
- Magix Vegas Pro 14+
- The Foundry’s Nuke: Nuke 9+
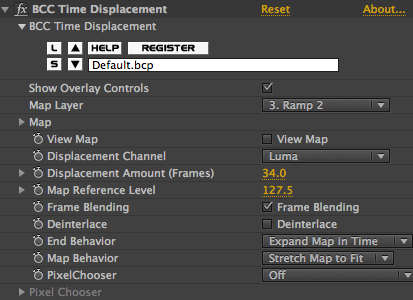
 The BCC Time Displacement works a lot like the AE plug-in but has several more bells and whistles and just gives a lot nicer of an effect on the footage, in my opinion.
Why is it better than the one that ships with AE?
- The stripey, aliased look which occurs when something in the shot is moving fast is smoothed by checking the Frame Blending box. If you haven’t seen the sample above in this section, see the footage examples of the AE Time Displacement filter vs. BCC Time Displacement. I used similar settings but used the Frame Blending option on BCC Time Displacement. The Difference is clear. BCC Time Displacement is the clear winner when it comes to displacing footage. The Frame Blending feature makes the distortions much less choppy. Frame blending did not, however, help with the text example.
- Presets, both still and animated, come with Continuum.
- The Displacement Channel pulldown menu allows for channels other than the luminance channel. The choices are Red, Green, Blue, Luma, White, Gray, and Black.
Learn more about the BCC Time Displacement Filter
Boris FX Sapphire S_TimeDisplace

This is a filter in the Sapphire Package
Perpetual License Annual Subscription
Hosts:
- Adobe After Effects (Builder compatible)
- Adobe Premiere Pro (Builder compatible)
- Avid Media Composer (Builder compatible)
- Autodesk Flame Family
- Blackmagic DaVinci Resolve (Builder compatible, Mocha tracking available on Resolve Studio only)
- Blackmagic Fusion
- The Foundry NUKE
- Vegas Pro Studio
- Grass Valley Edius
- Silhouette
- Baselight (versions 4.3 and 4.4 only)
- Toon Boom Harmony
- Other OFX-compatible hosts
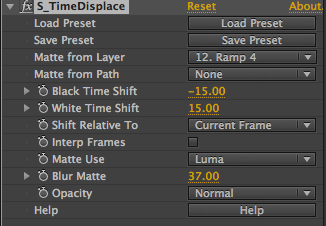
A quick S_TimeDisplace review
 The third plug-in I’m covering is in the Sapphire package, and although Boris normally hits them out of the park, I do not love this filter. It doesn’t give as smooth of effect with footage as BCC Time Displacement or with text as the AE Time Displacement does. A frame blending option would be useful. There’s just a single preset and it’s the default setting. It worked about the same as the AE Time Displacement filter does on the footage, but didn’t fare as well on text.
I could live with all of that but the killer was that it caused AE to crash on render, 6 times in a row. Sapphire is normally the Clydesdale of plug-ins so it surprises me that I could not get it to render. I ended up removing it from my sample above because I just couldn’t get it output.
Digieffects Tweak
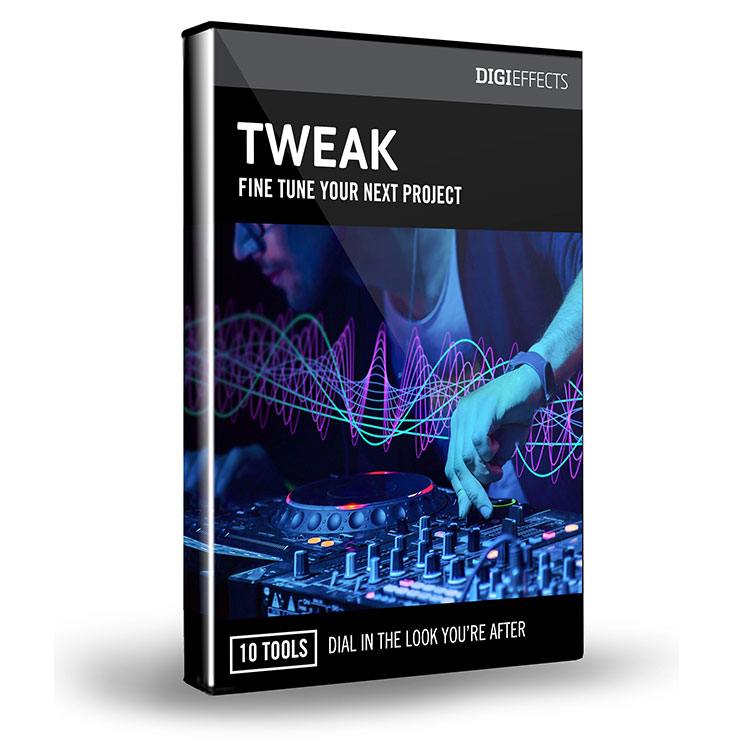
Fine tune your projects with Tweak.
Stylize your next project with this set of unique effects including Hyper Harmonizer, Newsprint, Crazy Stripes, Crystallizer, Visual Harmonizer, VanGoughist, Stargate, Nexus, Schematic Grids, and Perspectron.
Note: Digieffects Tweak has been discontinued.
Tutorial: Digieffects: Stargate from Tweak
Learn how to create a hyperdrive, warp speed, slit-scan look using Stargate, one of the tools included in Tweak.
Tips for Best Results and Experimenting
- Shoot your video at as high of frame rate as possible. This will allow you to use slow-motion footage, which looks really cool with Time Displacement.
- Use a tripod. Handheld footage with a lot of movement does not Time Displace well
- Try the effect on 3D Solid Layer with the Y rotation keyframed for some cool twisting box effects.
- If you’re not getting the effect that you like, experiment with moving the gradient, adjusting luminance values and keyframing the position of the gradient points.
- Search YouTube for more Slit Scan and Time Displacement examples. There are some really neat videos out there.
- Try combining the effect with other time plug-ins. You may need to precompose each time you apply the effect.
Further Reading:
Tips to Follow when Creating Bizarre Slit Scan Video with the use of After Effects – From BunkerMusik
Posted by Michele


